Table of Contents
Level2 interface and functions overview
Please refer to the following link on how to create your Level2 account.
Below a layout of the Level2 home page is given:
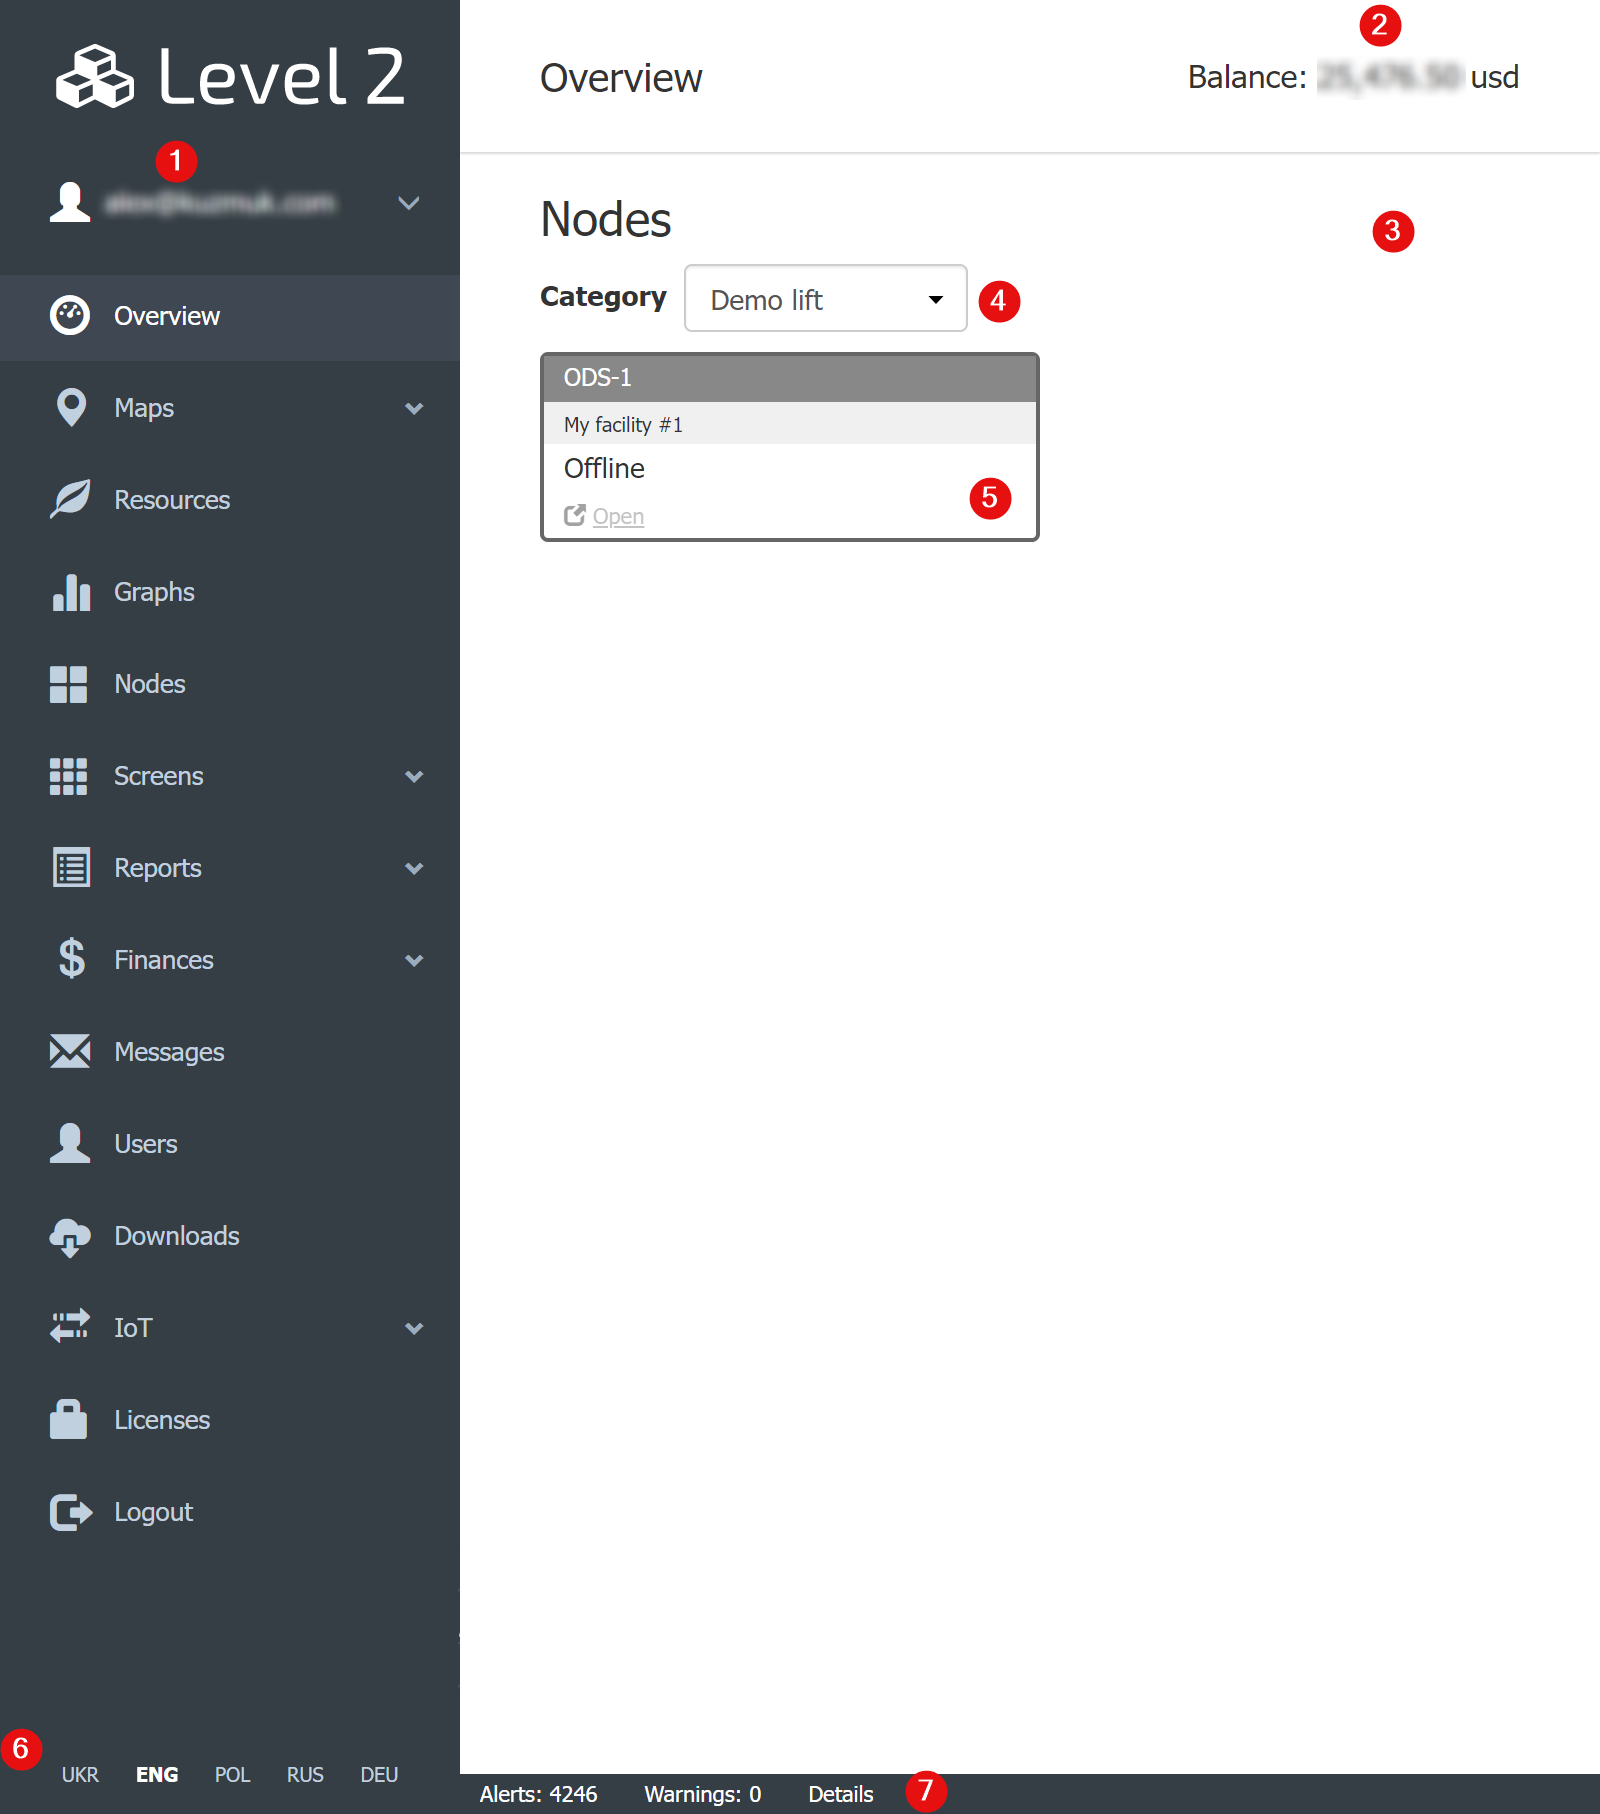
- The logged in user login (email) popup. Here you can manage your profile, change branding and log out.
- Current account's balance
- Page functional content area. For the Overview page please refer to the article below
- Category selector - for filtering out in big lists
- A node's tile
- Language quick selector
- Alerts and warning status bar. Shown in red or yellow when there are actvie alerts/warnings.
User account setup
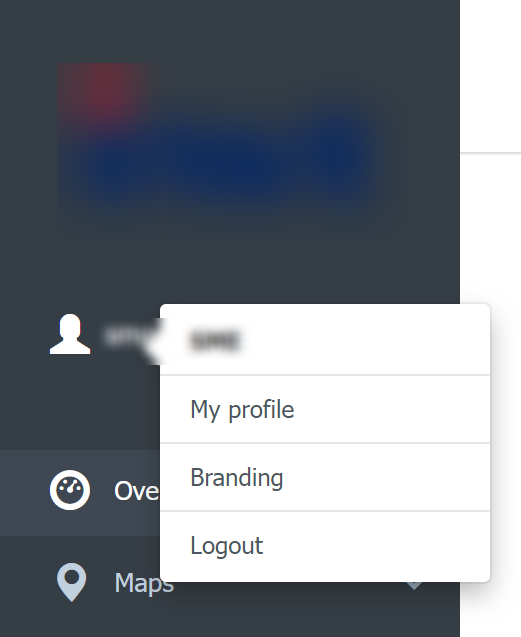
My profile leads to the logged in user setup. Read more here.
Branding is for setup logos that will be seen for the account users. Read more here
Logout terminates the user session.
Overview page
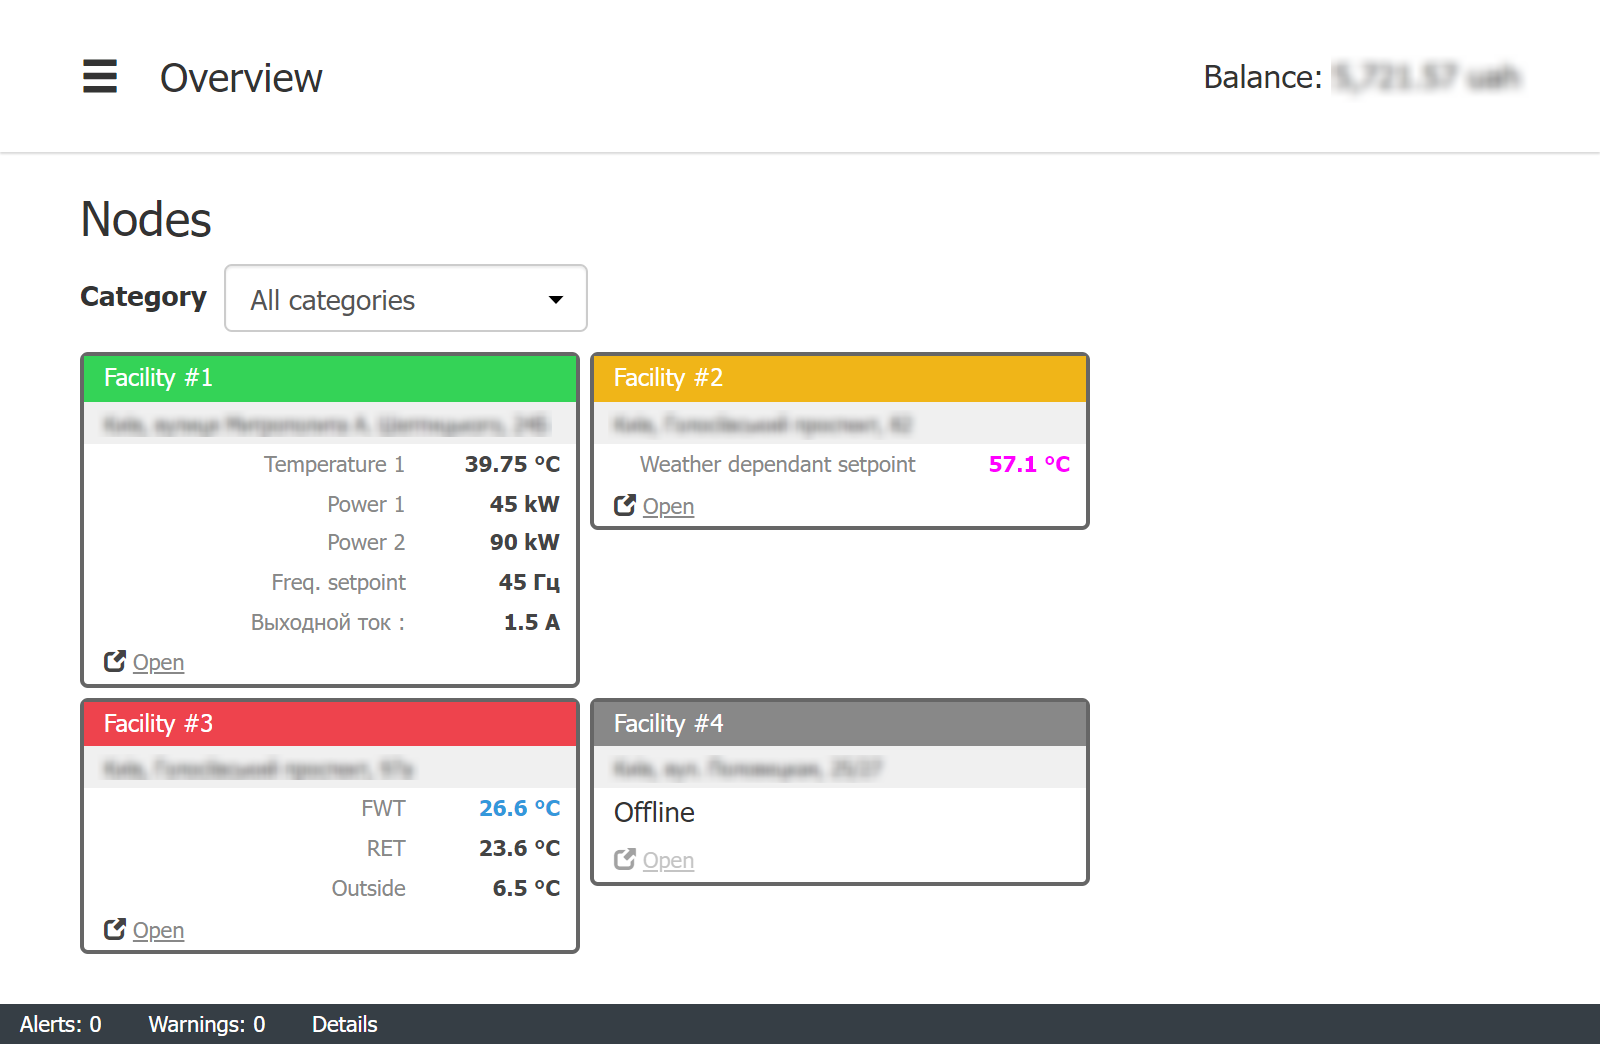
On this page, for all the WebHMI nodes an overview is given in the form of tiles.
Tiles reflect nodes status. Tile color relects node state - normal, has alert or warning. Some real-time values can be placed on the tile too. Offline - means the node does not send data to the server. by clicking Open you will be forwarded to the node's URL. Please refer to this page.
 |
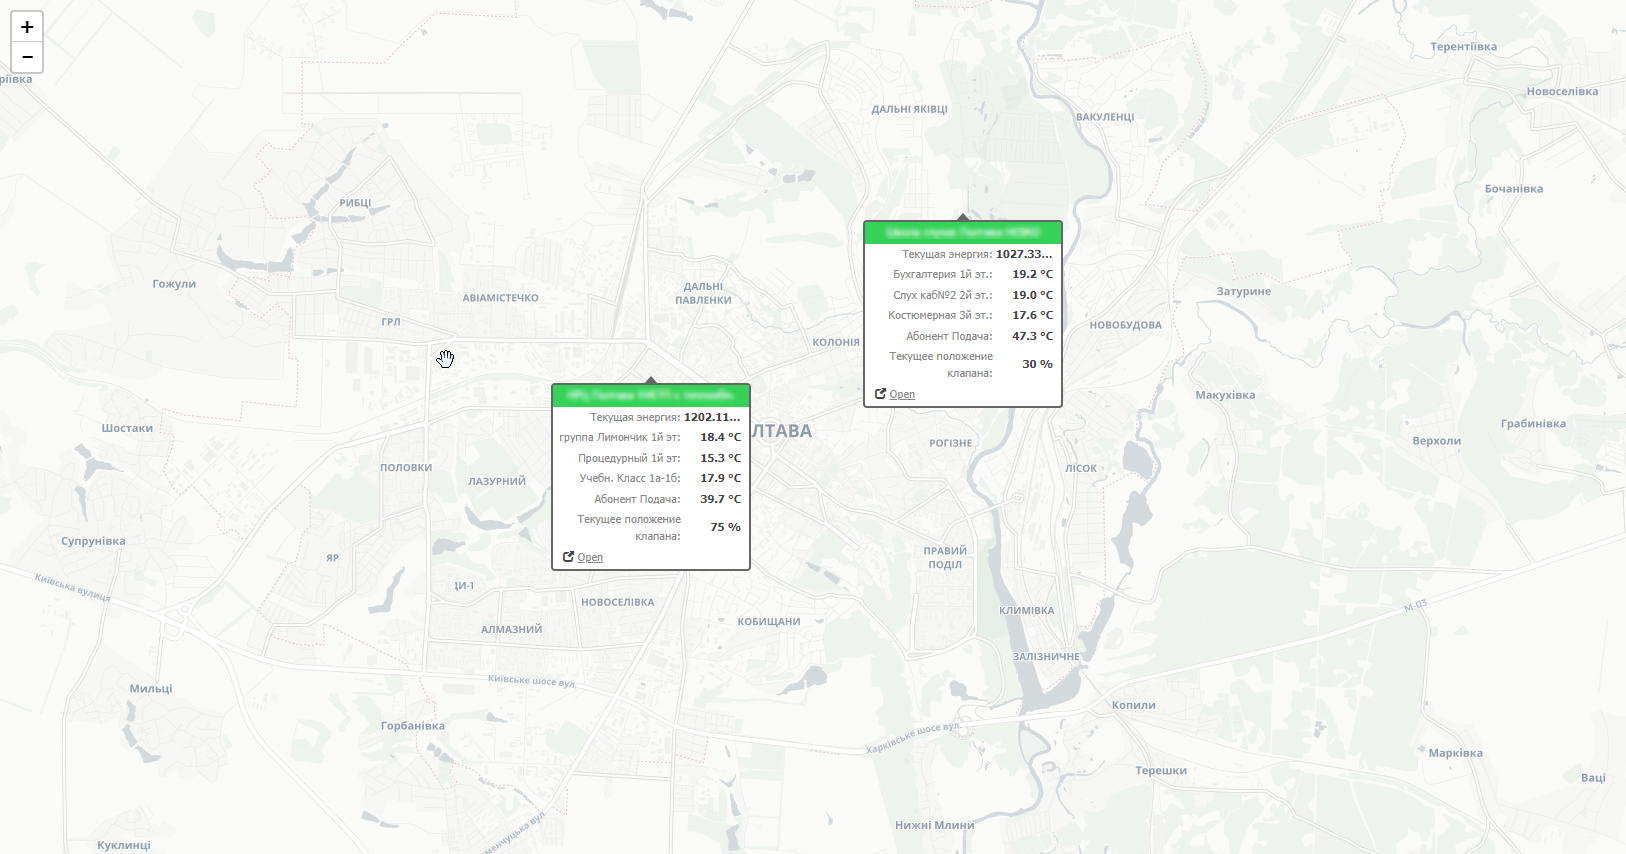
Maps
With maps you can view the nodes right on map with physical location. You have to create and setup maps before usage. Please refer to this page
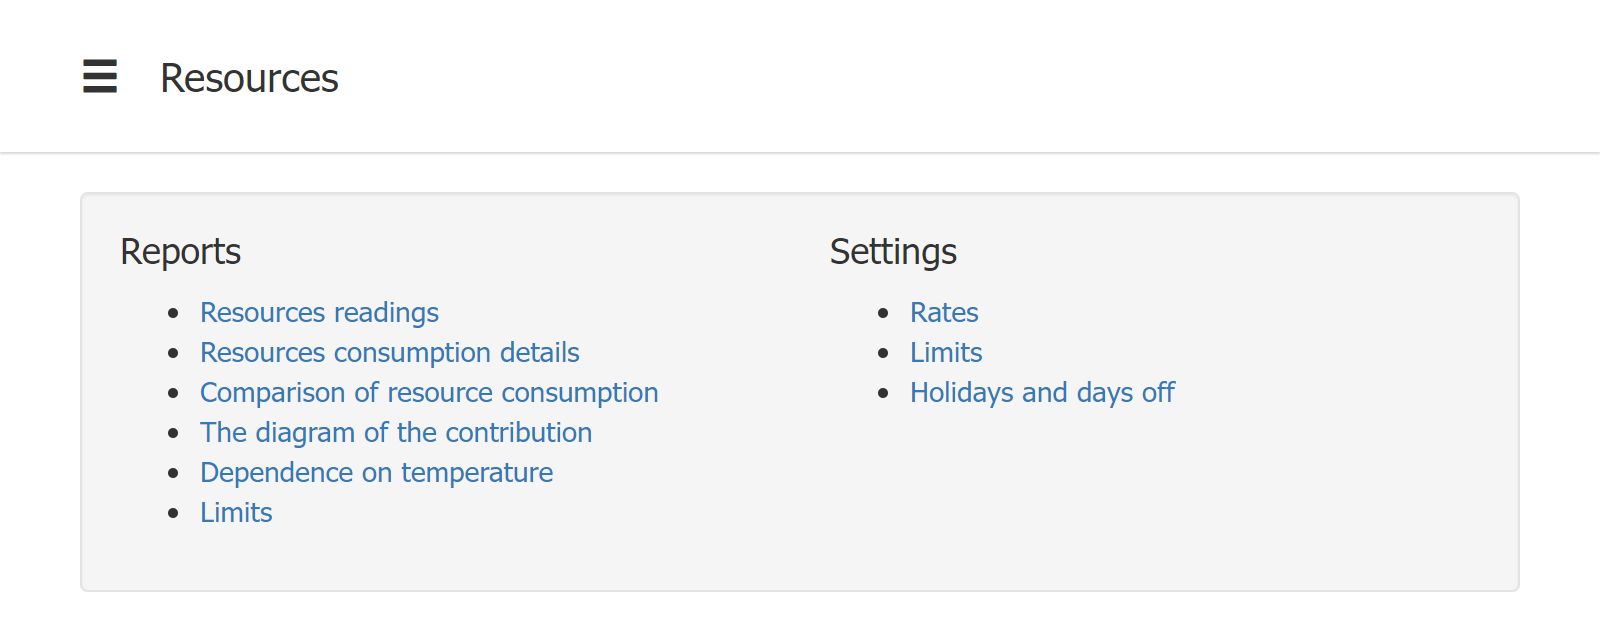
Resources
There are some useful tools to analize resource consumption by the facilites. Please refer to this page.
 |
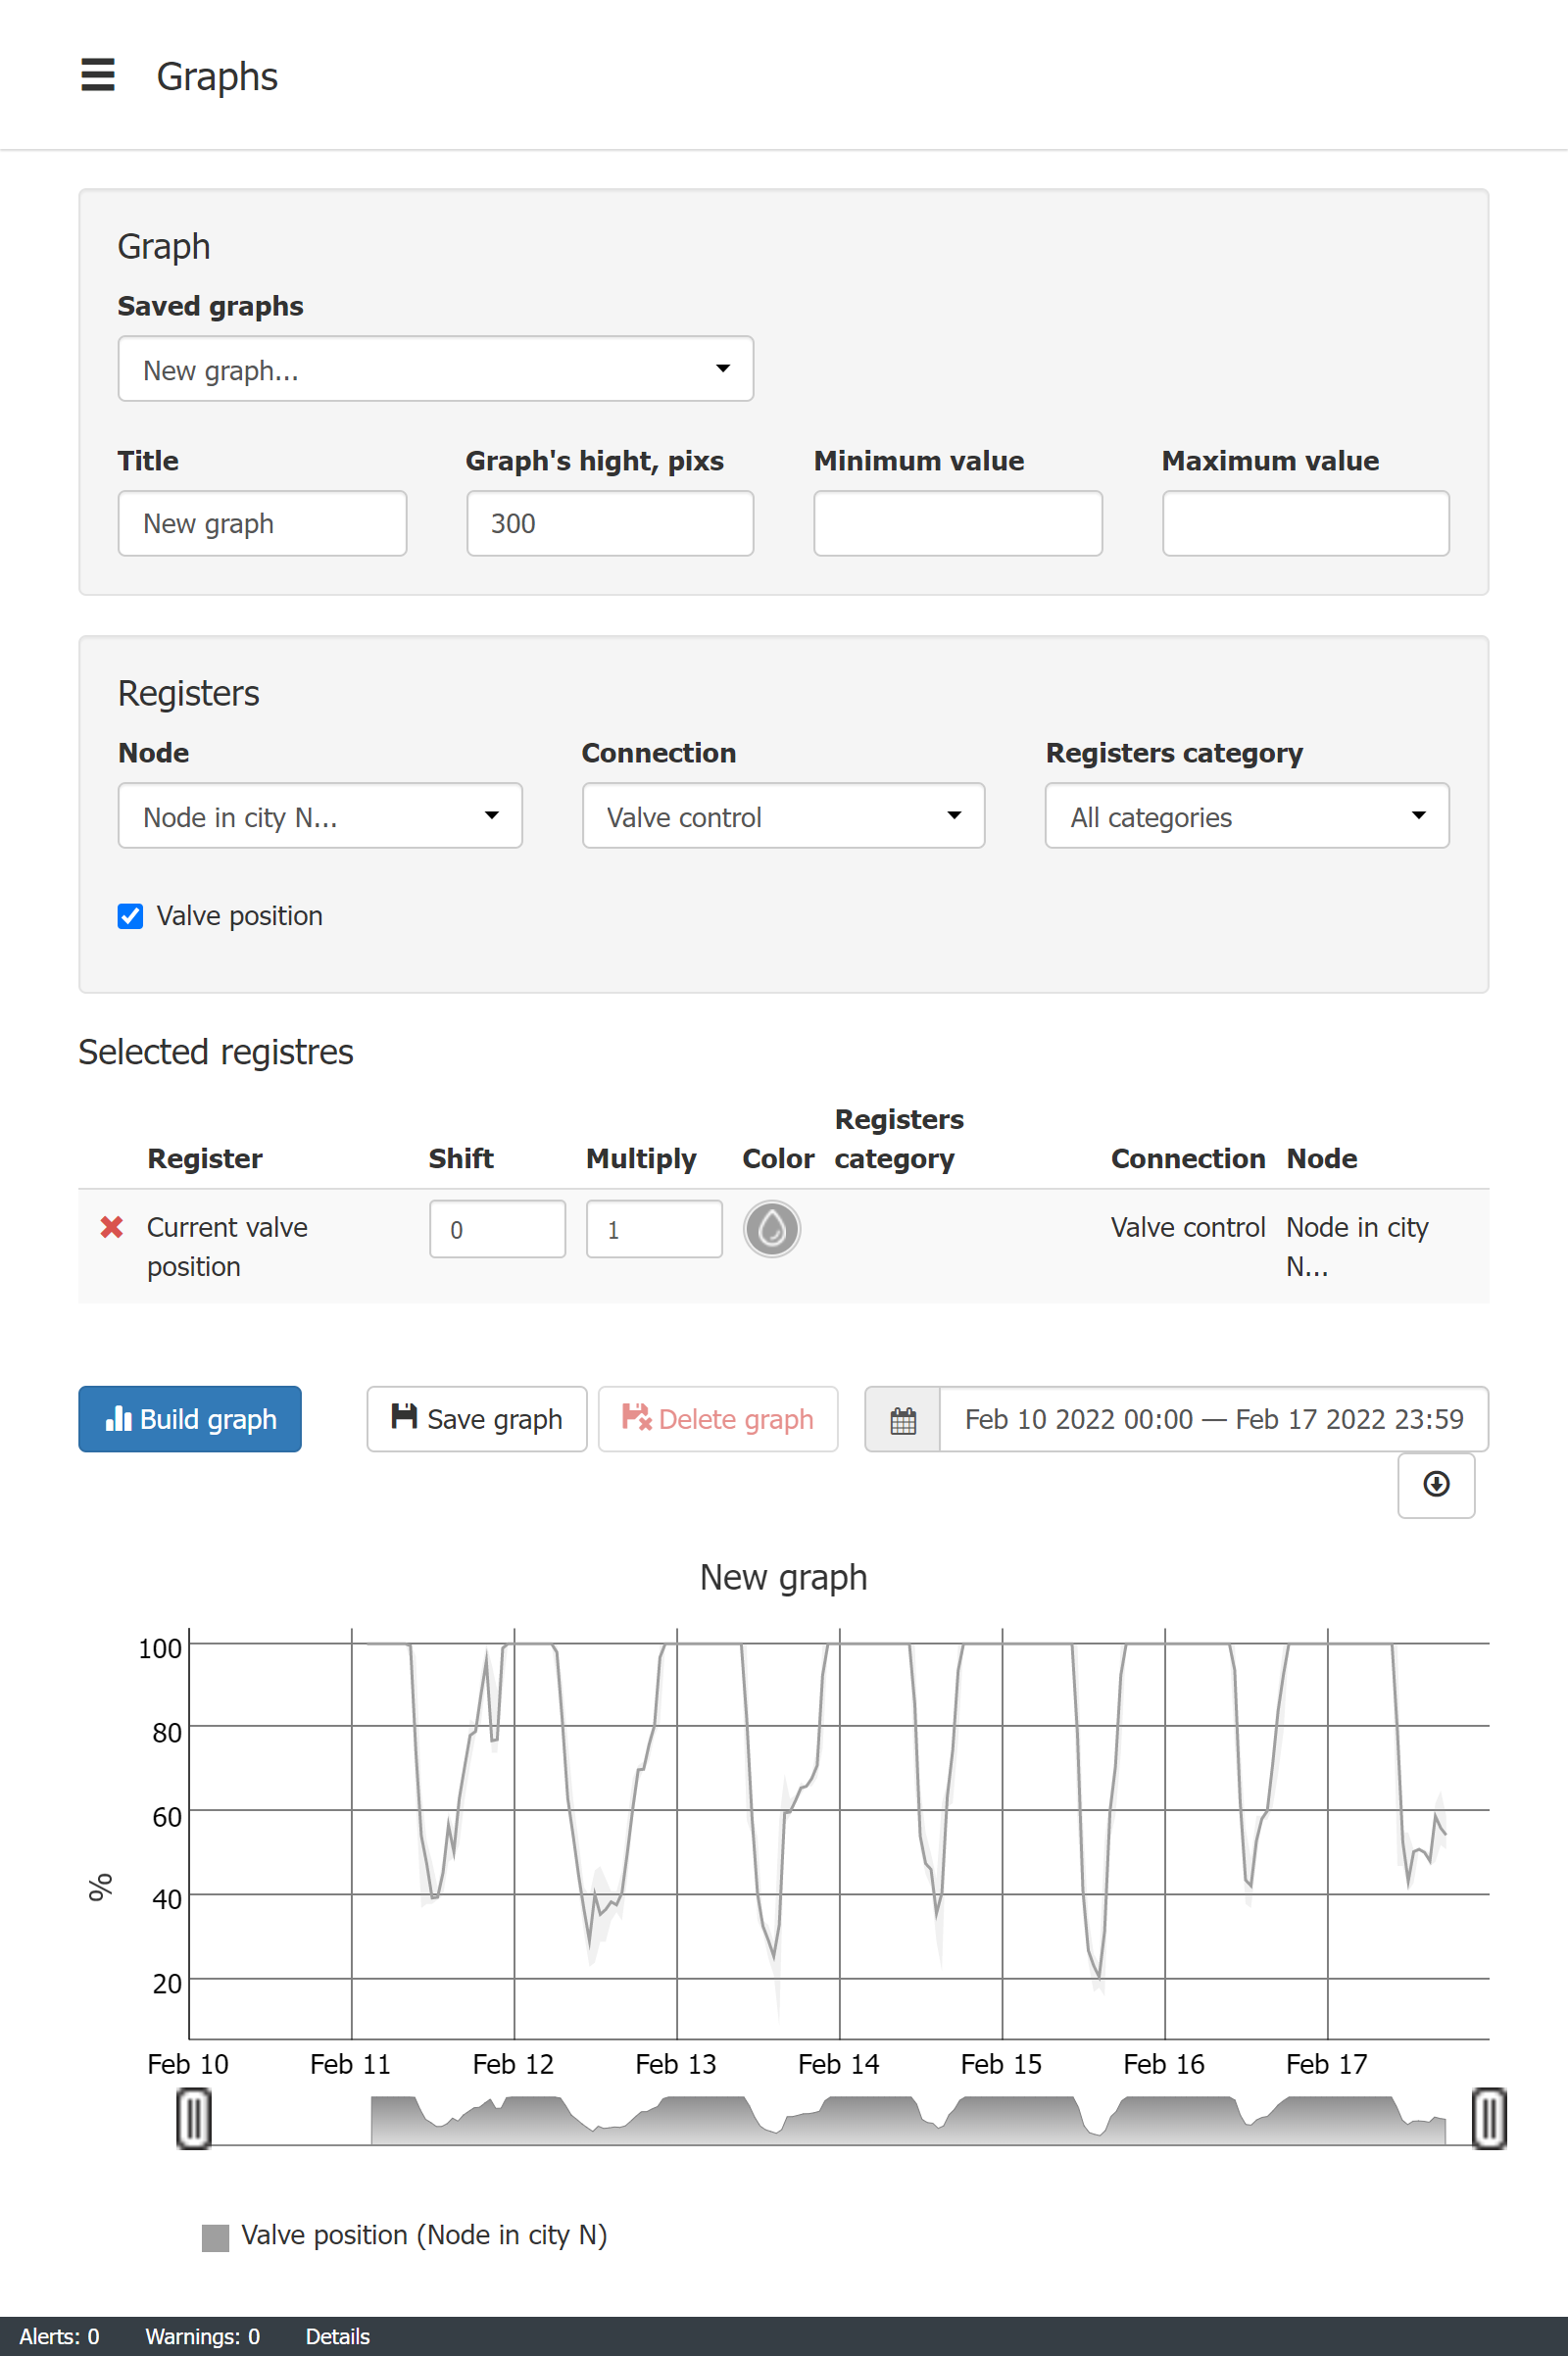
Graphs
You can log register values which comes to the Level2 and view them on the graphs. Please refer to this page
 |
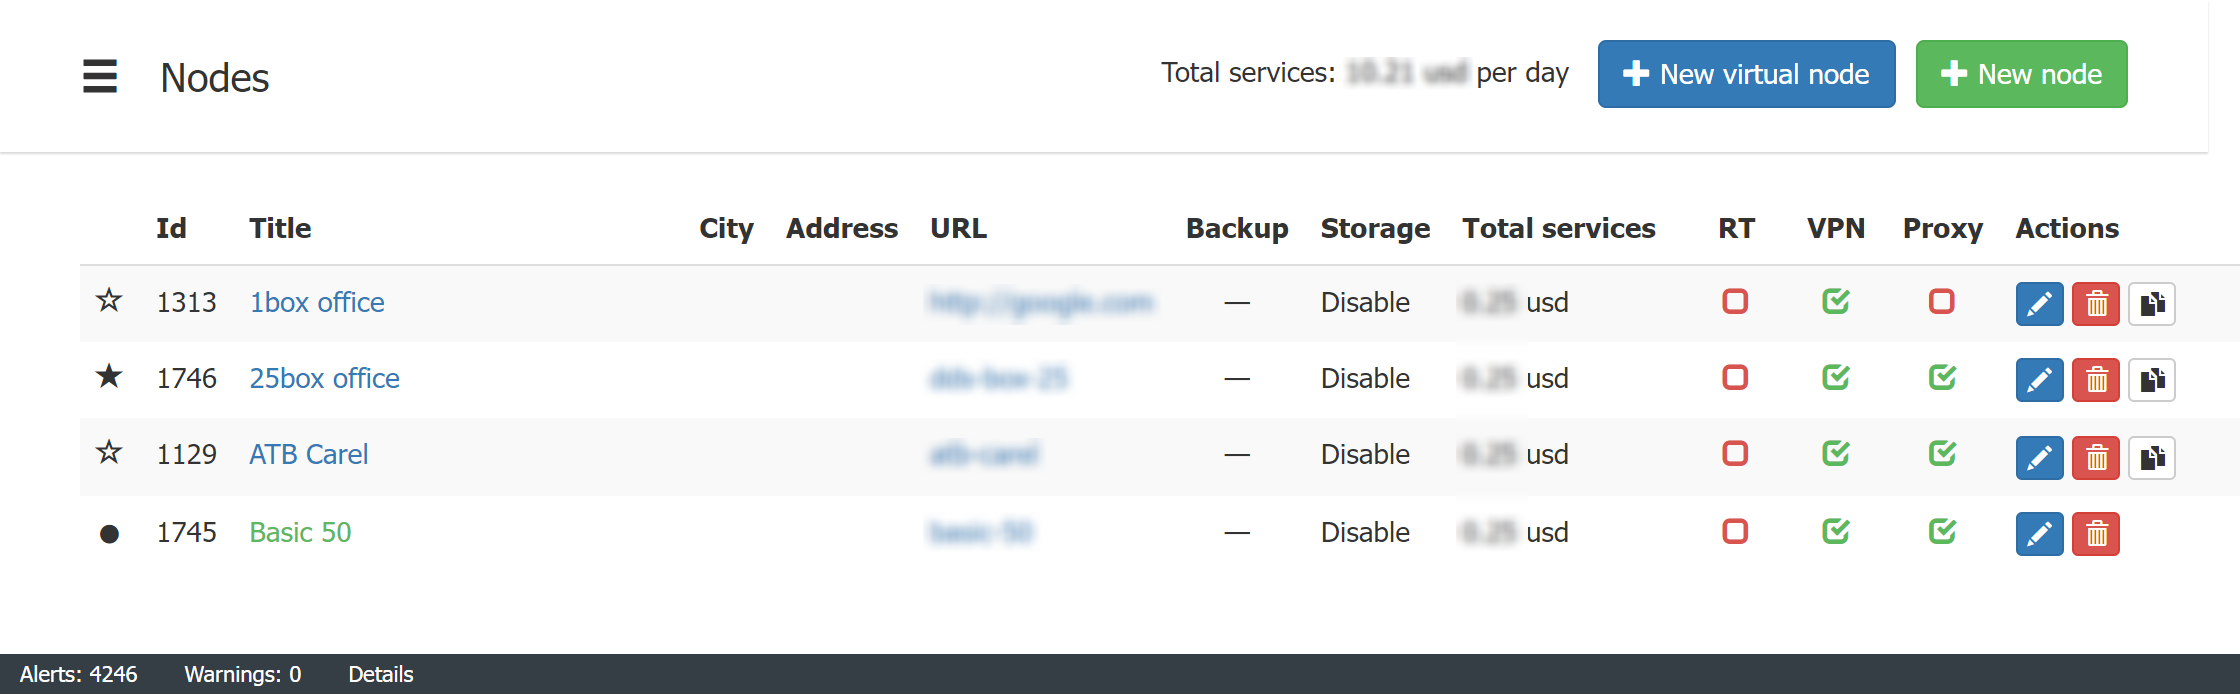
Nodes
It is the place where you add, remove and modifity your WebHMI nodes. Filled star/circle means the node is online. Star is for HW WebHMI version or Virtual box WebHMI while circle is for cloud virtual WebHMI. Which services are enabled and how much it costs is also displayed on this page.
 |
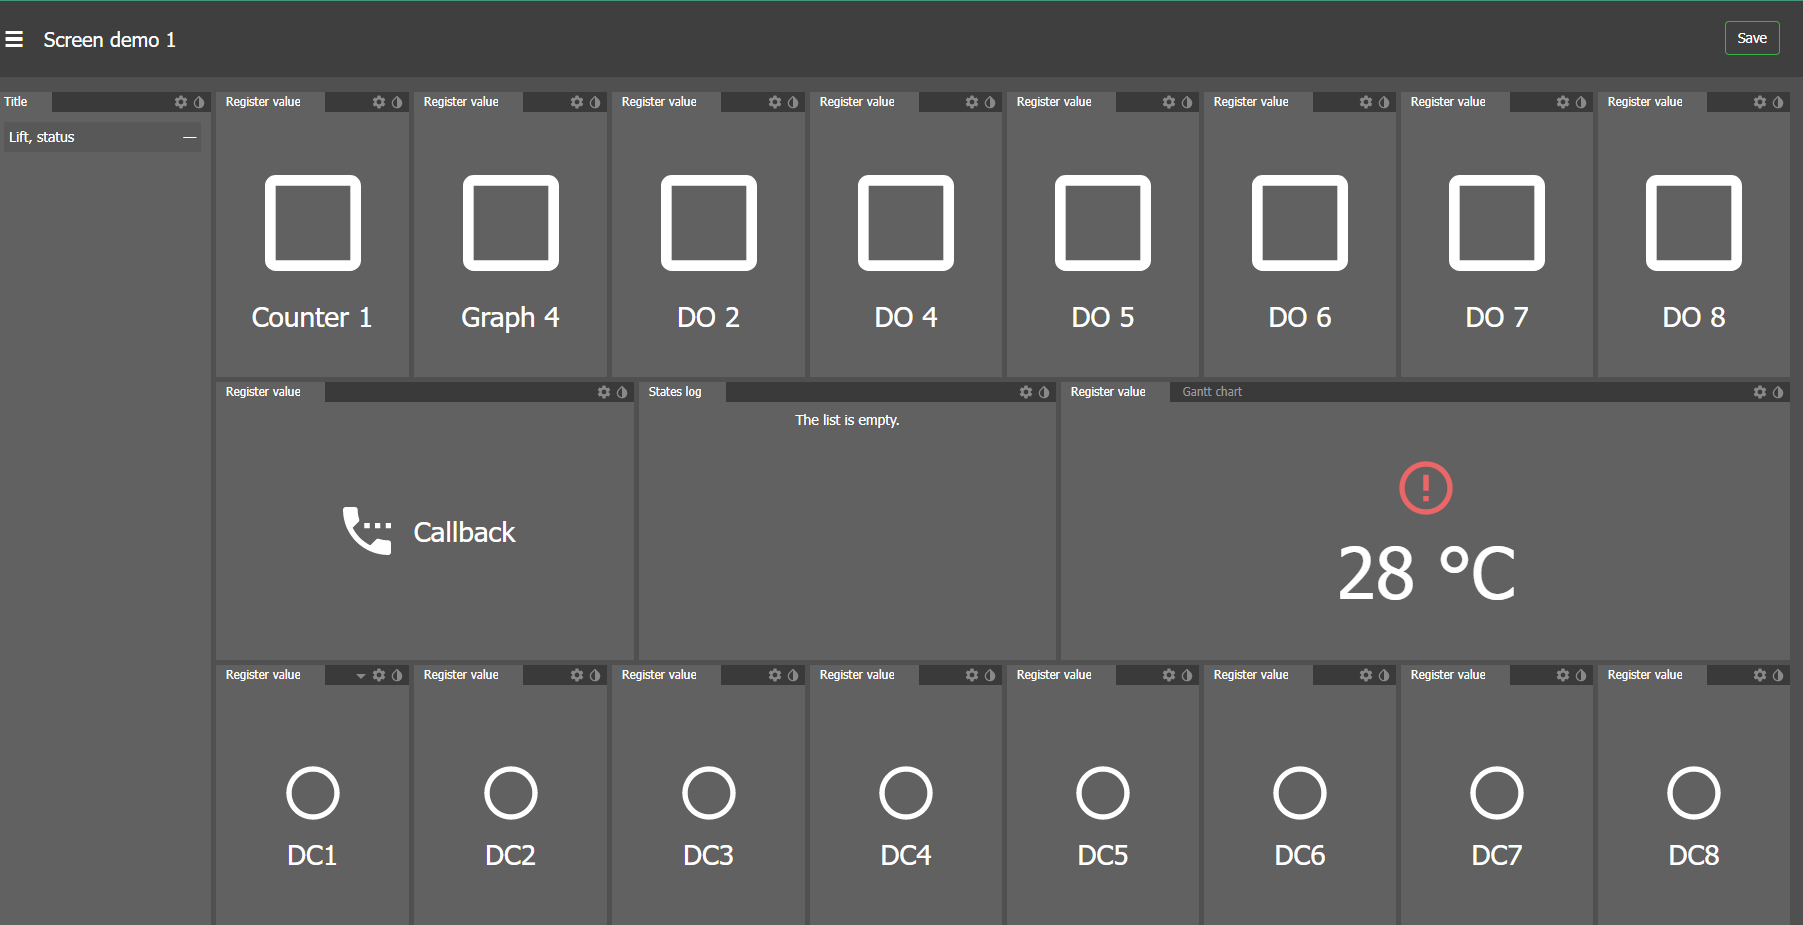
Screens
The concept of screen in Level2 is similar to the WebHMI's screens. Please refer to the respective article