Configure WebHMI
There is a WebHMI as MQTT Client considered here. The only difference is the Broker's settings, that time you need to connect to AWS and identification is related to certificates also. Be sure that your bunch of certificate files are valid and binded to your Thing in AWS, to test it using MQTT.fx is highly recommended.
The first thing is to create connection to AWS MQTT Broker. Click at “New connection”.
 Firstly select the “Device model: MQTT”.
Fill in the “Device address” from IoT Core Interact menu and 8883 port accoiding to AWS Developer Guide
Firstly select the “Device model: MQTT”.
Fill in the “Device address” from IoT Core Interact menu and 8883 port accoiding to AWS Developer Guide
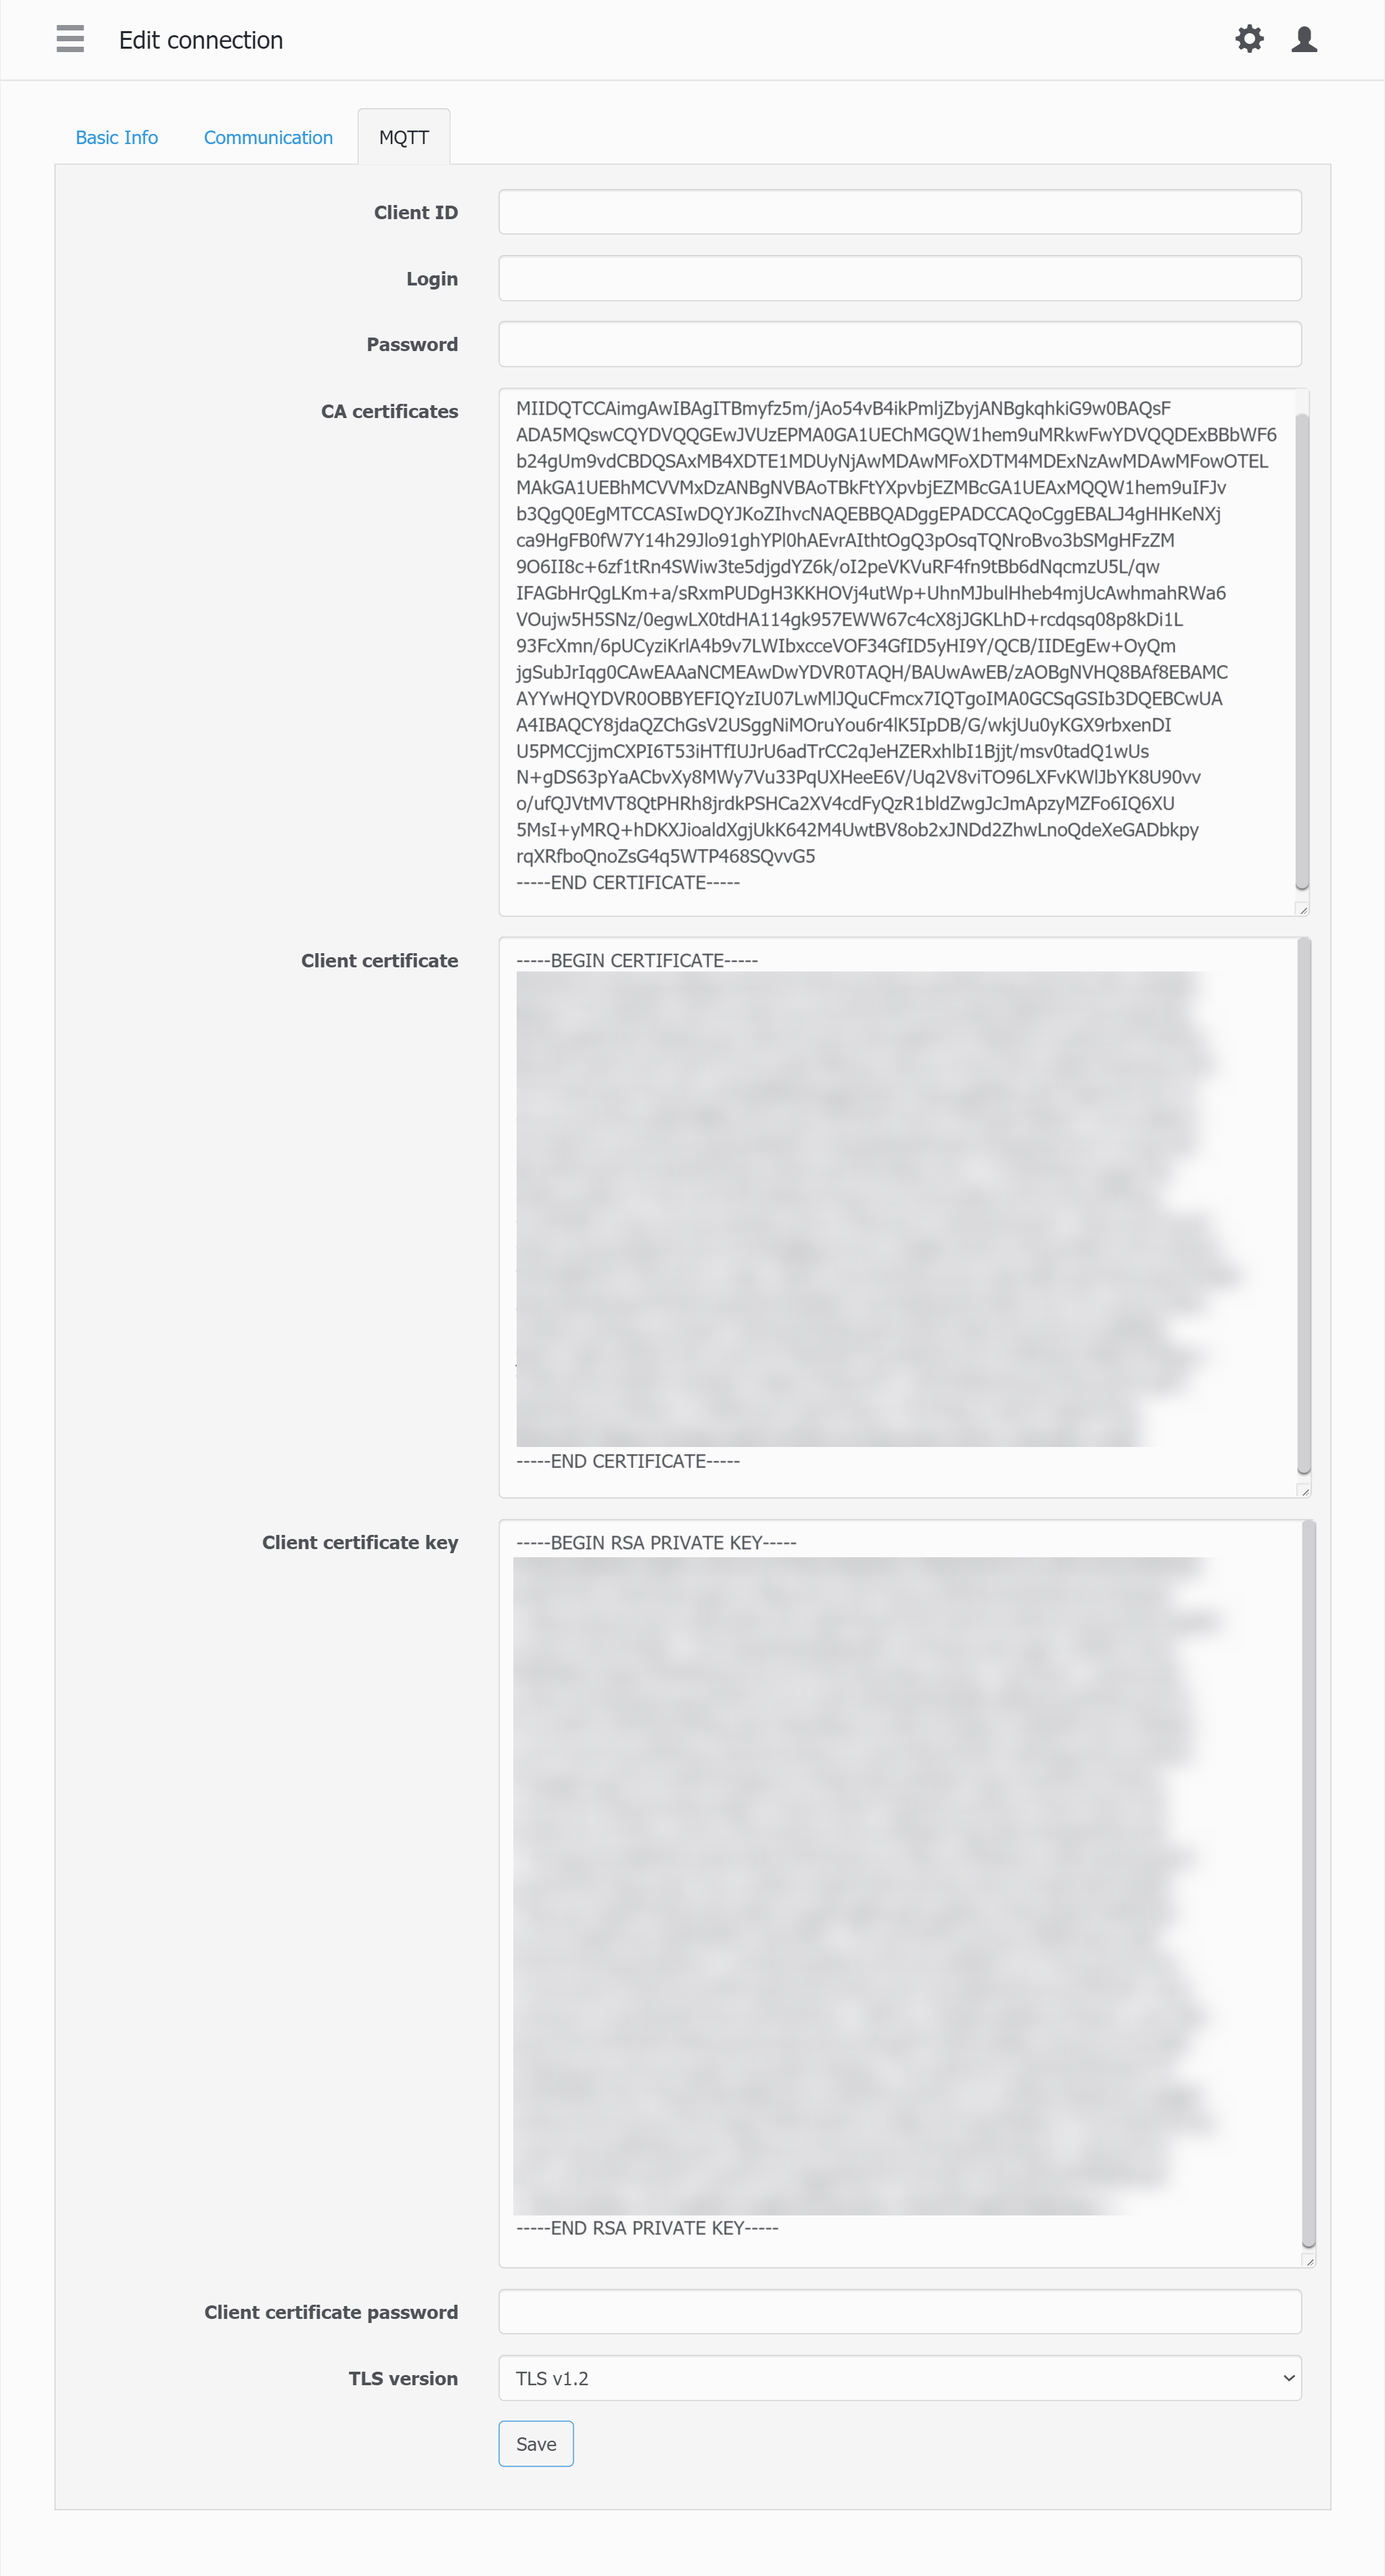
 Go to MQTT tab to copypaste certificates to WebHMI connection settings.
At the moment you should configure MQTT.fx to work with AWS IoT Core Thing's Shadow. So, you have all files downloaded such as .pem and .crt.
So the task is to copy symbols from files to WebHMI MQTT field using notepad.
Go to MQTT tab to copypaste certificates to WebHMI connection settings.
At the moment you should configure MQTT.fx to work with AWS IoT Core Thing's Shadow. So, you have all files downloaded such as .pem and .crt.
So the task is to copy symbols from files to WebHMI MQTT field using notepad.
CA Certificates is a “AmazonRootCA1.pem”.
Client certificate is a “…-certificate.pem.crt.txt”.
Client certificate key is a “…-private.pem.key”.
Pick the TSL version v1.2 at the final.
 Now, there is a connection configured. Let's create a register which would correspond to MQTT topic.
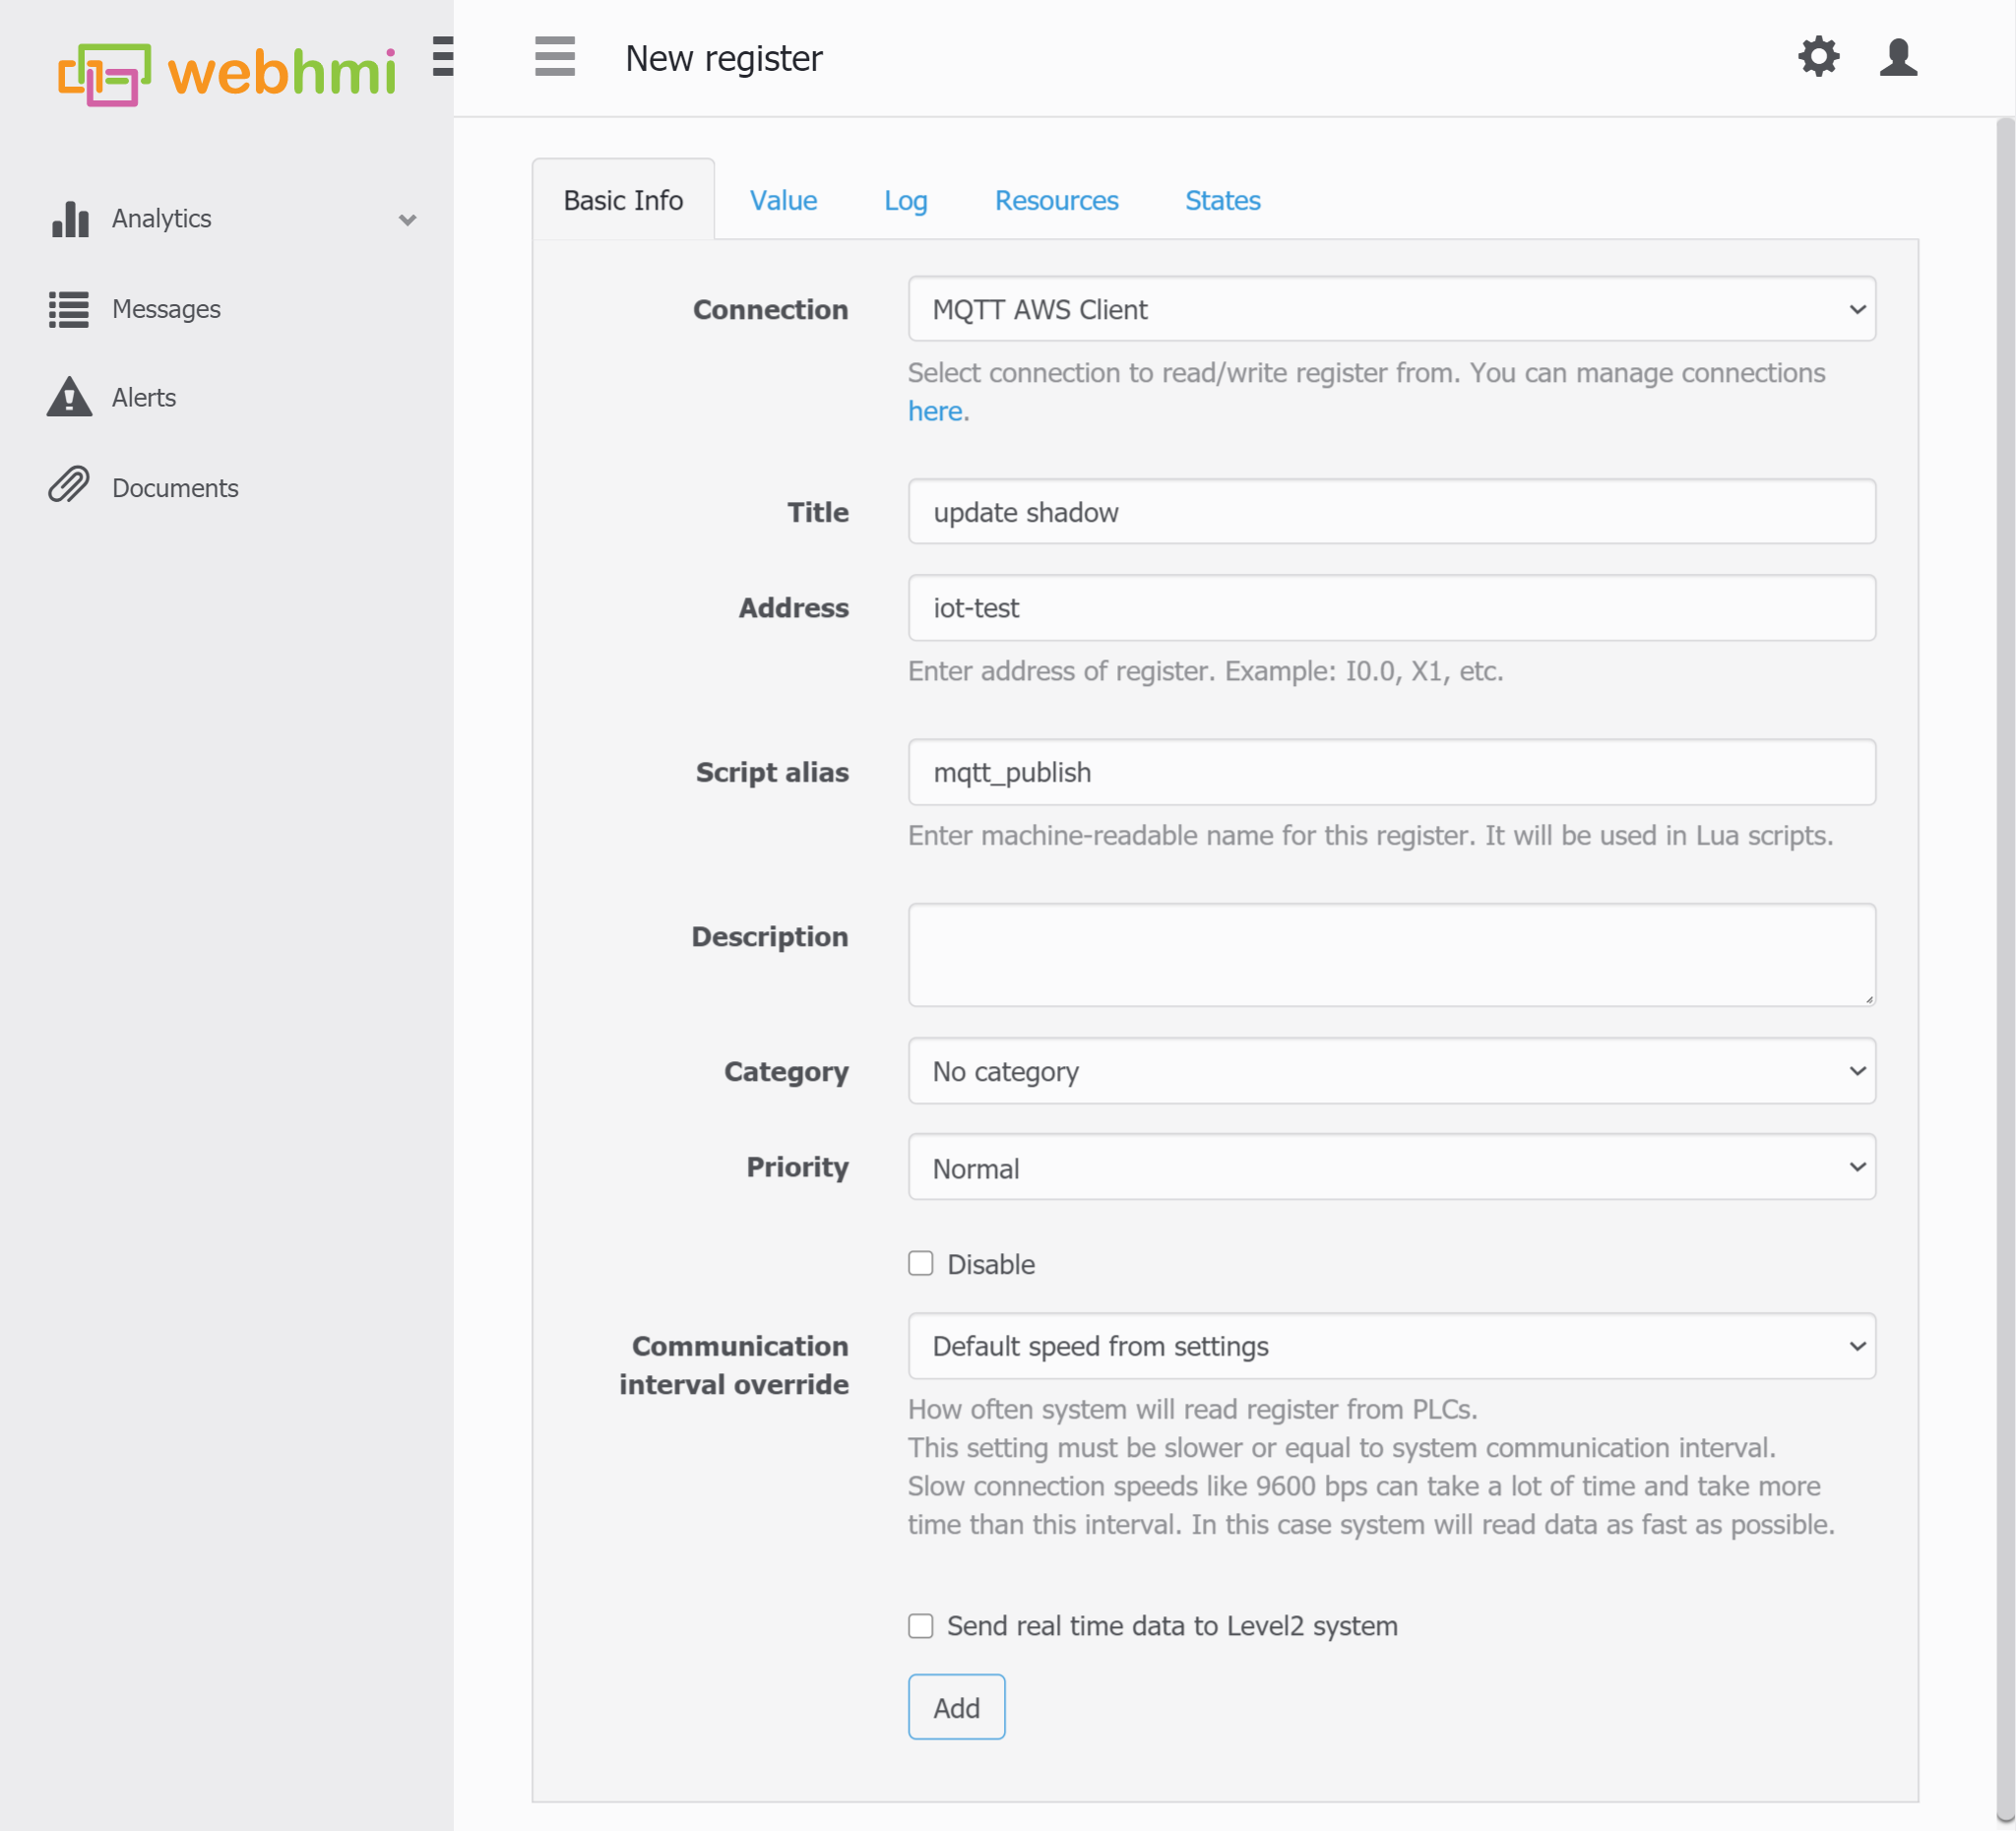
Create a register.
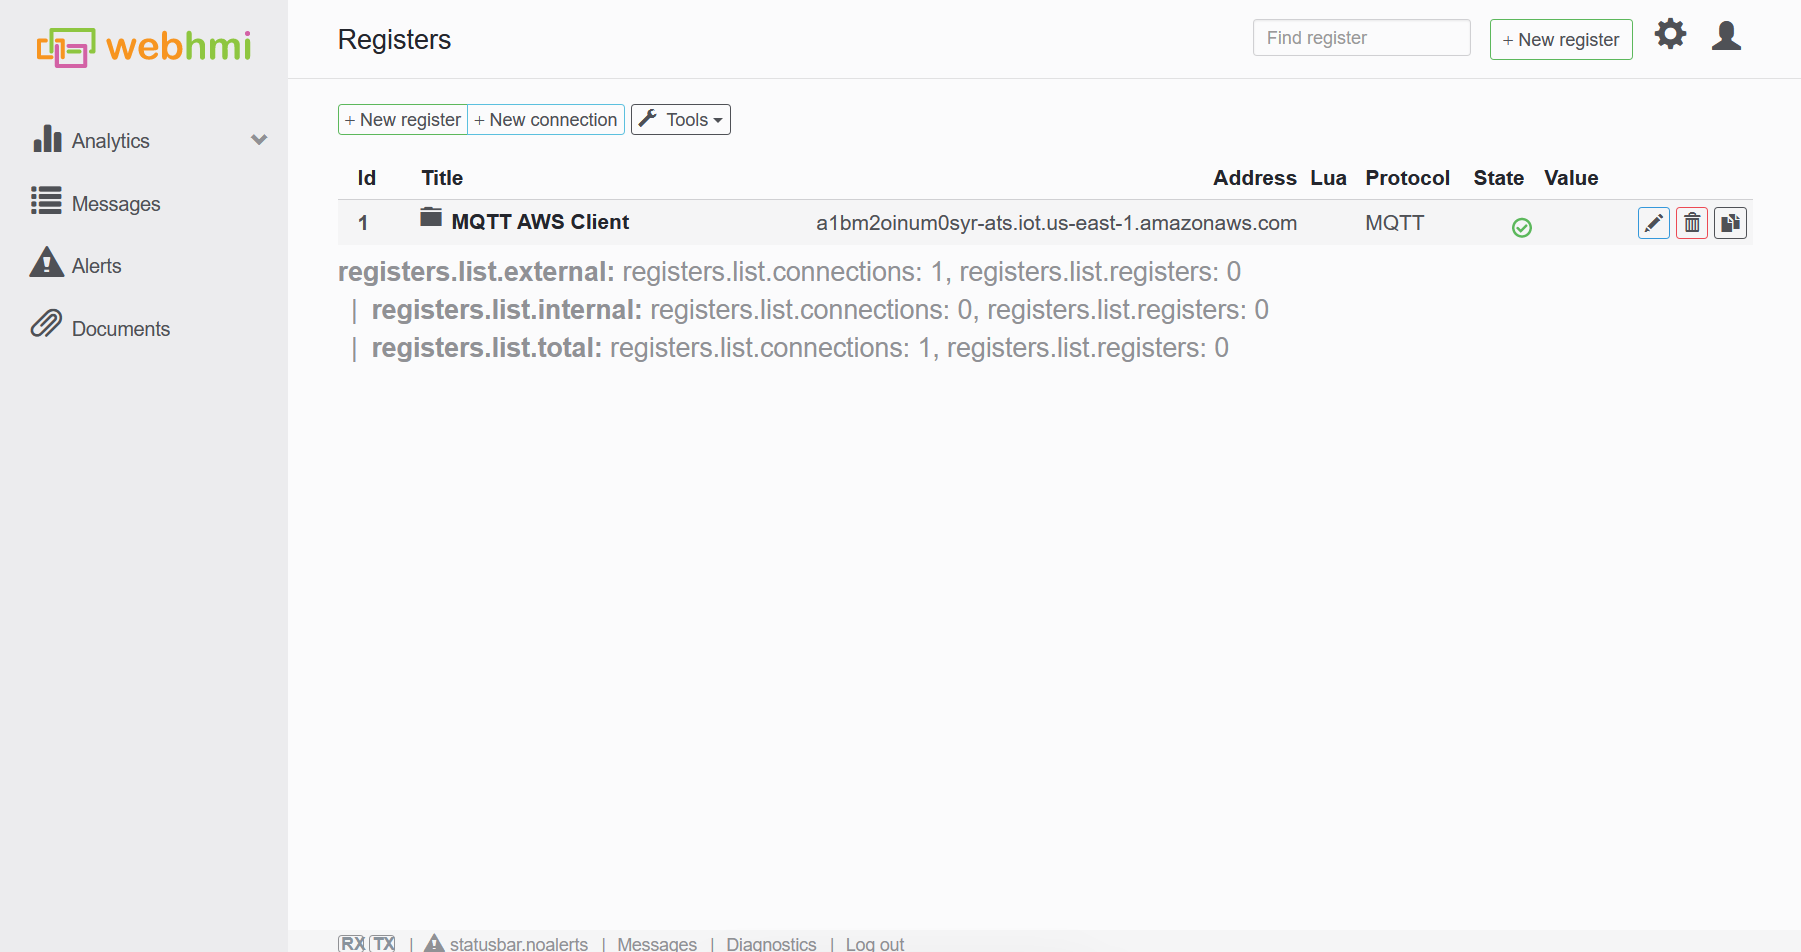 Select the pre-created connection.
Fill in the Topic name in the Address field.
Select the pre-created connection.
Fill in the Topic name in the Address field.
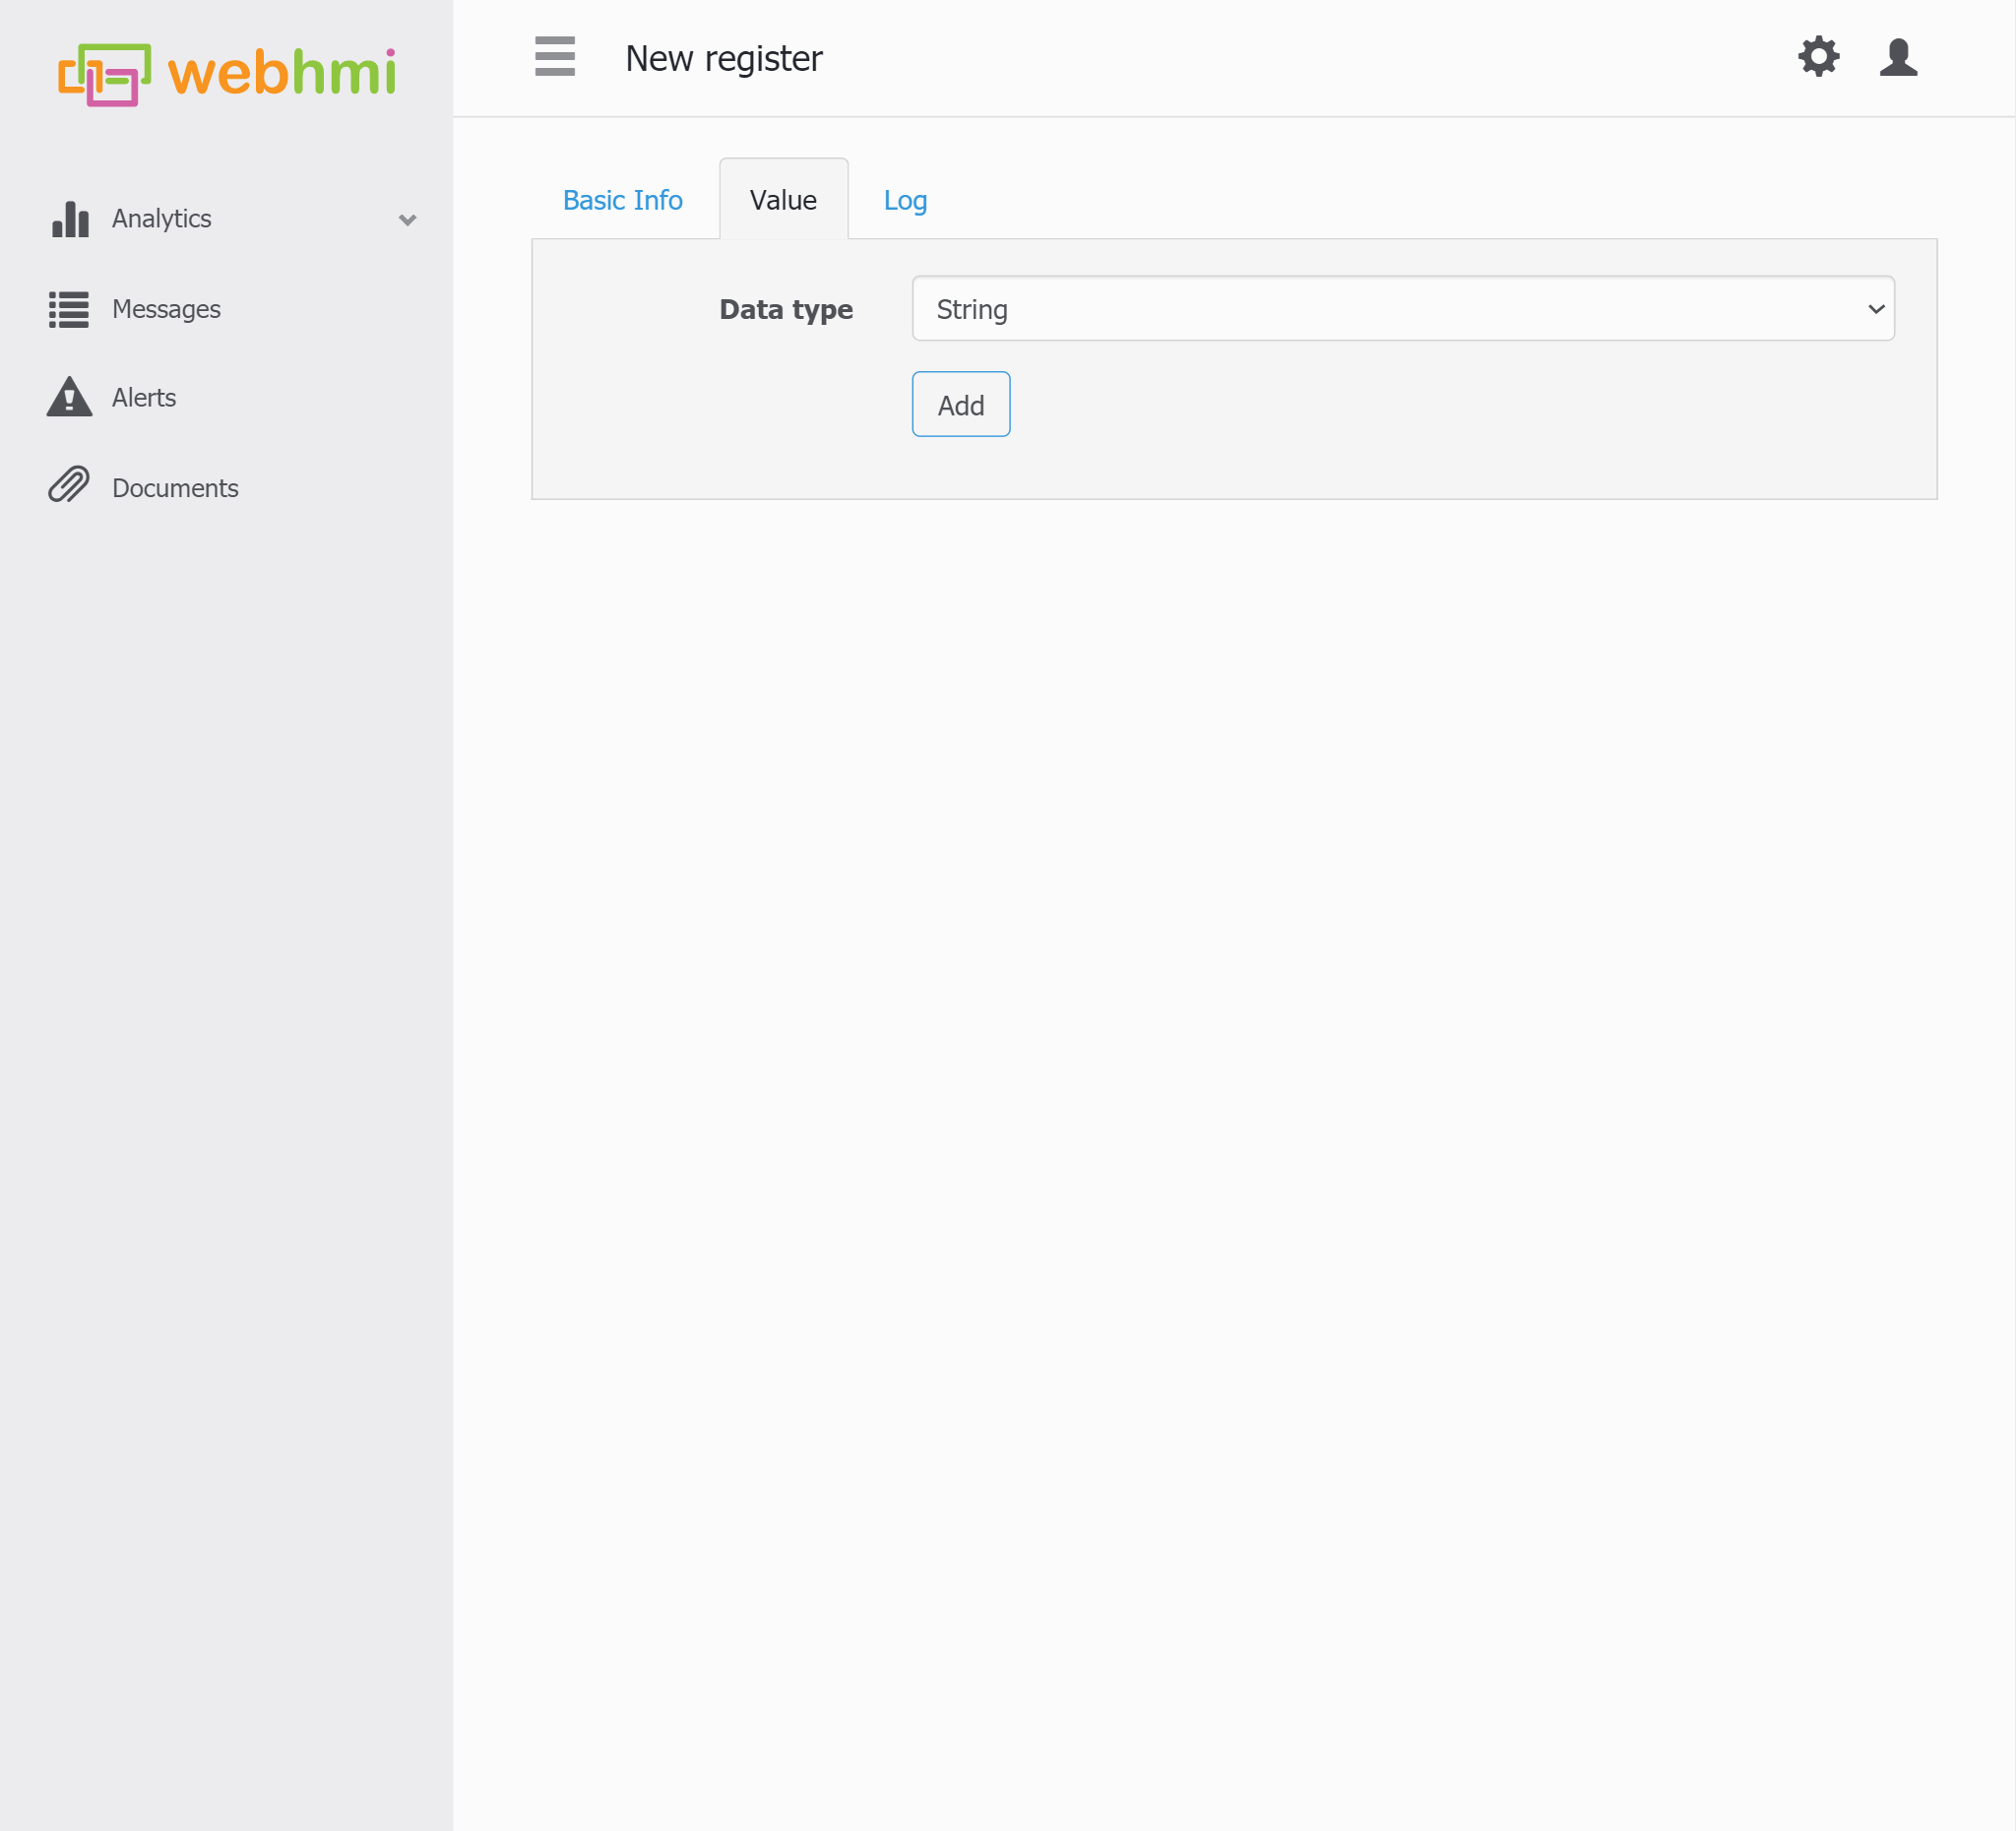
 Also, it is important to switch the value type to String.
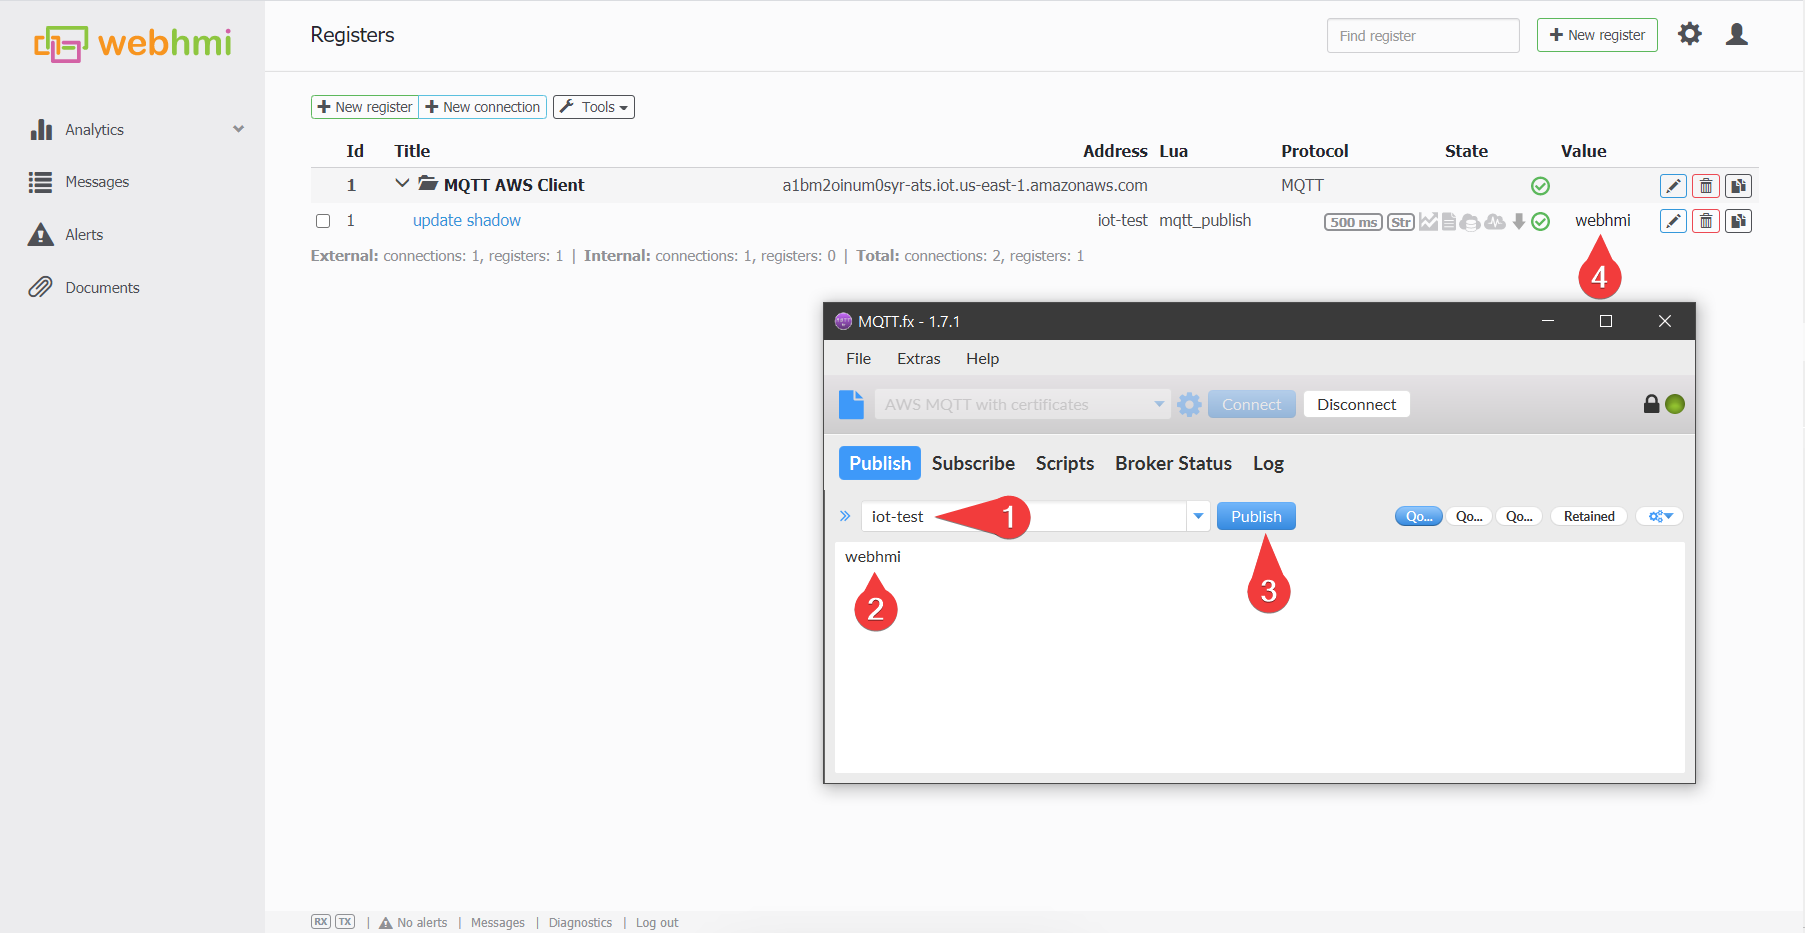
 So to test the connection, let's act WebHMI as subscriber and act MQTT.fx as publisher or vice versa to see the both of clients works well.
To demostrate let's WebHMI act as Subscriber.
So to test the connection, let's act WebHMI as subscriber and act MQTT.fx as publisher or vice versa to see the both of clients works well.
To demostrate let's WebHMI act as Subscriber.
For now, it is WebHMI can post the data from real devices to various AWS Things, visualise with QuickSight tool and store this data in DynamoDB with possibility to import as .csv file to S3 bucket for example.