Table of Contents
![]()
Run Virtual Box WebHMI image
It is possible to run WebHMI as virtual machine (VM).
Prerequisites - You must have VirtualBox installed on your computer to be able run this VM. VirtualBox Extension Pack is required as well if you want to use USB serial adapters (RS-232 or RS-485) inside VM.
The steps required are as follows:
You can also export your machine to other virtualization systems like VMware, Proxmox, etc.
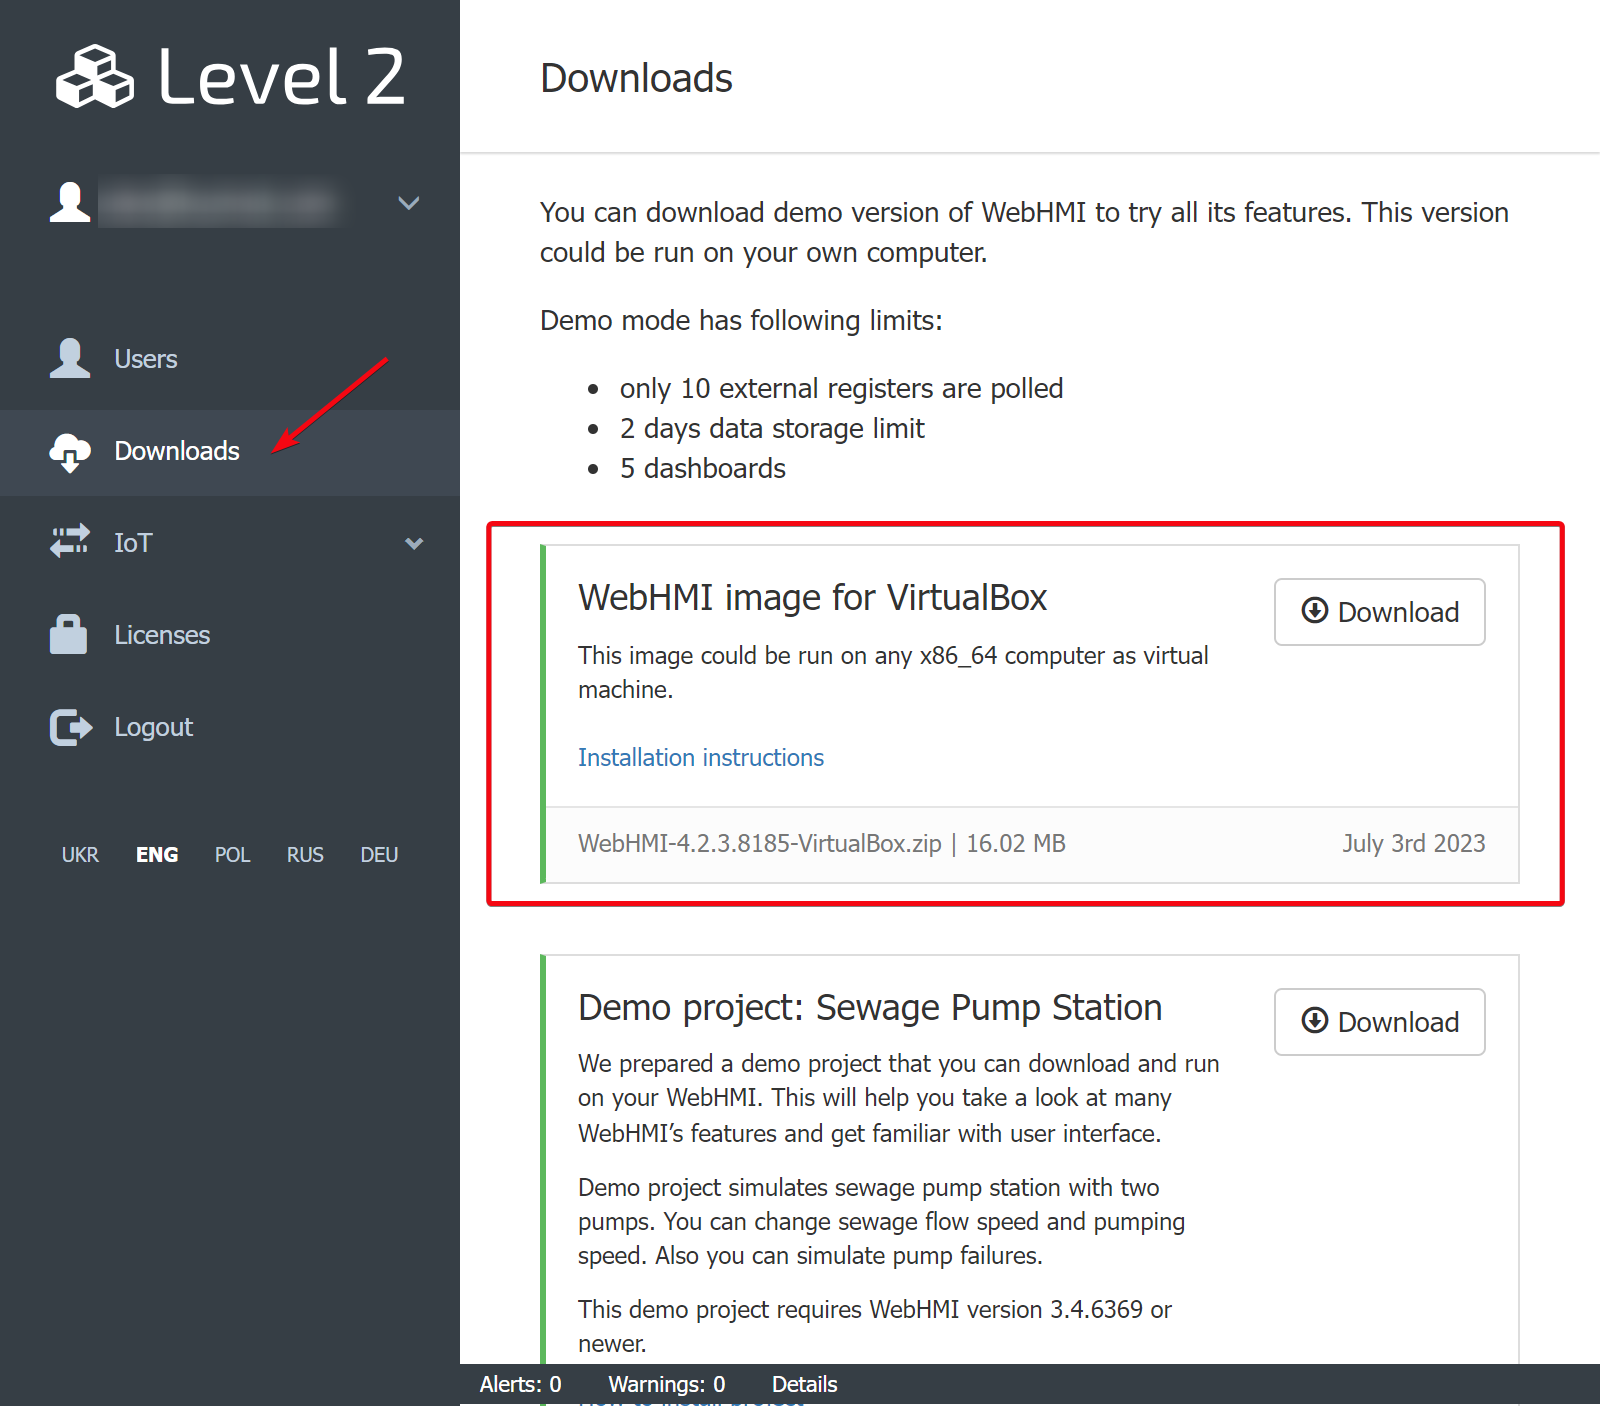
Downloading the image
You can download VirtualBox image at Level2 system.
Add the image to your virtual machines
Once image was downloaded, extract archive to desired destination and double click the image configuration file for auto-install.

After this WebHMI VM will be in your system.
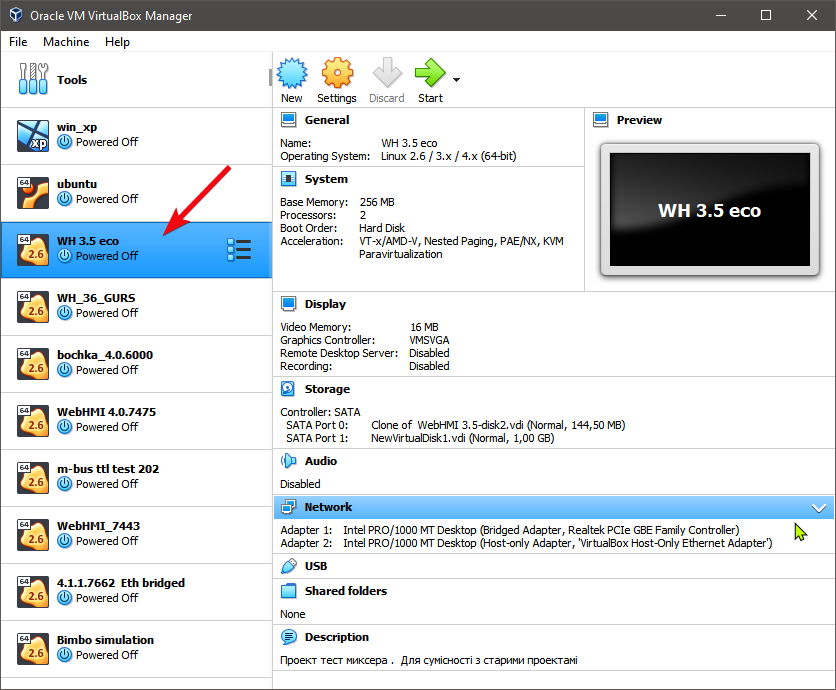
Network setup
Upon installation, there will be one network adapter in the virtual machine with static IP address of 192.168.1.1 bound to one of your PC's network adapters (bridge mode).
If your PC network differs from 192.168.1.0 network, you won't be able to connect to your virtual machine yet, becuase adapter's IP is set inside the VM.
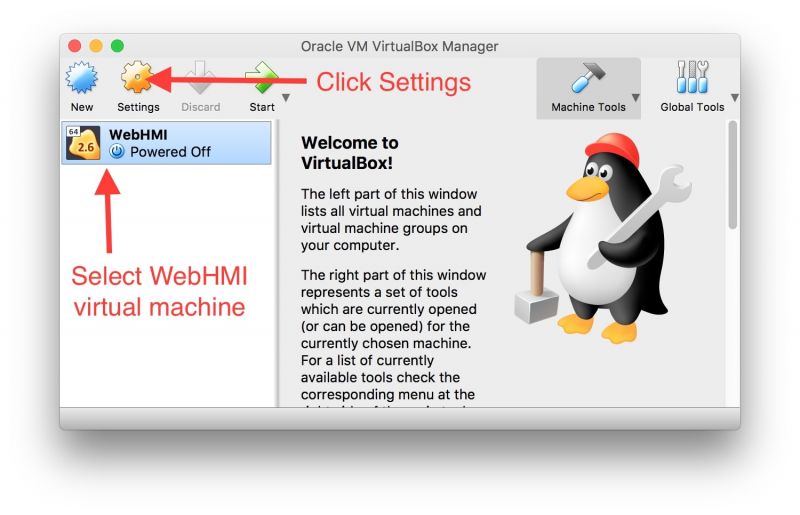
Enter setting and make neccessary network changes accordingly.
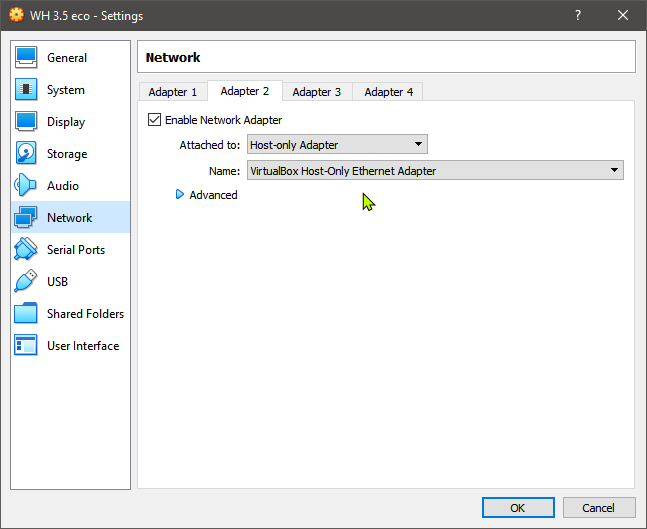
Select the PC's network adapter on Network→Adapter 1 tab you want to share with VM's network #1 adapter.

Also we reccomend add another Adapter #2 to your VM in the virtual host adapter mode to be able to connect to VM for sure. Please refer to this section
Running VM
Close settings window and click Start button.
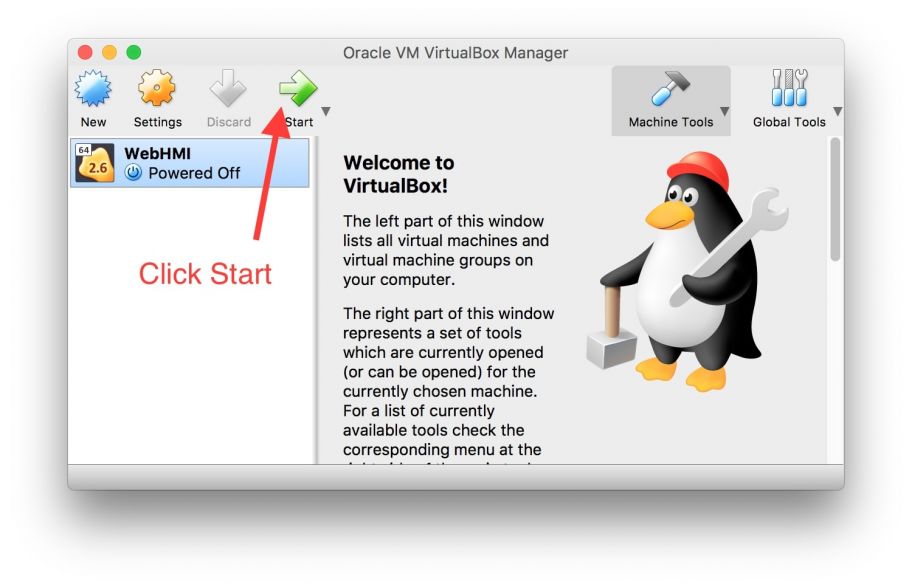
Virtual machine will be started now.

In about 10-20 seconds it will complete boot process. You should see “WebHMI server started” message in console.
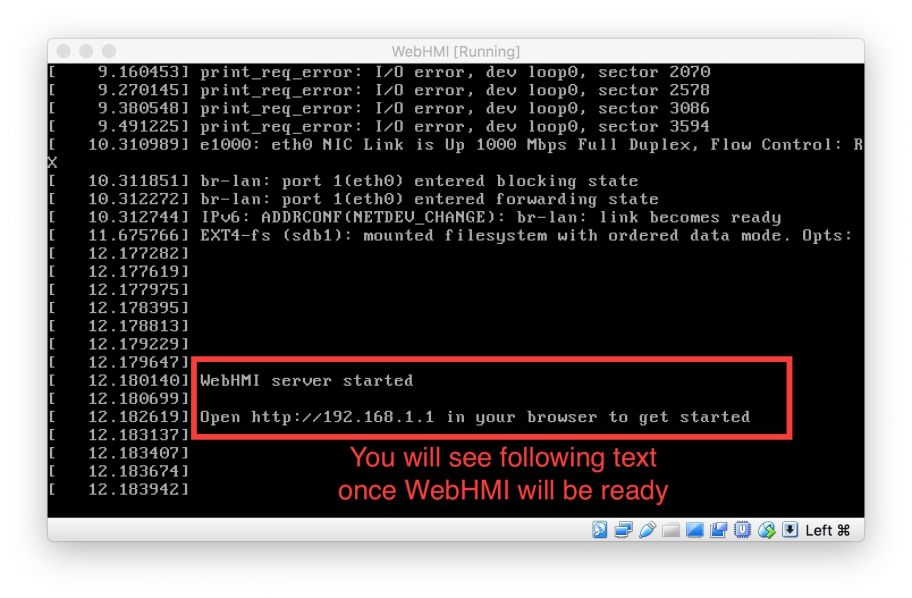
By default virtual machine is connected to your network via bridged network adapter. It uses static ip address 192.168.1.1. So web interface of WebHMI will be available at address 192.168.1.1 too. You can change this address later via Network Settings interface.
Open http://192.168.1.1 in your browser. You should now see WebHMI's user interface.
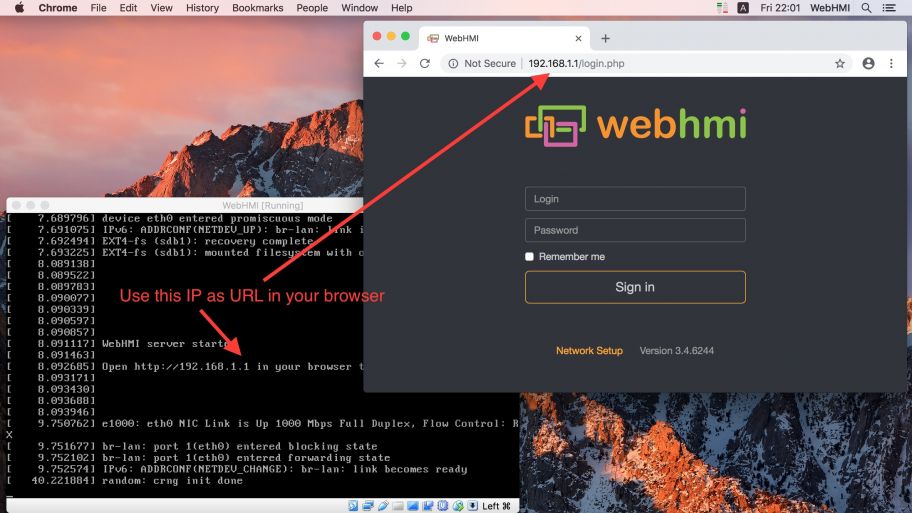
Default credentials are:
| Login | admin |
| Password | admin |
Congratulations! You was able to run WebHMI on your computer. Have fun with it.
Adding serial ports to VM
Windows 10 host system
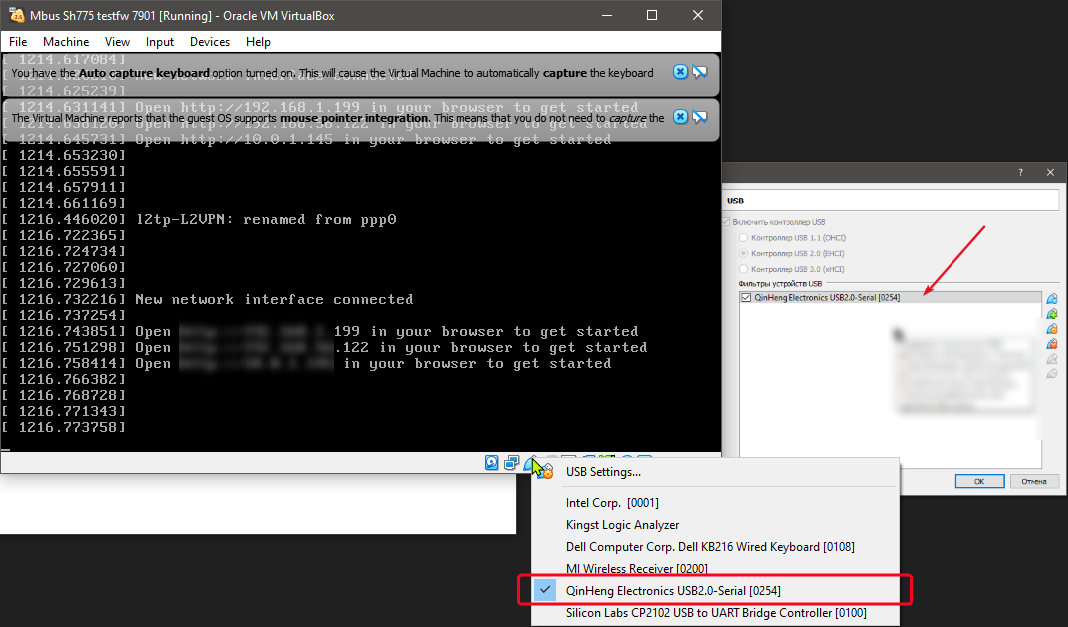
For Windows 10 host system, a USB filter should be set up in the image properties. Please refer to the following picture:
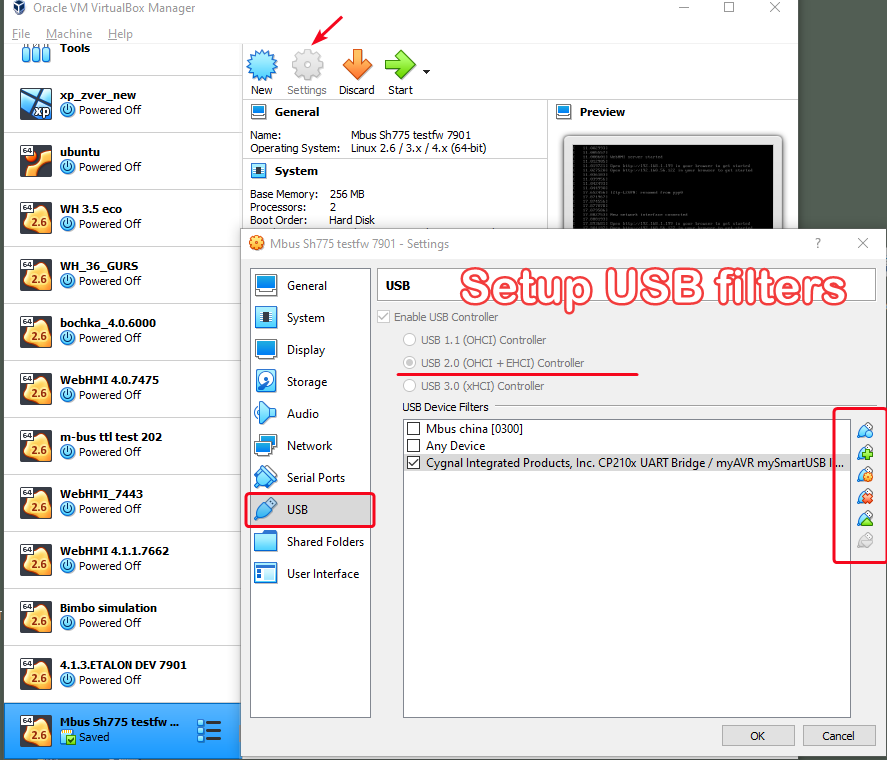
Be sure you enabled the USB converter for the virtual machine:
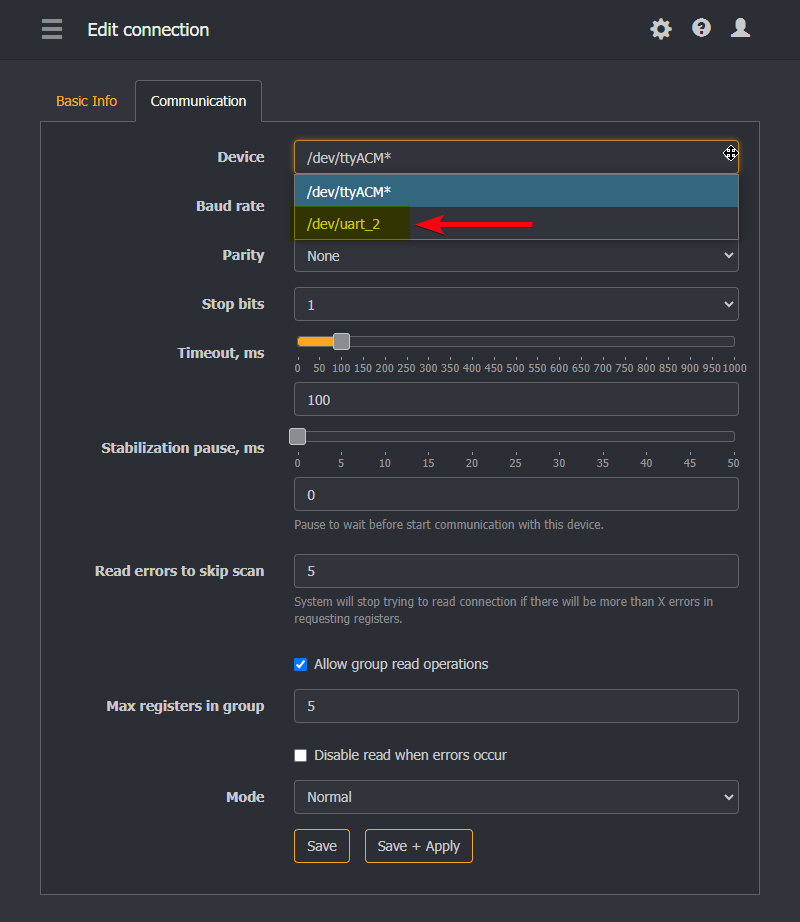
Inside WebHMI project, select your serial device in the connection properties, as shown below:
Troubleshooting
I can't get access to web interface
Please make sure that you physical network adapter is connected to some network. If you are using Ethernet adapter, please make sure that it is connected to switch or router or other device so your operation system will detect link on it. If you can't connect it to any device please see below Creating Virtual Network section.
192.168.1.1 is already in use in my network
There are 2 possible workarounds for this situation:
- Use DHCP in your network to configure second network interface in virtual machine
- Create virtual network in VirtualBox
Use your DHCP
WebHMI's virtual machine has second network interface setup as DHCP client. By default it is disabled.
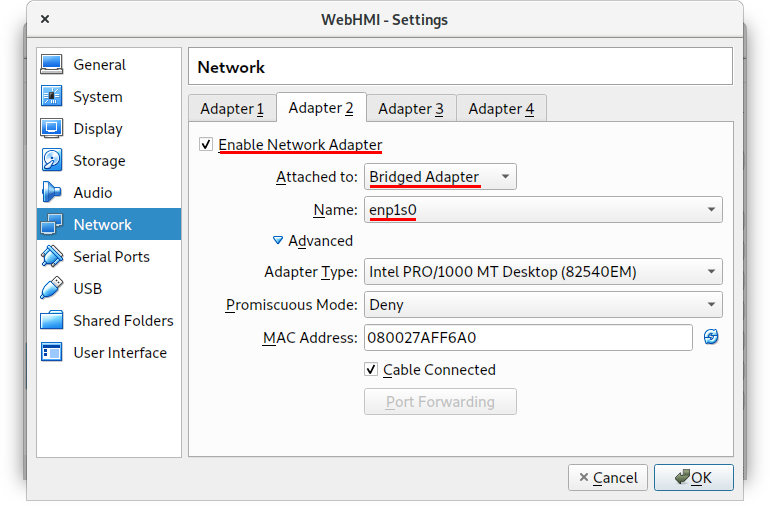
Go to virtual machine settings, select Network→Adapter 2. Check Enable Network Adapter. Choose “Bridged Adapter” and select your network card.
Save settings and start virtual machine. Wait for boot to complete. For second interface it takes a few seconds longer to initialize and get IP address from DHCP server. Wait until you will see message “New network interface connected”. There will be a list of all available IP addresses (192.168.1.1 plus IP from DHCP).
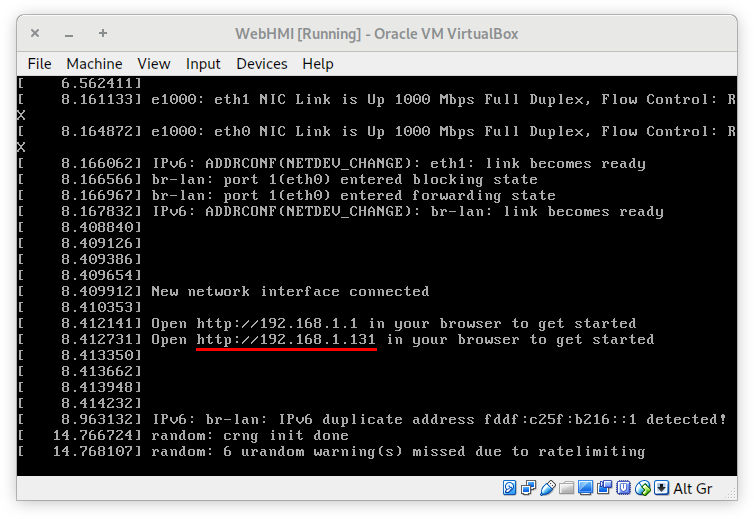
In this example you can get access to WebHMI's UI via http://192.168.1.131/ URL. So now you should be able login into WebHMI and adjust Network Settings to match your existent network,
Create Virtual Network
In some cases you might want to create absolutely independent network for your virtual machine. These might be security or any other reasons. Here is VirtualBox's manual about virtual networking.
For example, if you have only only one Ethernet adapter which is not connected anywhere. In this case your operation system will to send any traffic to such interface and you will be unable to use WebHMI' UI with bridged adapter. In opposite, virtual network's cable is always connected. So there will be no such problem.
To create new virtual network go to File→Host Network Manager.
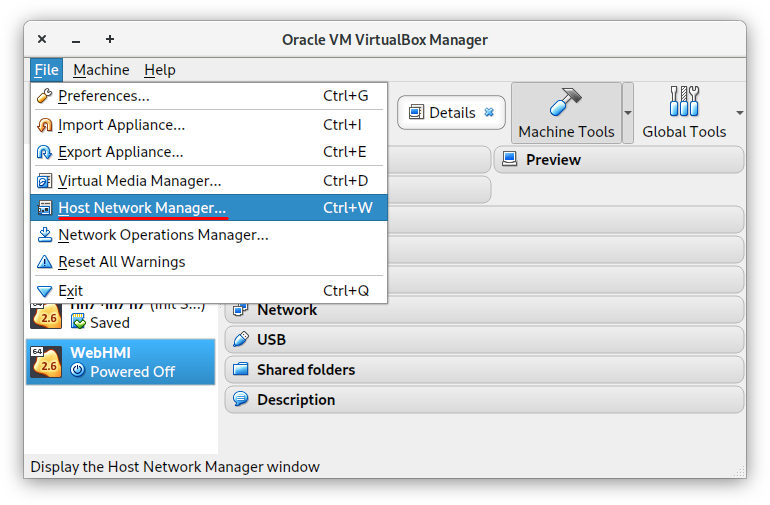
Click “Create” button. This will create new network. Here you can adjust network setting if needed.
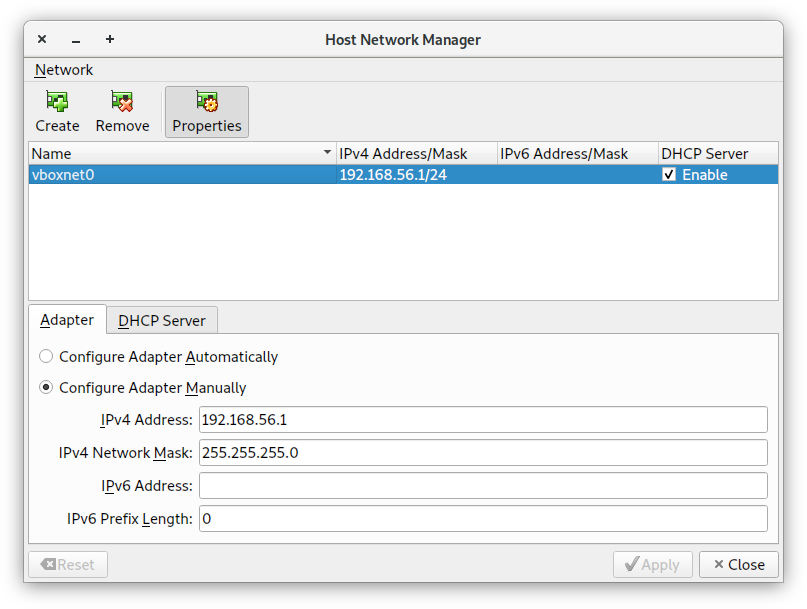
Now go to WebHM's virtual machine settings, select Network→Adapter 2. Check Enable Network Adapter. Choose “Host-only Adapter” and select your newly created virtual network (vboxnet0).

Save settings and start virtual machine. Wait for boot to complete. For second interface it takes a few seconds longer to initialize and get IP address from DHCP server. Wait until you will see message “New network interface connected”. There will be a list of all available IP addresses (192.168.1.1 plus IP from DHCP).

In this example you can get access to WebHMI's UI via http://192.168.56.105/ URL. So now you should be able login into WebHMI and adjust Network Settings to match your existent network, Or you can continue to use this virtual network.