Table of Contents
![]()
Level2 cloud running virtual image
About
In this scenario, your WebHMI image is running on a cloud virtualization platform. You can connect to real world devices via two ways:
- connecting the devices to the Level2 IoT with MQTT protocol
- use Level2 VPN and NAT method
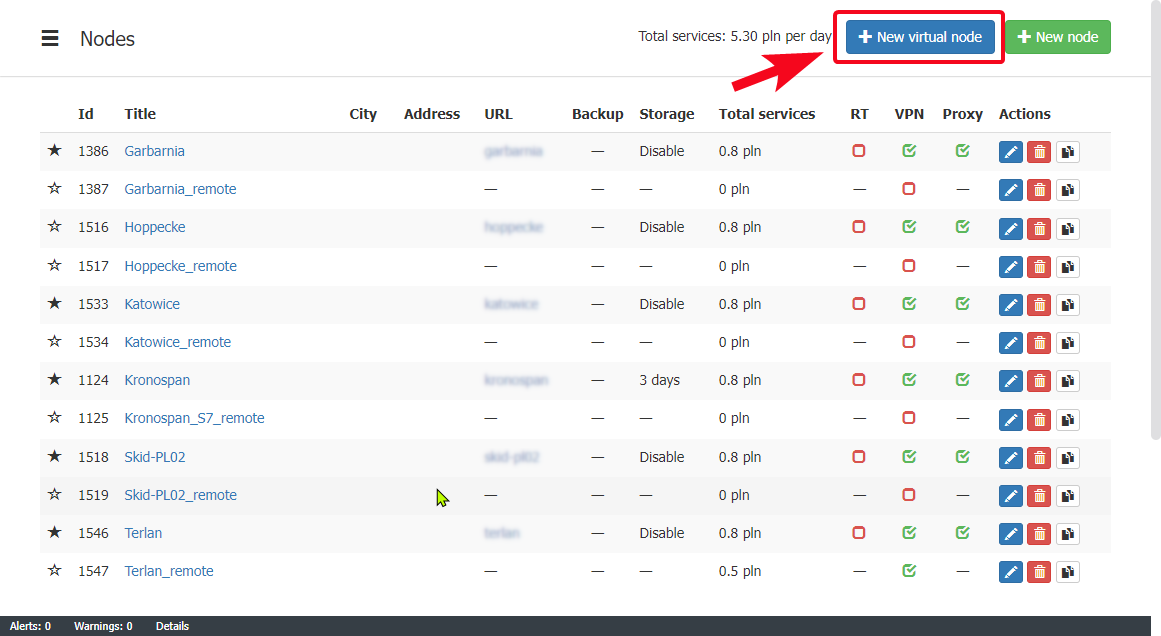
Adding virtual cloud node
To add a virtual node, press the respective button in the Level2 node list:
You will see the following popup window:
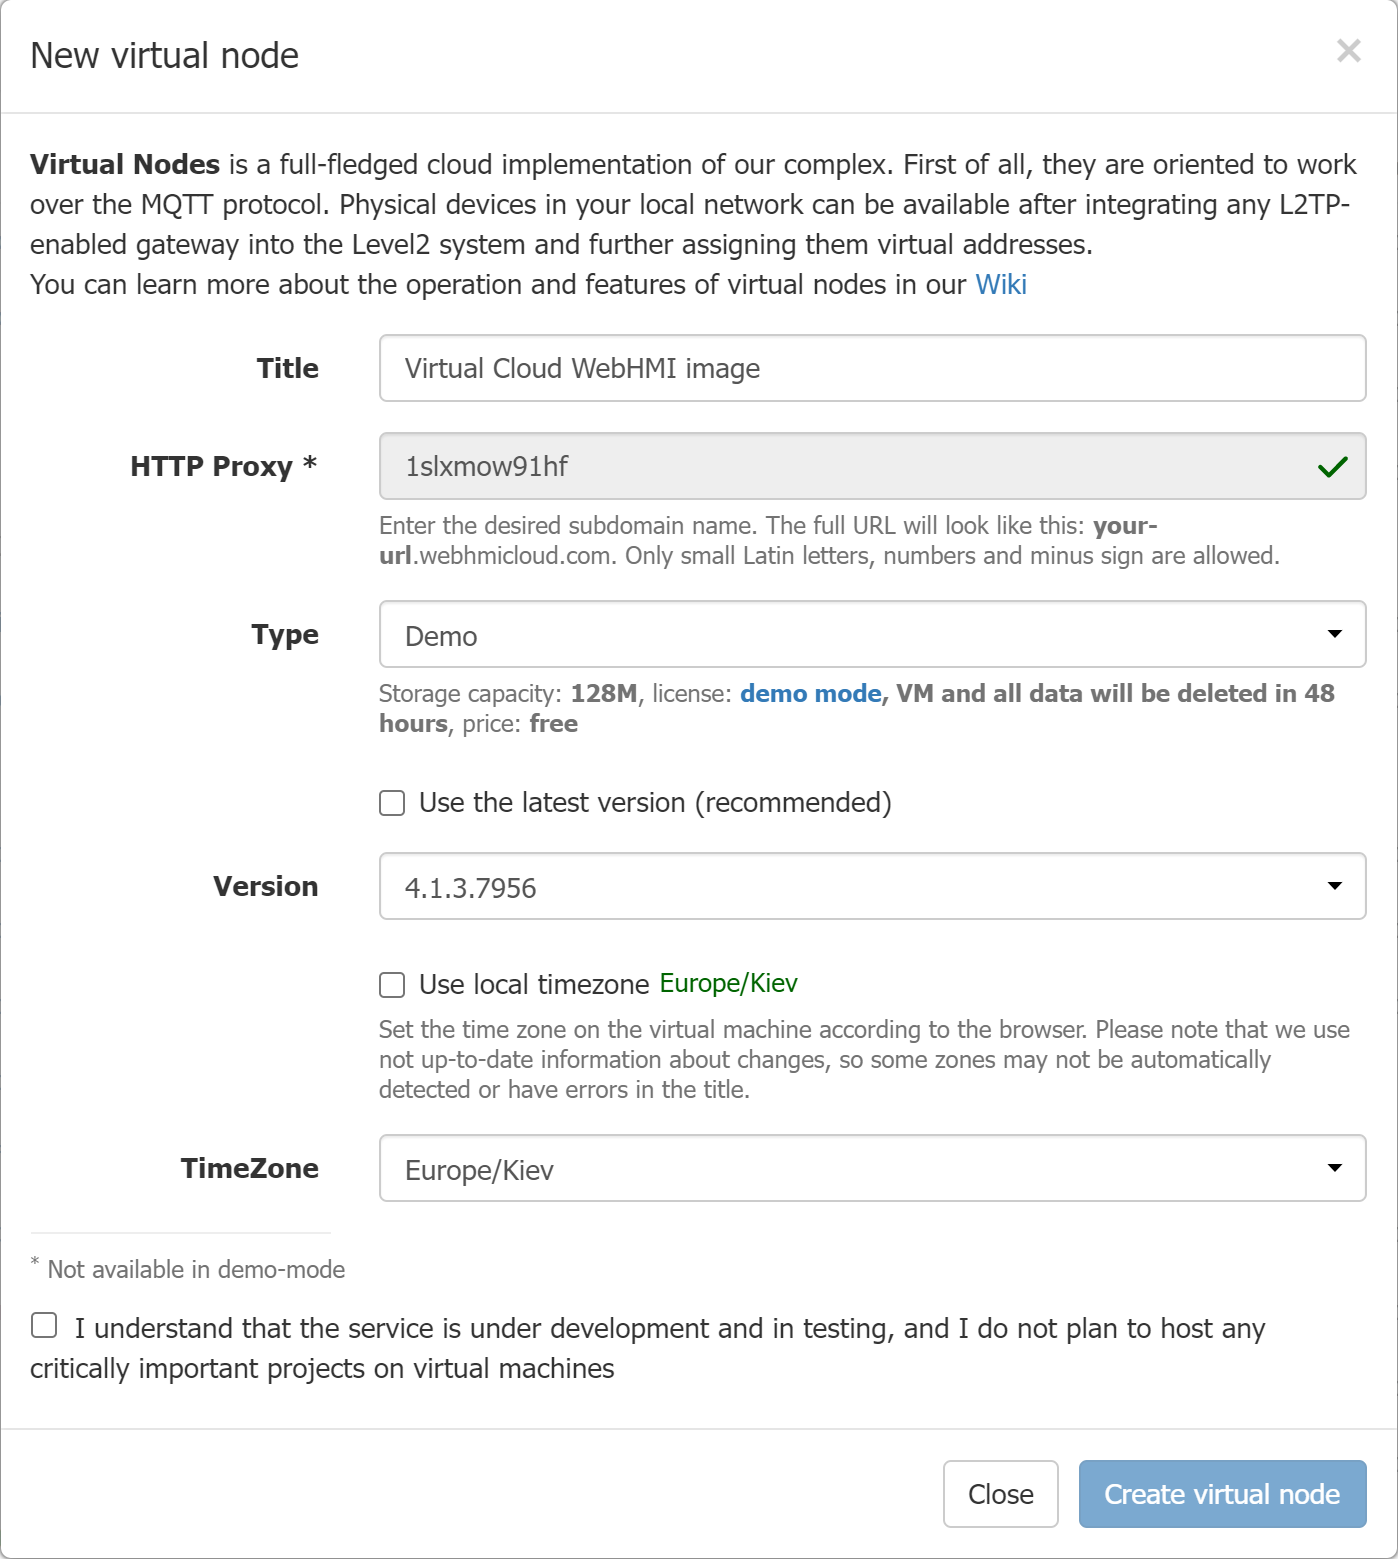
- Title - set name for your image
- HTTP Proxy - for the Demo type virtual node, an arbitrary immutable node URL will be proposed, and you can set custom URL for a full-featured node
- Type - For Demo type node, you will have limited storage capacity, limited lifetime and limited external register count. If you select one of the licensed versions, you will have only respecitve register count limit, set for this kind of license.
When selecting a license, please refer to the license extra information underneath the selection box:
 |
- Version - select either the latest version, or some previous versions. For the licensed types only a few last versions will be available for compatibility reasons.
- TimeZone - sets the timezone for the virtual node. With this setting the node will log the data with the respective timestamps in UTC, so that you'll get right times for data when viewing node graphs/trends from the browser with the same time zone. You can use your current session browser timezone or explicitly select another timezone, if you're going to view the node from that timezone.
Then a progress window will come:

and final message:

Virtual nodes are basically the same as for hw WebHMI or Virtual Box image except for minor details (like VPN + HTTP proxy service control, which are enabled by default for that kind of nodes). Further node configuration is only performed on the Level2.
Connecting virtual cloud node to your hardware
You can connect your virtual node to real equipment with either ways:
MQTT protocol
Please refer to the article on connecting MQTT devices to Level2
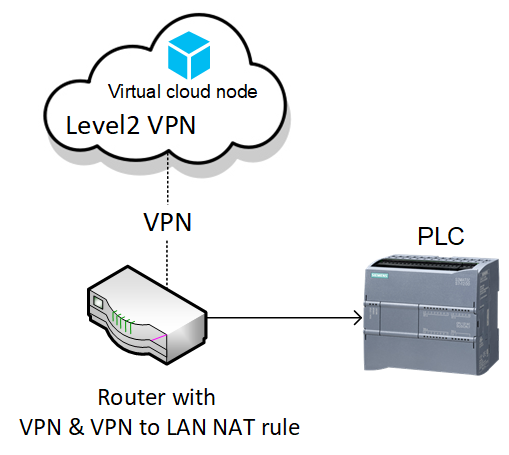
TCP/IP based protocols using NAT technique
In this scenario, you arrange your system like this:
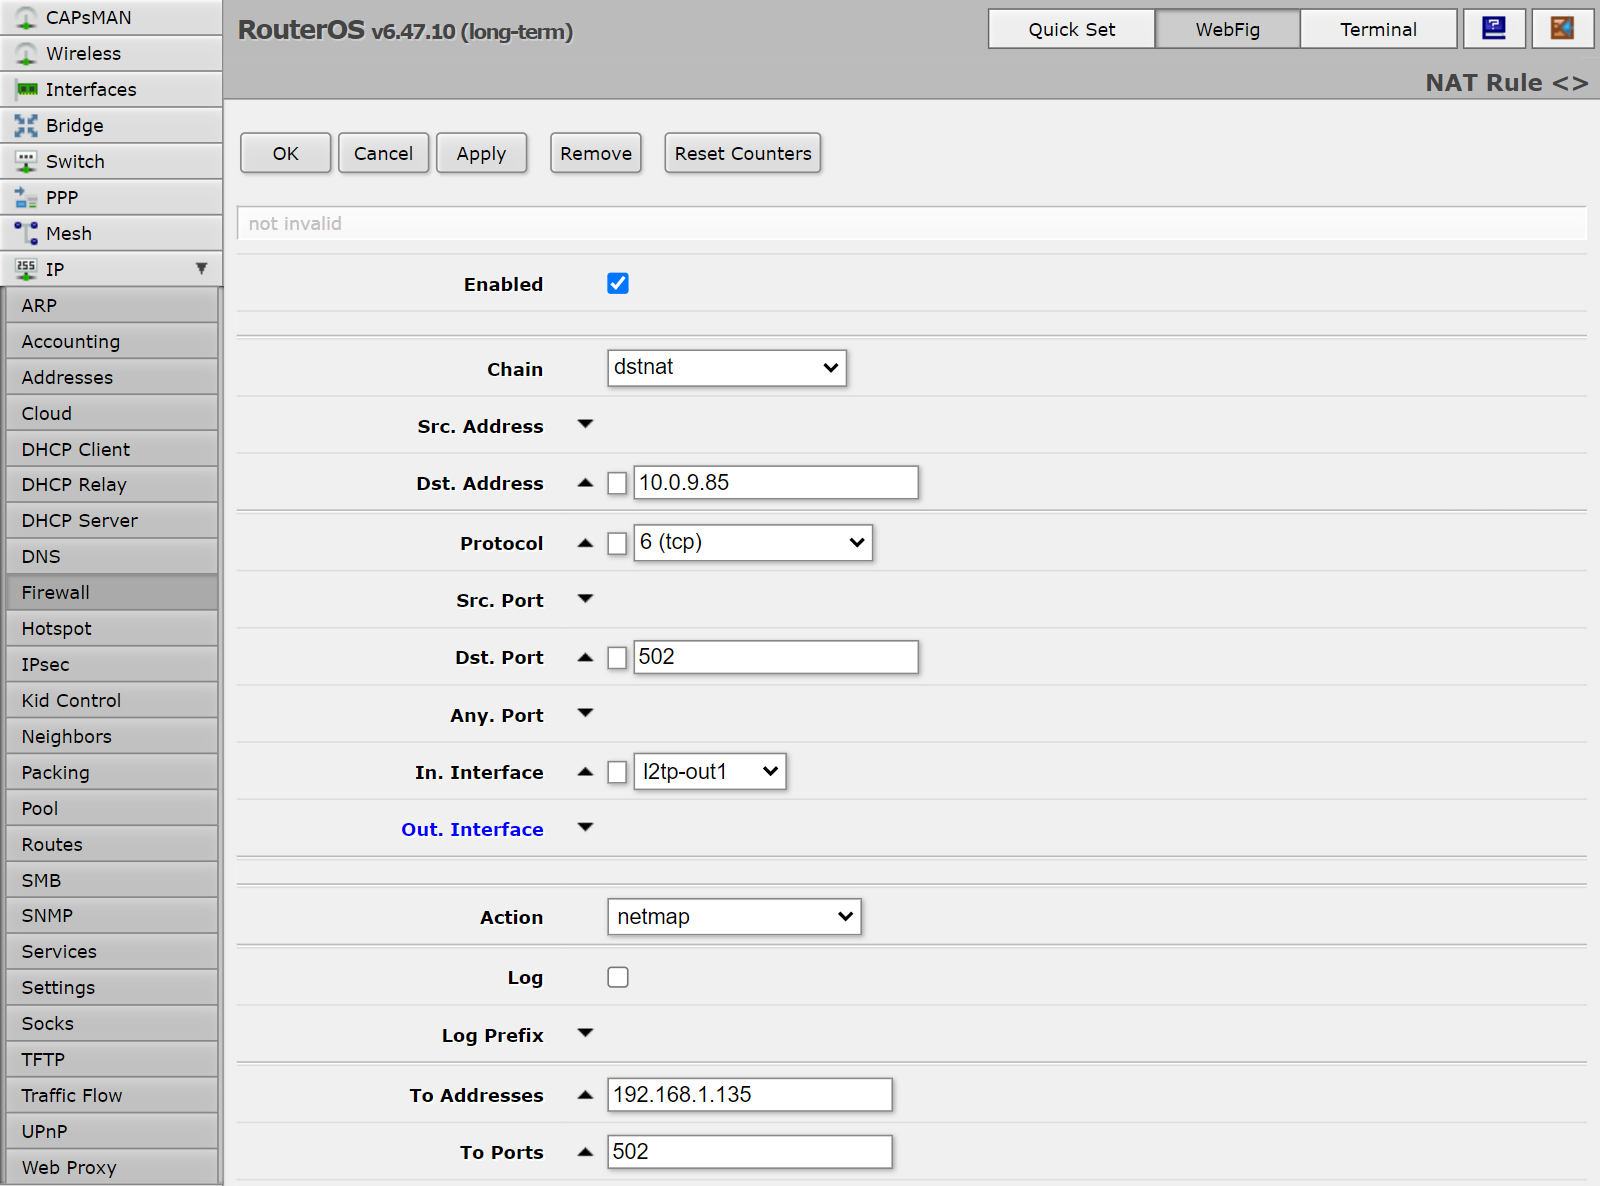
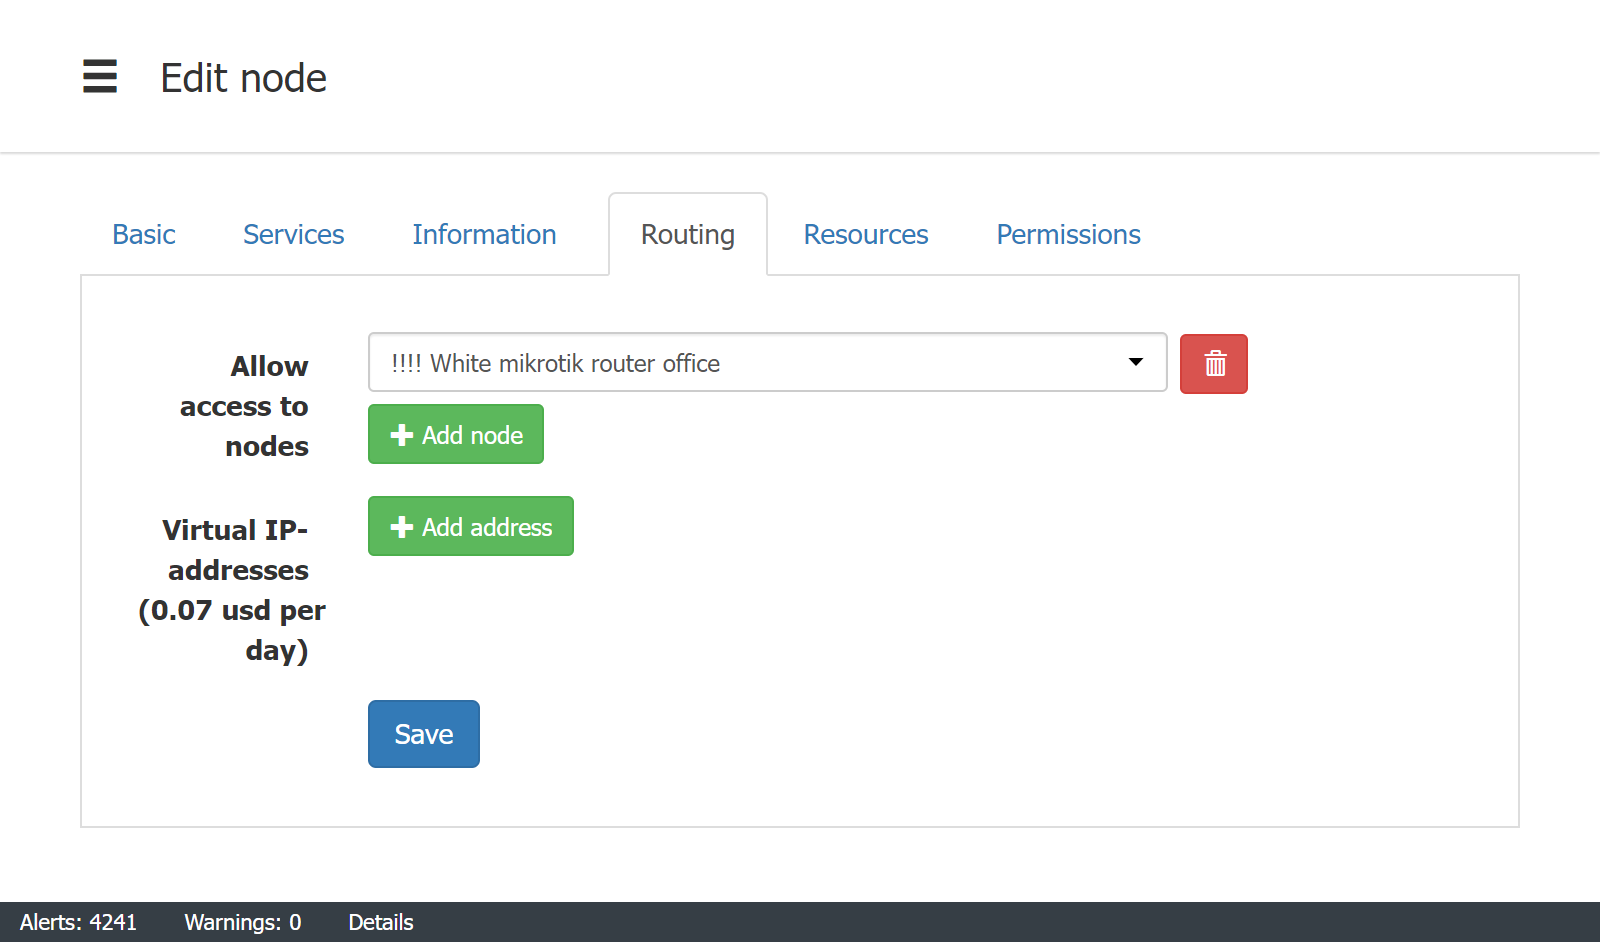
Below is the example of NAT settings for Mikrotik router:
And you also have to enable routing to the L2 node for your router:
Virtual node peculiarities
Please note, that the virtual node will be created with the “hidden” VPN service turned on. Because the VPN is the only method you can access the VM remotely. Please rerfer to your local rates for the cost of the services.
Please note that licensed cloud image will be stopped after account balance becomes zero, then after 2 weeks of stopped state this image will be deleted.