Table of Contents
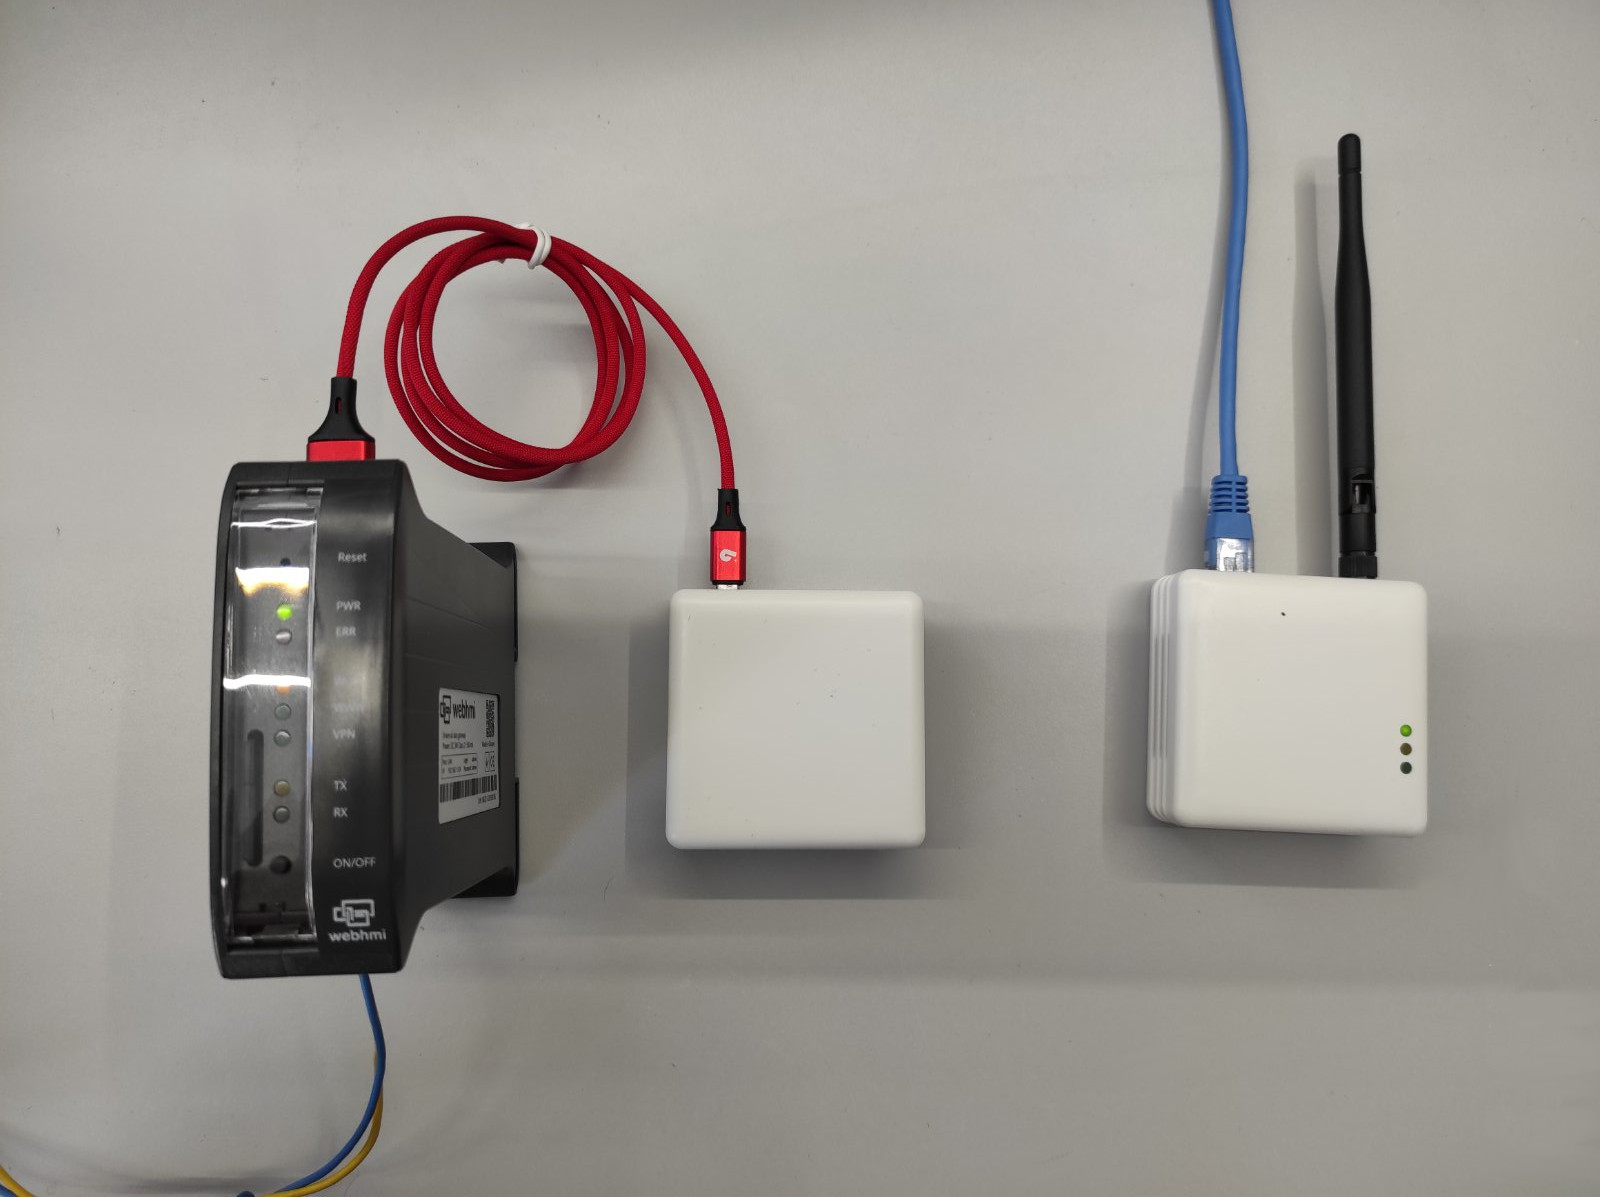
Connecting AirWave remote arbitrary data telemetry module
The AirWave is a modification of the AirPoint wireless telemetry module which allows for sending arbitrary process data over the LoRa radio channels which are employed in AirPoint/AirGate modules.
When you have a remote standalone (or auxilary) system with WebHMI, that is not able to send data to another system or to a higher-level system like Level2 (due to the absence of the local network/mobile connection ), you can use this solution to nonetheless send necessary data.
The application structure is as follows:
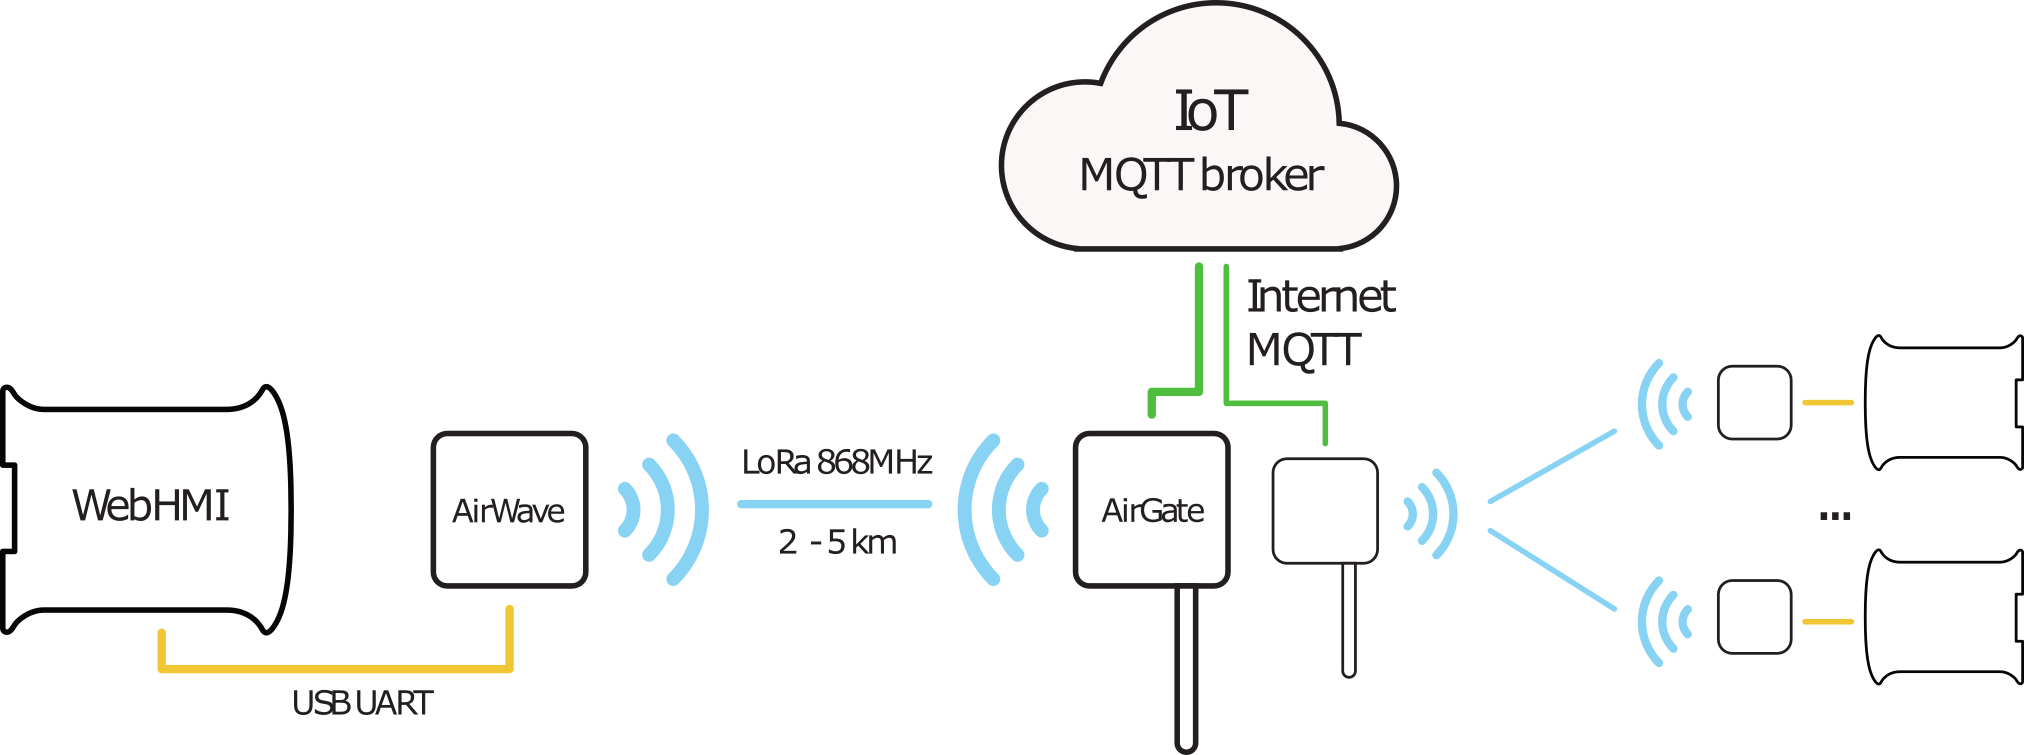
To achieve this, you need the following steps:
- Connect AirWave to WebHMI with a micro USB - cable which will create a new serial port in the system
- Setup AirGate to match your MQTT client (WebHMI, Level2, and others) setting to be able to accept data
- Write a small Lua script, formatting your application data into JSON topic, compatible with AirGate data format and writing it to the connection with custom protocol.
- Write a small custom protocol driver that will send the necessary data to this port
We will consider this more in detail in the following parts:
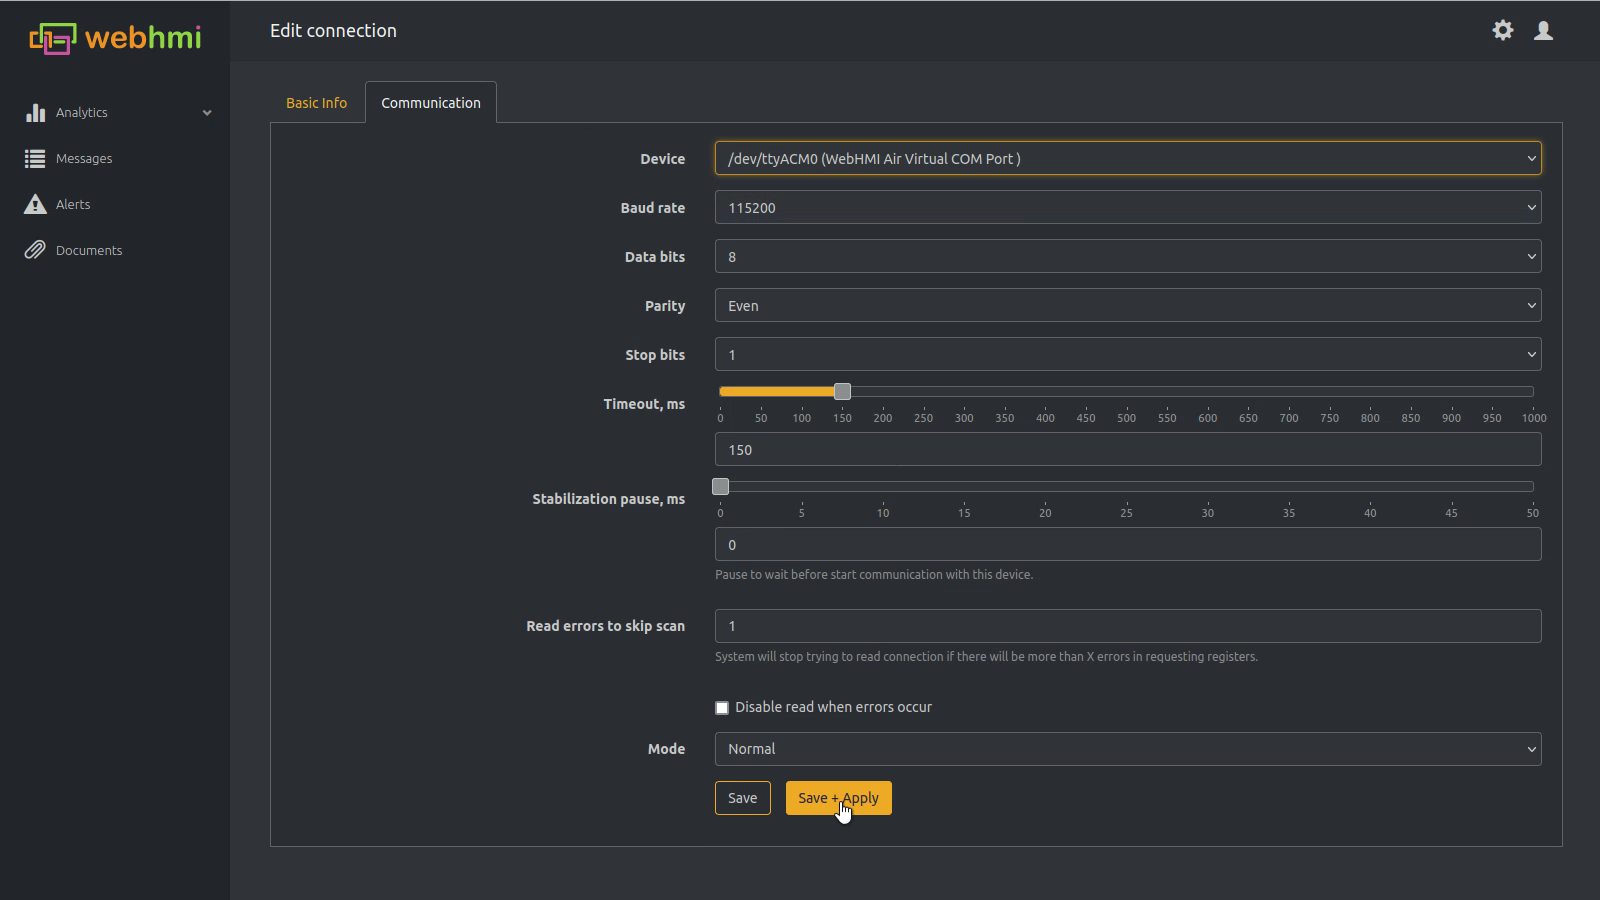
Connecting AirWave to WebHMI
That is the simplest part. Upon connection, there will be an extra serial port available in the connection option that you have to use in your custom protocol connection.
Check that the extra port is present in some serial connection (or create a new one) in the 'Device' field. Use the following screen for reference when creating a connection for the AirWave module.
AirGate setup
Please refer to the AirGate manual for reference.
Lua script preparing your data
The AirGate expects certain data format when accepting packets from AirPoint modules, which you should follow when writing a communication function. E.g. the hardware address of the AirPoint has a kind of self-check based on hash/checksum. To get the “valid” address for the AirWave you can use “Add custom IoT device” procedure on the Level2 and get the address:

Store the hw address of the custom device you got and use it in the script:
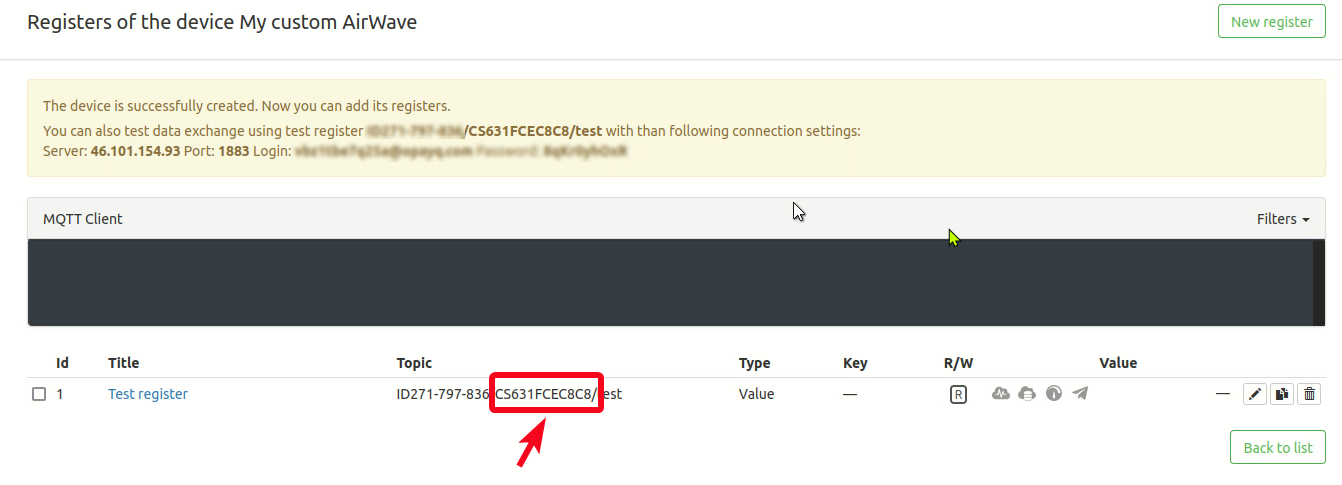
TARGET_DEV_ID = "CS631FCEC8C8"  -- <-- use the hw address you got in the Level2 Add device procedure
regsToSend = {"payload", "error", "ts"}

function main (userId)
  local tabToSend = {}
  for _, regId in pairs(regsToSend)  do
      tabToSend[reg] = R(regId)
  end

  local jsonString = cjson.encode(tabToSend)  ; TRACE("json str = " .. jsonString)
  local jsonL2 = "$C," .. TARGET_DEV_ID .. "," .. jsonString  ; TRACE("jsonL2 = " .. jsonL2)

  W(5, jsonL2)
end
This script should not be called in every scan. You can set it as “On register's value change” invoke method, and change the respective register with another script which analize a set of conditions, like time interval, alert arise etc. You can refer to this example.
Custom Protocol for AirWave
The custom protocol just gets the string prepared by the Lua script above, sends it and checks send/read process.
function createDevices ()
    addDevice({name = "W",  shift = 0, base = 10, xtraFields = {}})
end

function splitString(str)
    local s, rt = tostring(str), {}
    for i = 1, #s do
        table.insert(rt, s:sub(i,i))
    end
    return rt
end

function writeRegister (reg, device, unitId, newValue)
  local wrRequest = splitString(newValue)
  wrRequest[#wrRequest + 1] = ';'         ; DEBUG("Going to send this packet " .. table.concat(wrRequest) )

  TRACE("estimated resp len = " .. #wrRequest - 2)
  local resp = sendBytes(wrRequest)
  if (not resp) then
      ERROR("Can't send request")
      return false
  end

  sleep(100)

  resp = readBytes(4)
  if (not resp) then
      ERROR("Can't receive reply") ; return false
  end
  if (#resp ~= 4) then
      ERROR("Response length is wrong") ; return false
  end

  local respondedLength = resp[1]                   ; DEBUG("respondedLength: " .. respondedLength)
  if (respondedLength ~= #wrRequest - 1) then
      ERROR("Wrong responded length: " .. respondedLength .. ", expected " .. #wrRequest - 1)
      return false
  end
  TRACE("Write done successfully!")
  return true

end

function readRegister (reg, device, unitId)
  return 1
end
Check your messages in the MQTT client. In the example provided, Level2 IoT console is used:
