Table of Contents
![]()
Connecting WebHMI to Level2
The information in this section relates to the hardware WebHMI & Virtual box version. The cloud running version is connected automatically during creation phase.
The “connection” means getting API key from Level2 system, which then WebHMI uses for data sending to the cloud. Other part of the connection is the WebHMI VPN client connection to the Level2 VPN server which facilitates remote accessing to the WebHMI using HTTP proxy service.
Depending on the fw version, there are 2 ways how to setup the connection:
- For the fw versions starting from 3.5, the connection (both VPN and data sending) can be made right from the WebHMI project setup, and further adjusted in the Level2 system. You must have valid Level2 account or you will be prompted1) to do this during the setup.
- For the older versions, the setup is made a bit different:
- A node condiguration is created on the Level2, which generates API key and VPN client credentials
- On the WebHMI, you enter this API key and VPN credentials to get connected.
Connecting from WebHMI project setup menu, newer method (#1)
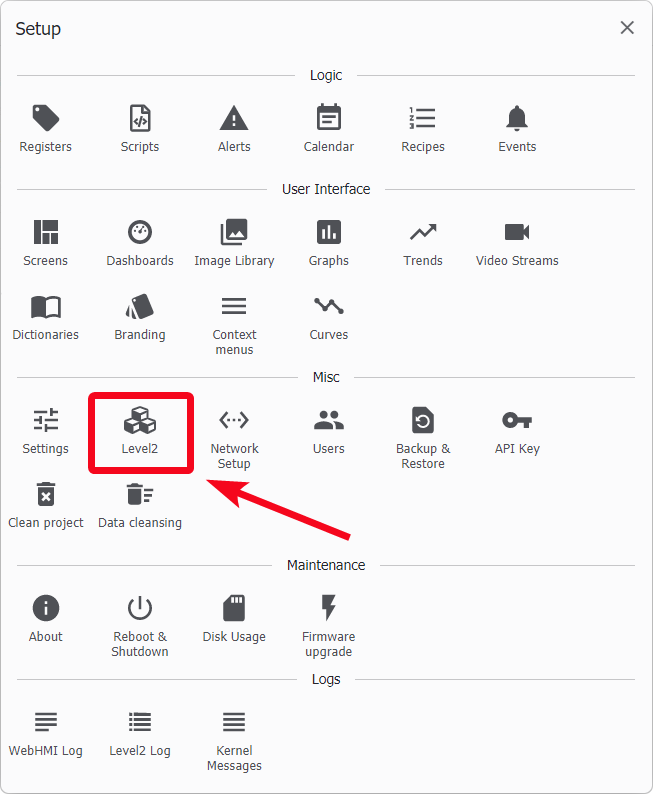
You can connect WebHMI to Level2 following Setup / Level2 link from side bar menu:

Then you have several options how to proceed:
- if you don't have any Level2 account, you can follow Register now link and create new account
- if you have Level2 account, you can Sign-in and use step-by-step procedure right from this page.
- if you already have an account and some node created there in advance, you can just input API key from this node following Enter API key directly
As of 3.6 fw version, Level2 setup link resides in the popup setup menu
Registering in Level2 system
You may follow the above mentioned Register now link or use this URL - level2.webhmi.com.ua.
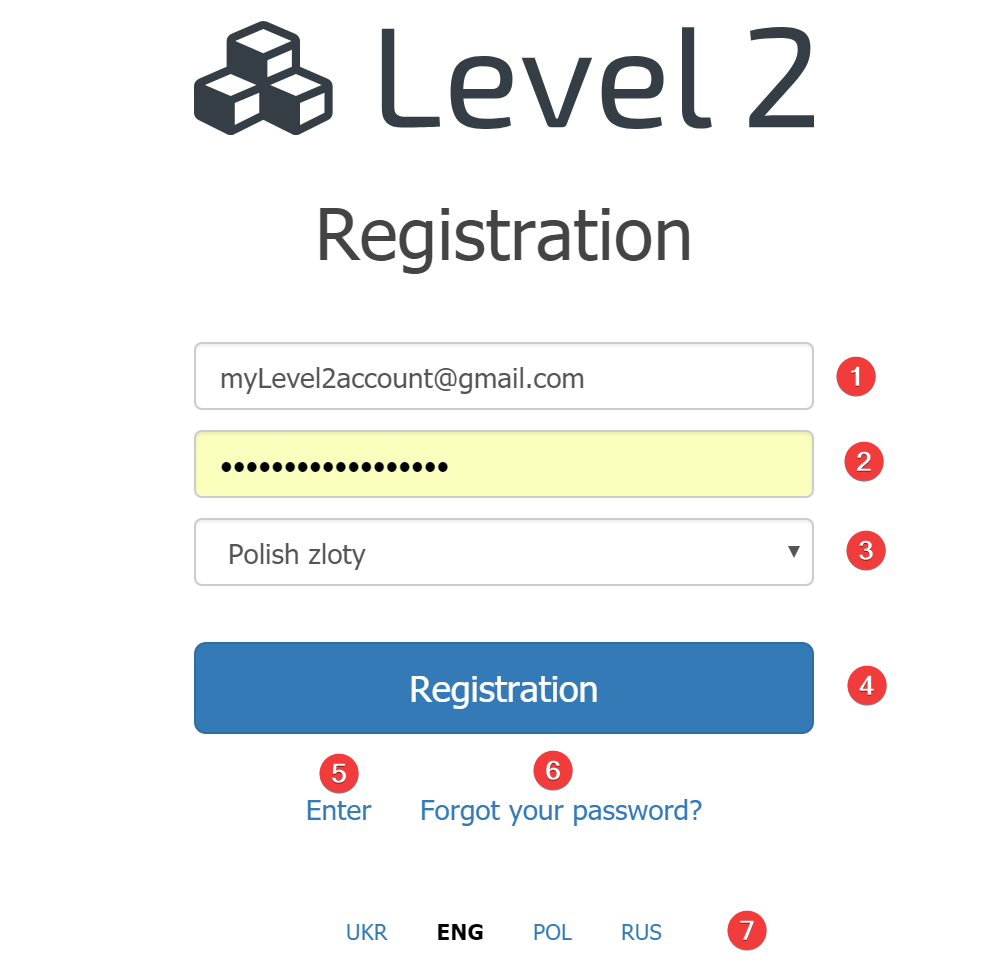
- Enter e-mail you want to use as a login for Level2
- Enter password
- Choose currency to use in Level2 tarriffs, reports, billing etc.
- Starts registration process ( confirmation e-mail will be sent to the e-mail indicated as login )
- To Enter into existing account with login and password provided
- Recover password link
- Language selection for Level2 interface
Adding a node to Level2 using WebHMI sign-in option
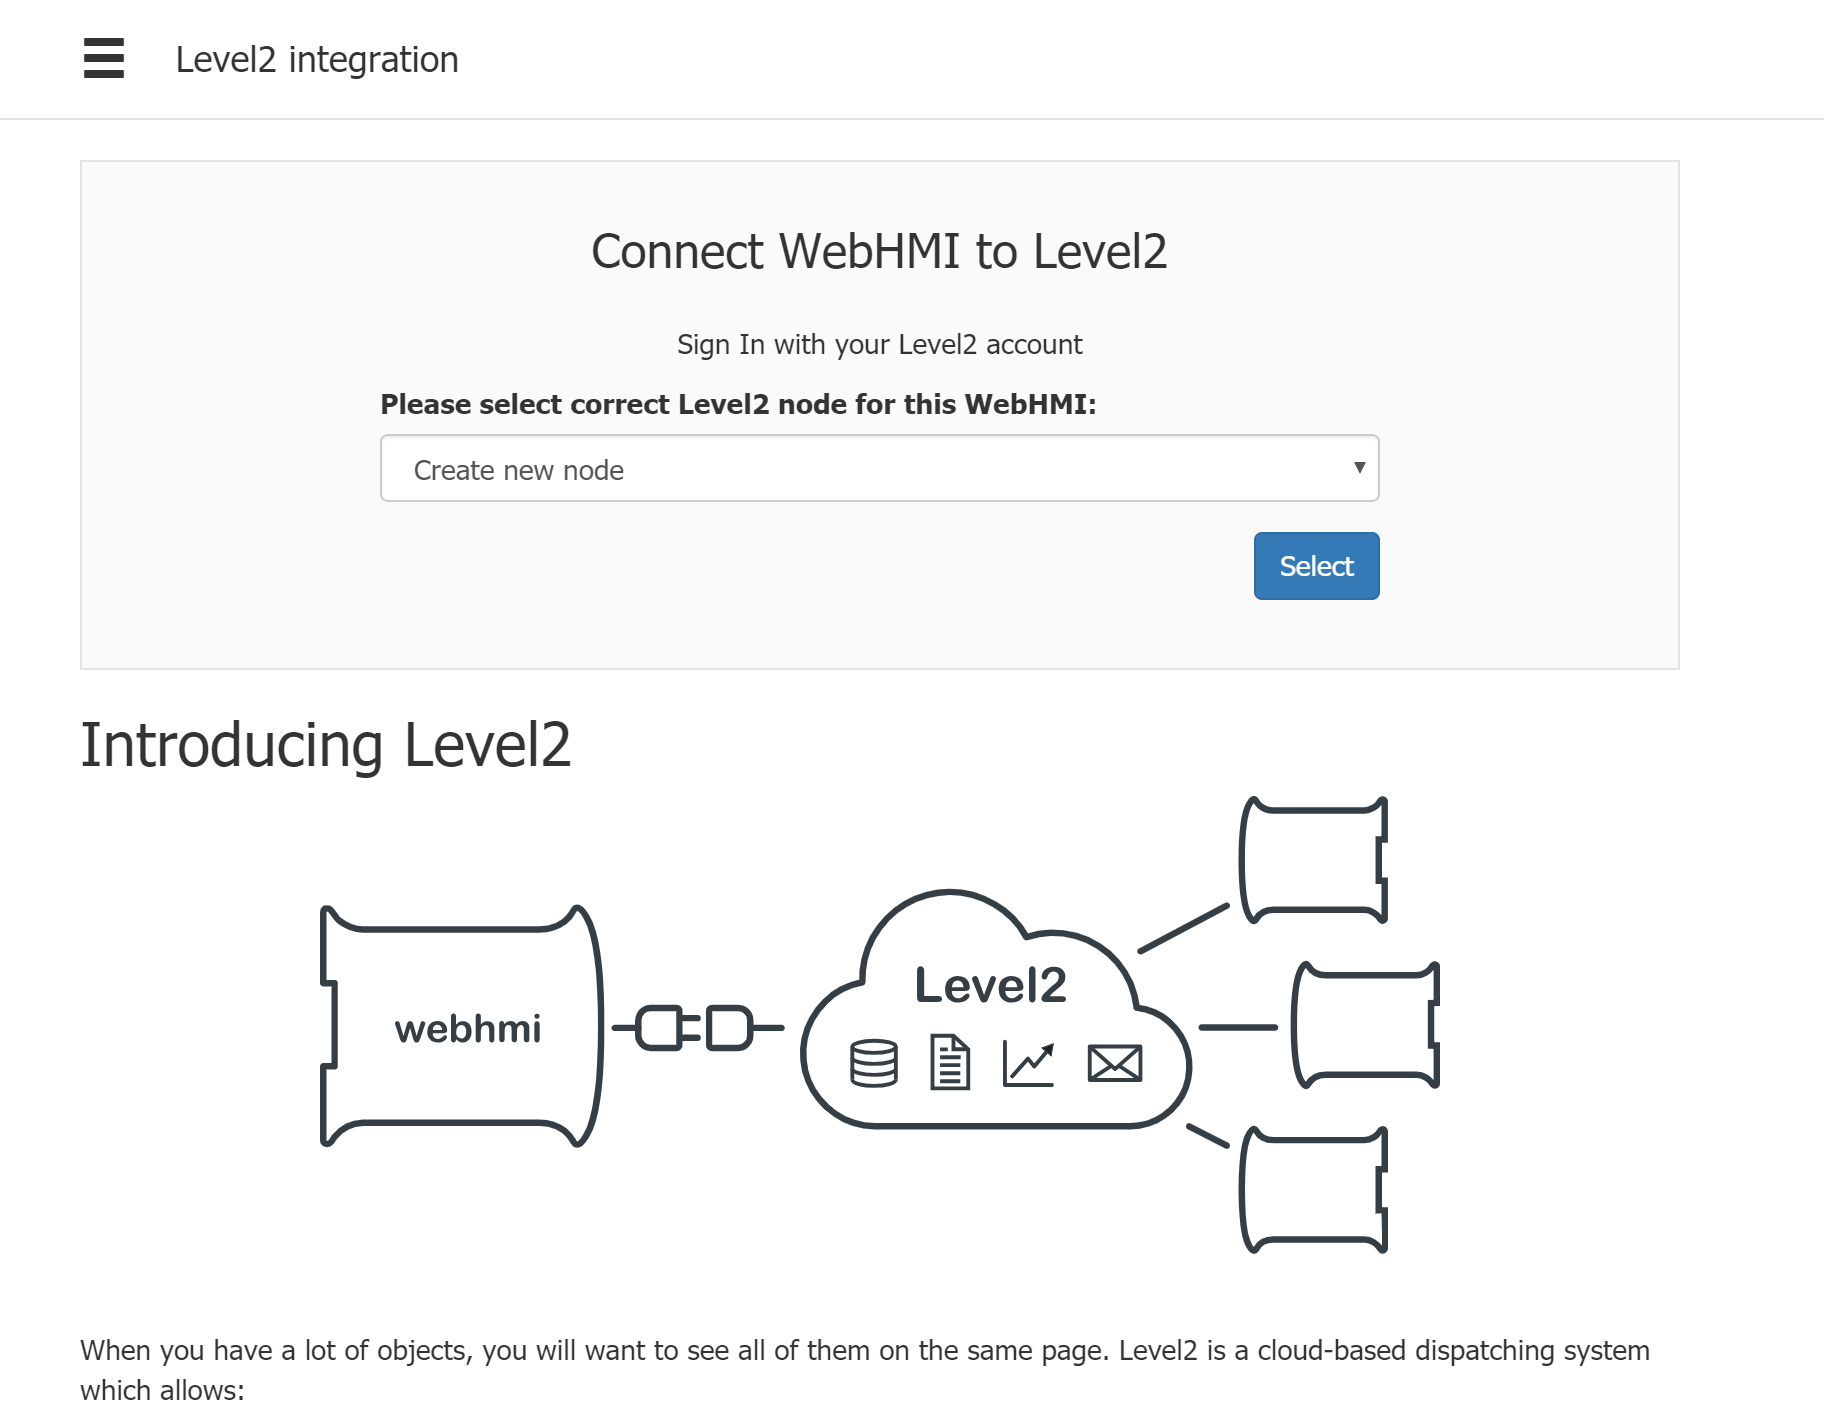
With this method you can add WebHMI node into Level2 system right from Setup / Level2 menu. Pressing Sign-in button will lead to this step where you can create a new node or choose an existing one:
After successful creation, this page is displayed which indicates, that the node with title “webhmi” was added to Level2 account “myLevel2account@gmail.com”. You can remove node from here by clicking “Disconnect” or setup some basic Level2 services:
- VPN
- data storage
- real-time data storage and visualization
- weather forecast
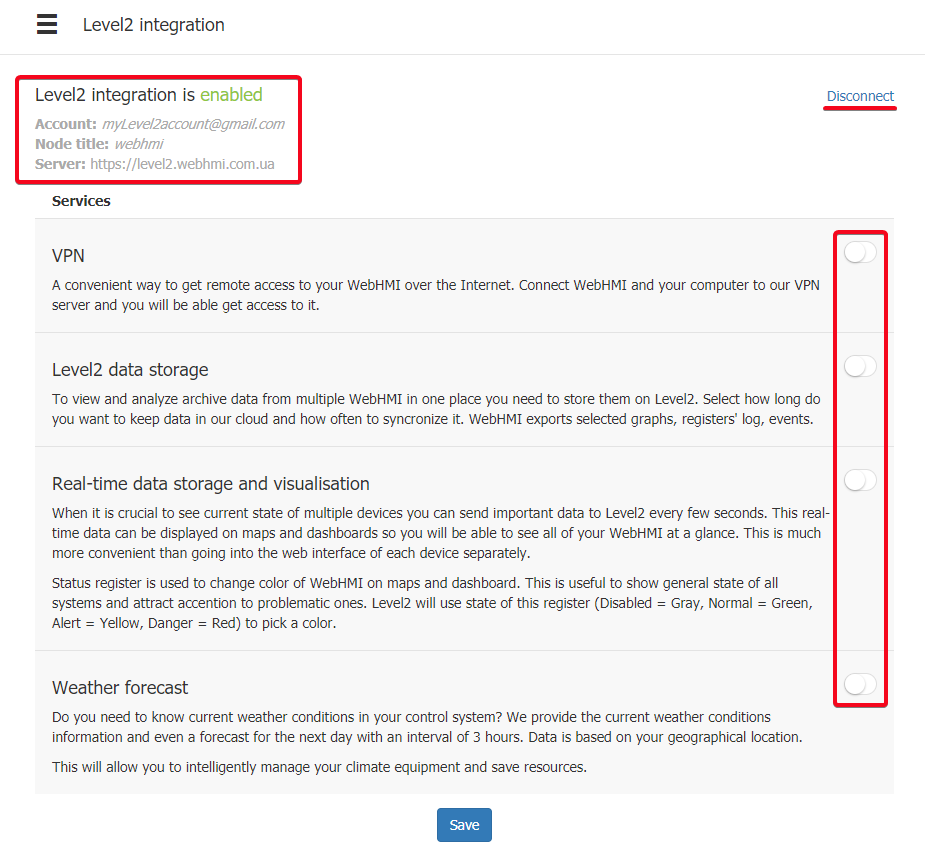
After WebHMI and its node settings in Level2 were tied together, you can enable basic Level2 services right from the WebHMI.
VPN setup from WebHMI Level2 menu
There is a simple way to setup VPN connection for WebHMI to Level2 right from this page - turn the switch button on and press Save.

Then a new L2TP connection will be created on the WebHMI with settings that match Level2 network setting for this node.
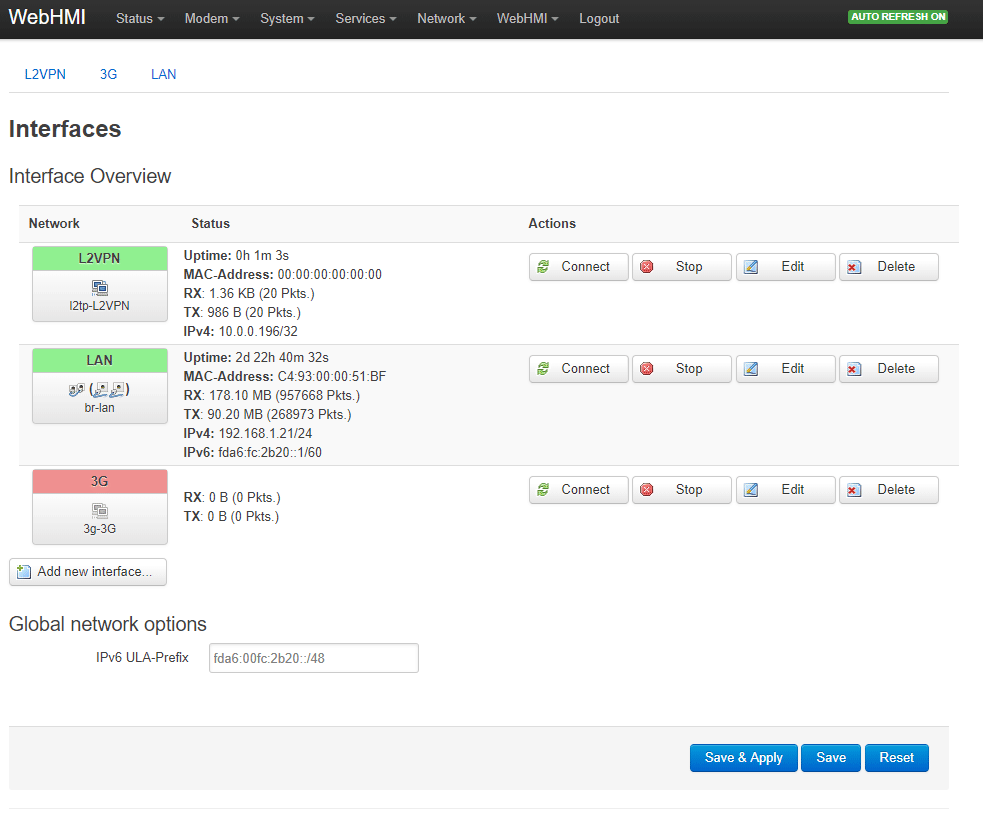
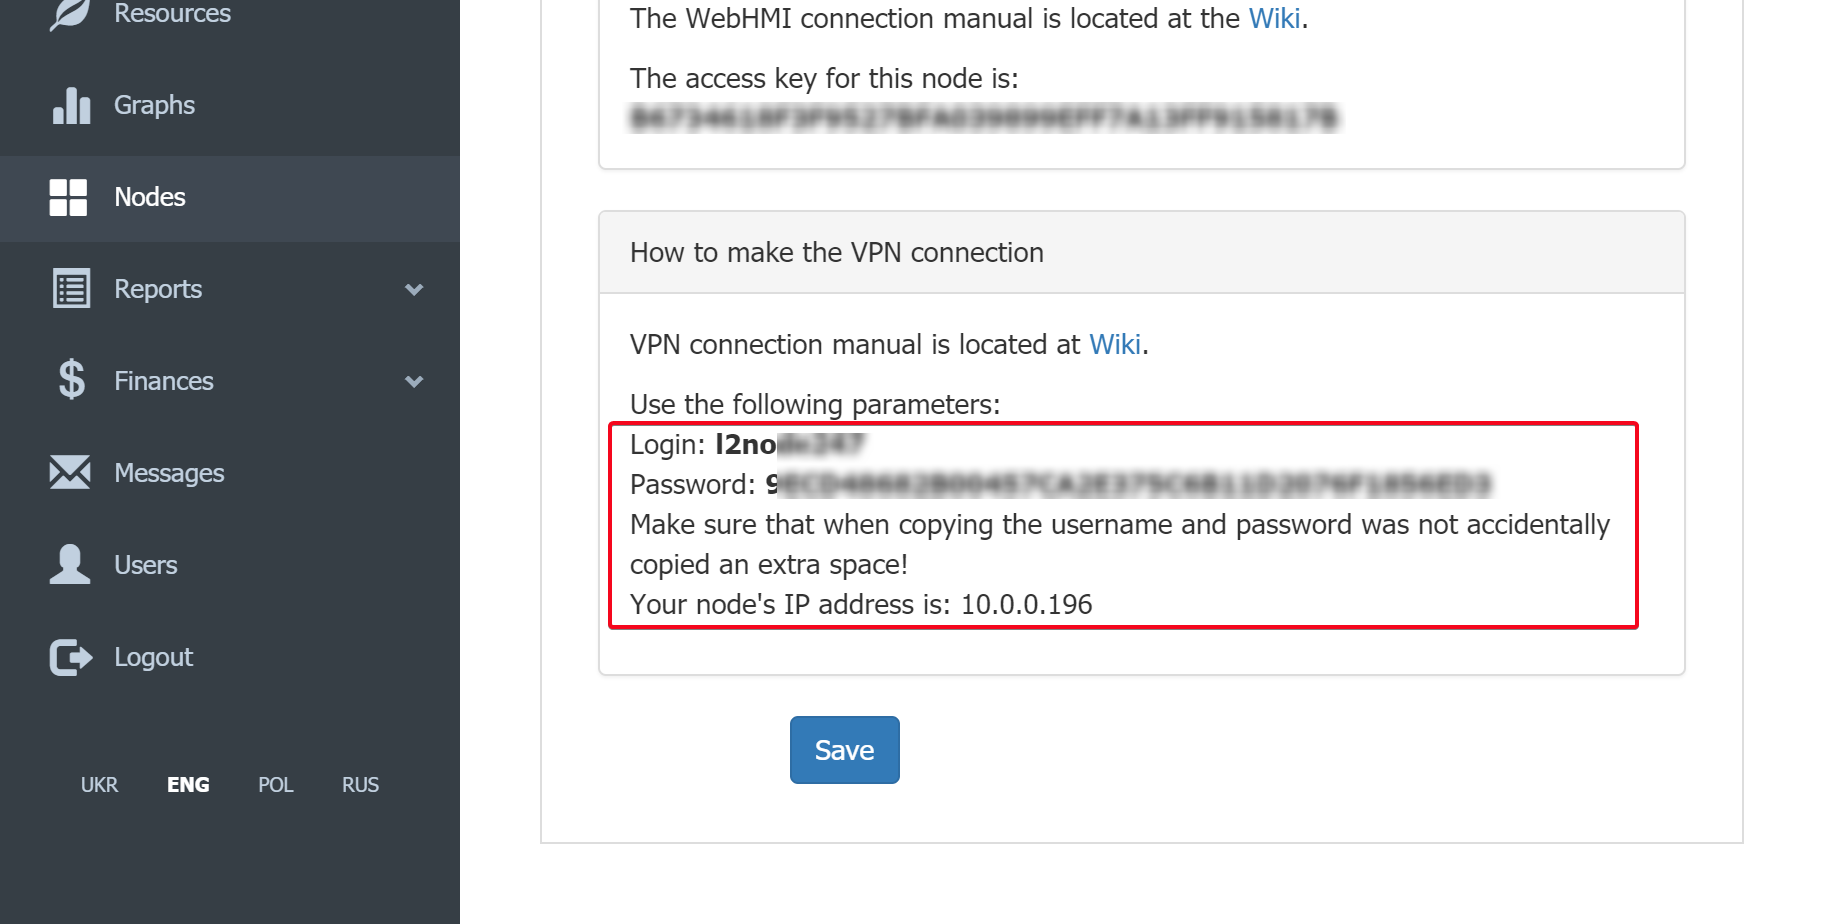
The VPN account settings were automatically created in Level2 node settings and applied to VPN network interface in WebHMI:
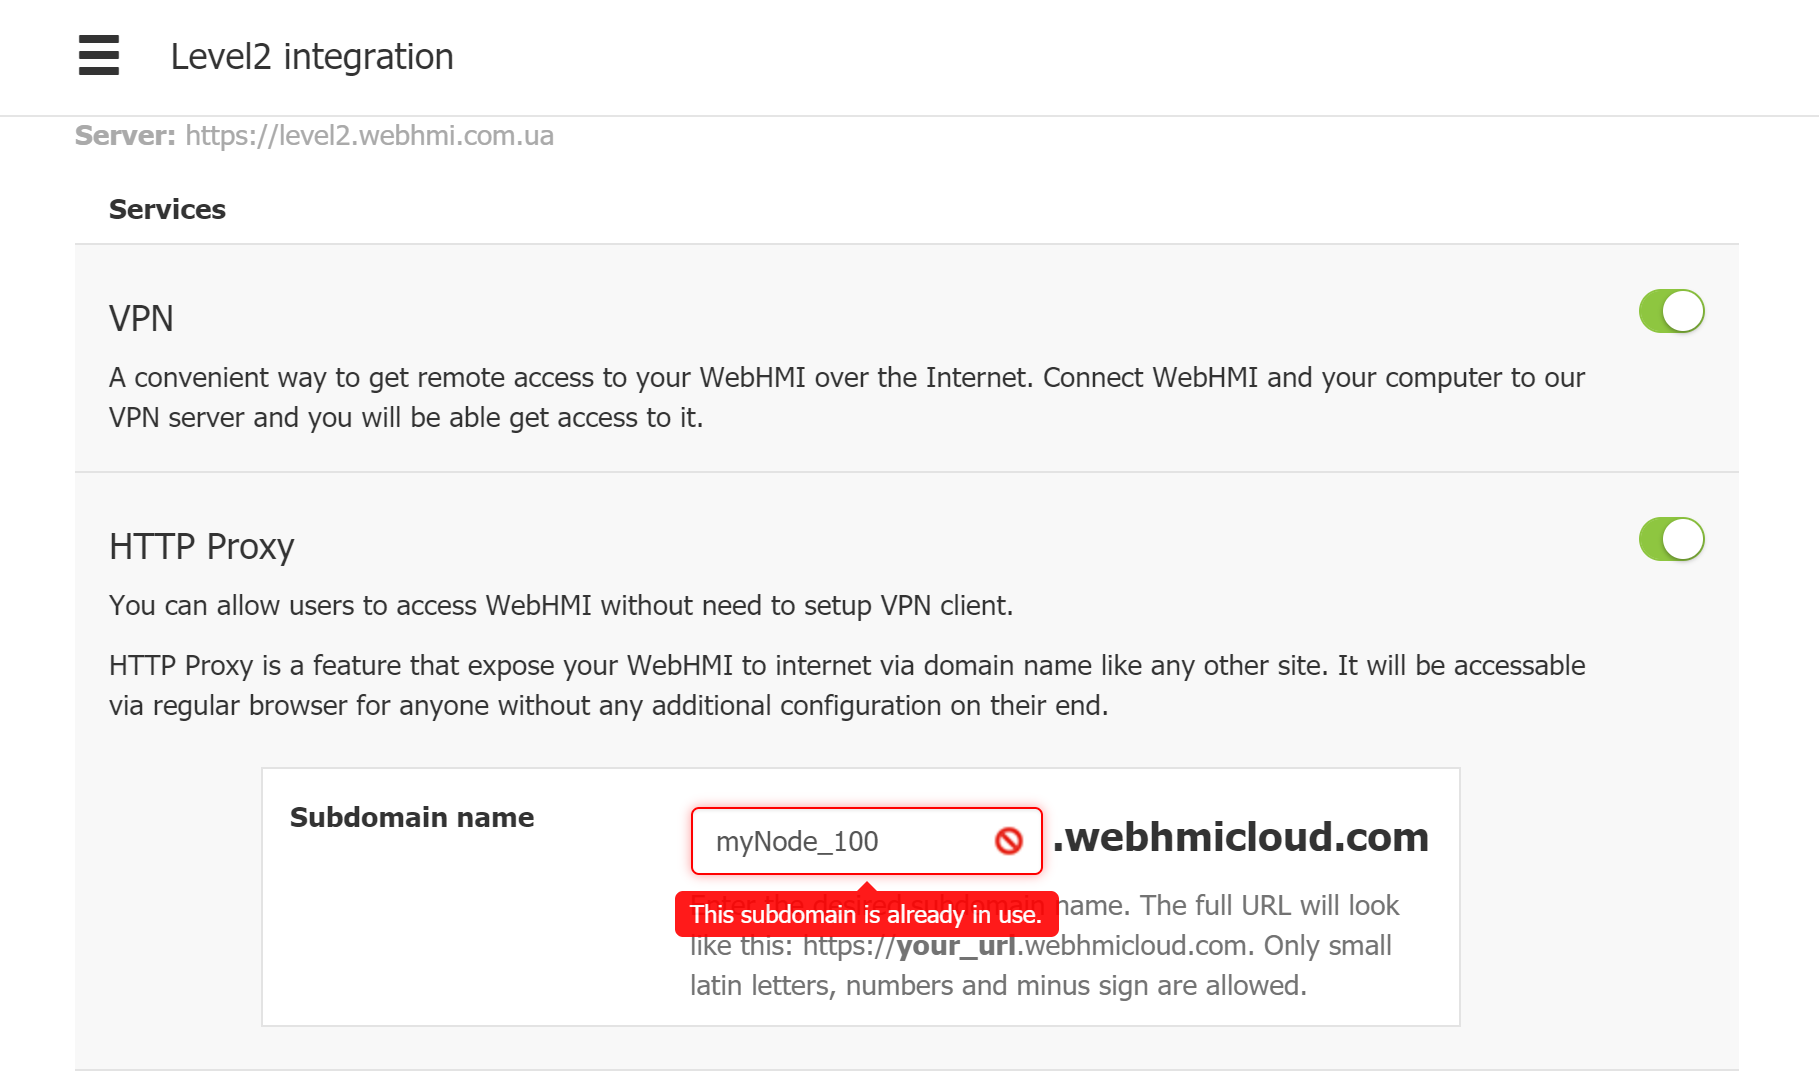
If VPN option is turned on, HTTP proxy service also can be turned on:
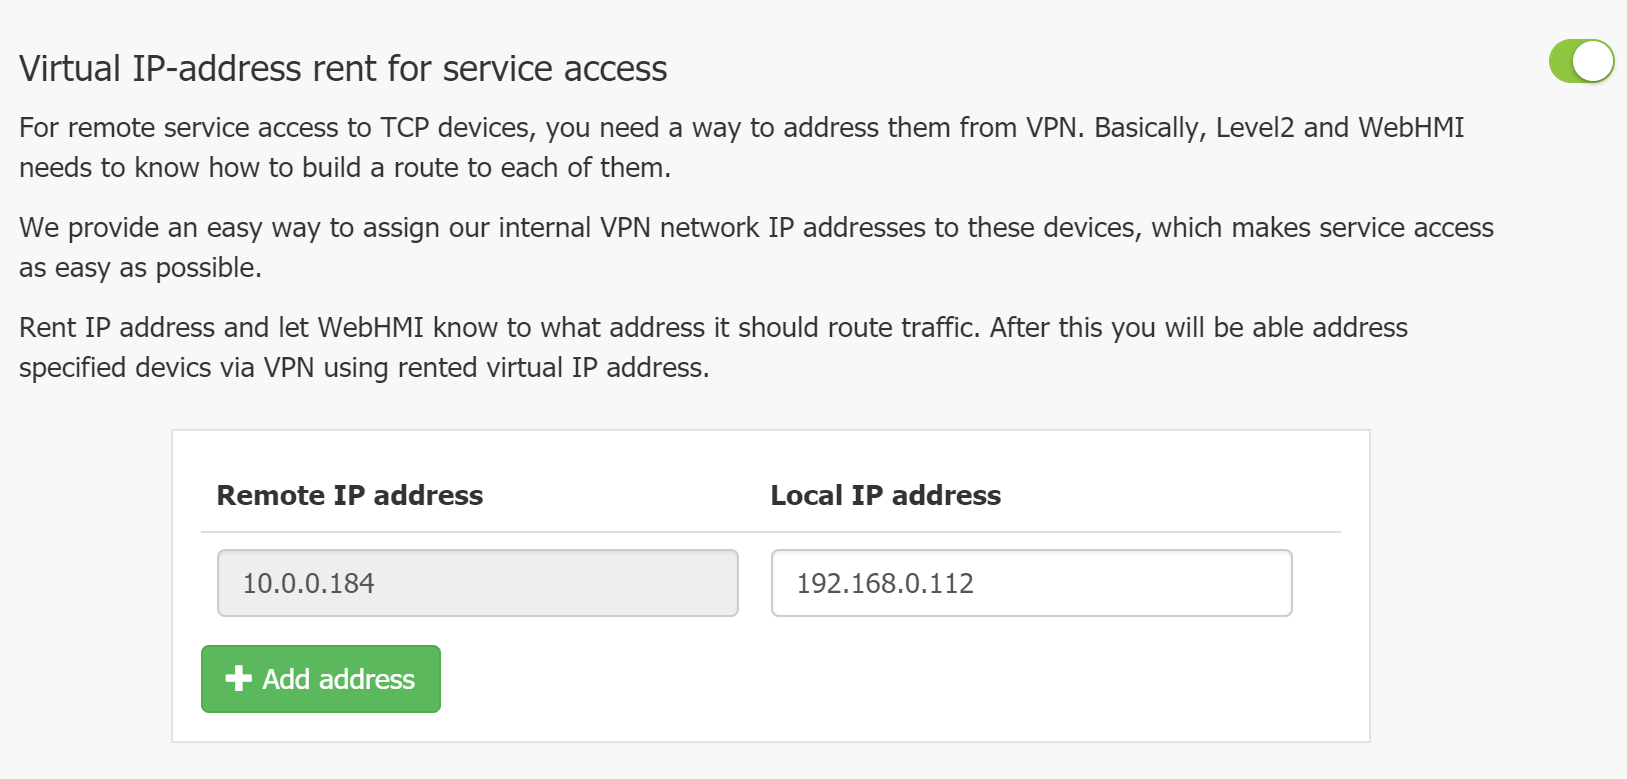
Another powerful feauture based on Level2 VPN is a Virtual IP. With this feature you can remotely access other devices in WebHMI local network using Virtual IPs set in these settings:
Connecting using old method, #2 (for fw below 3.5)
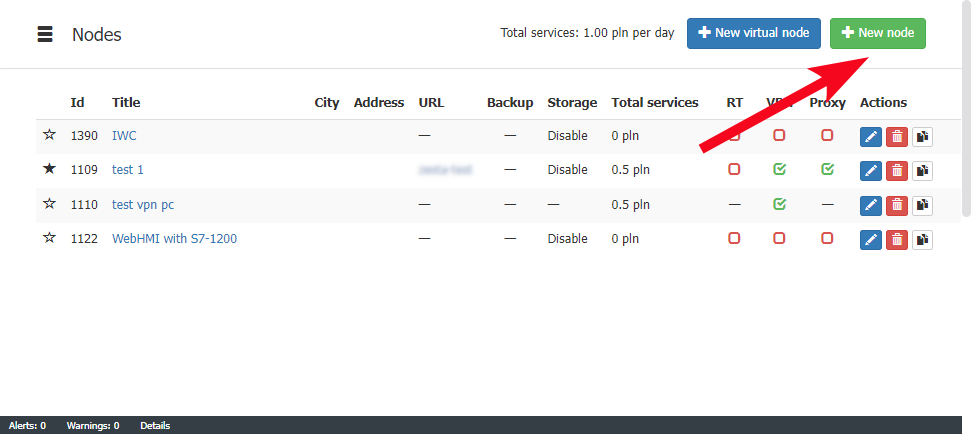
First, create a node in the Level2 node list:
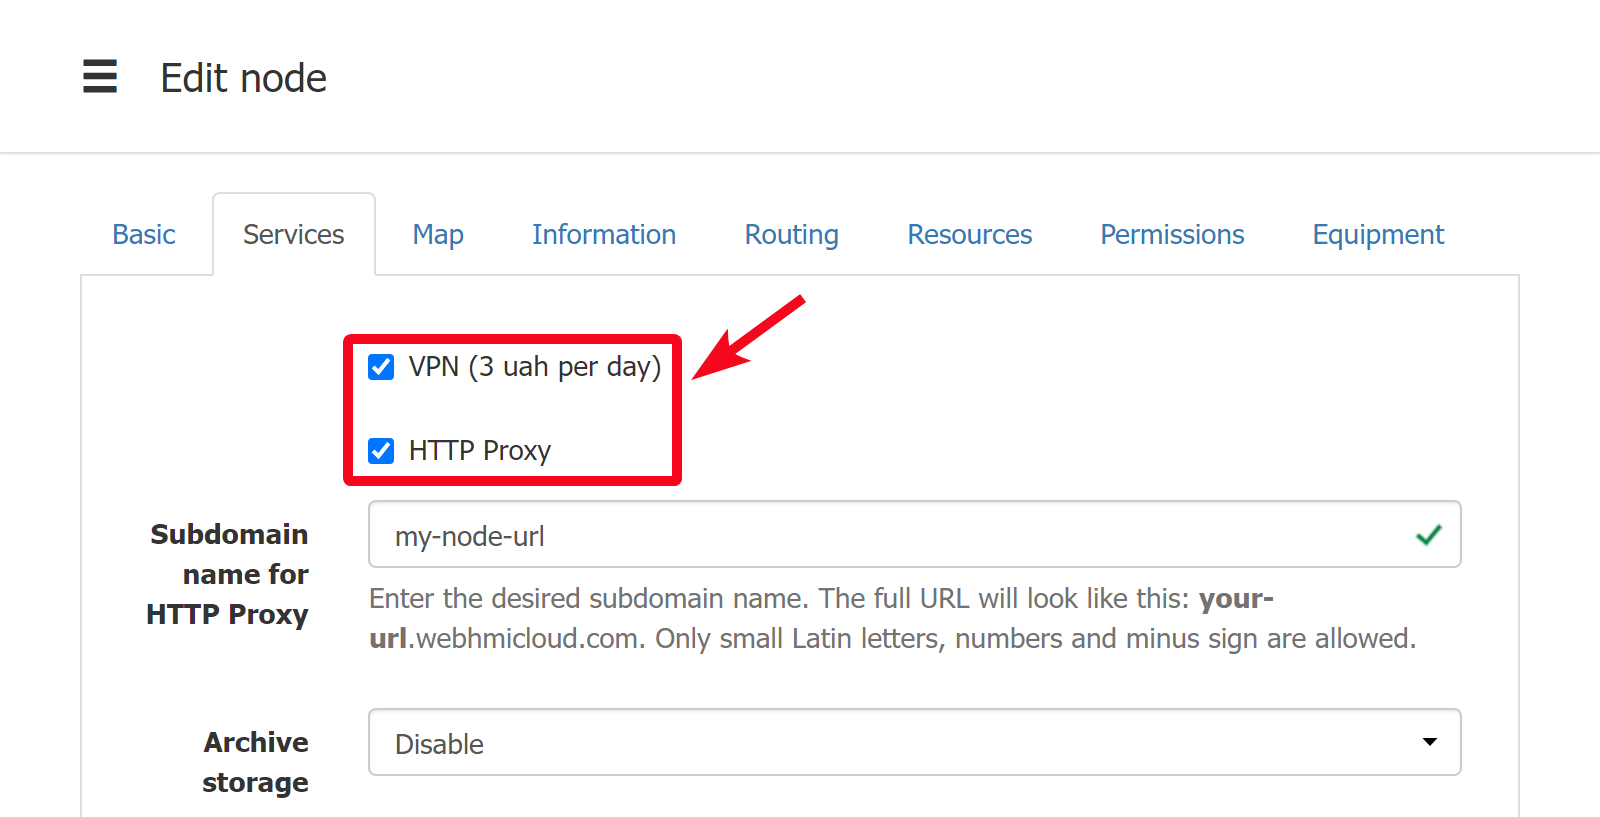
Turn on VPN and Http proxy services:
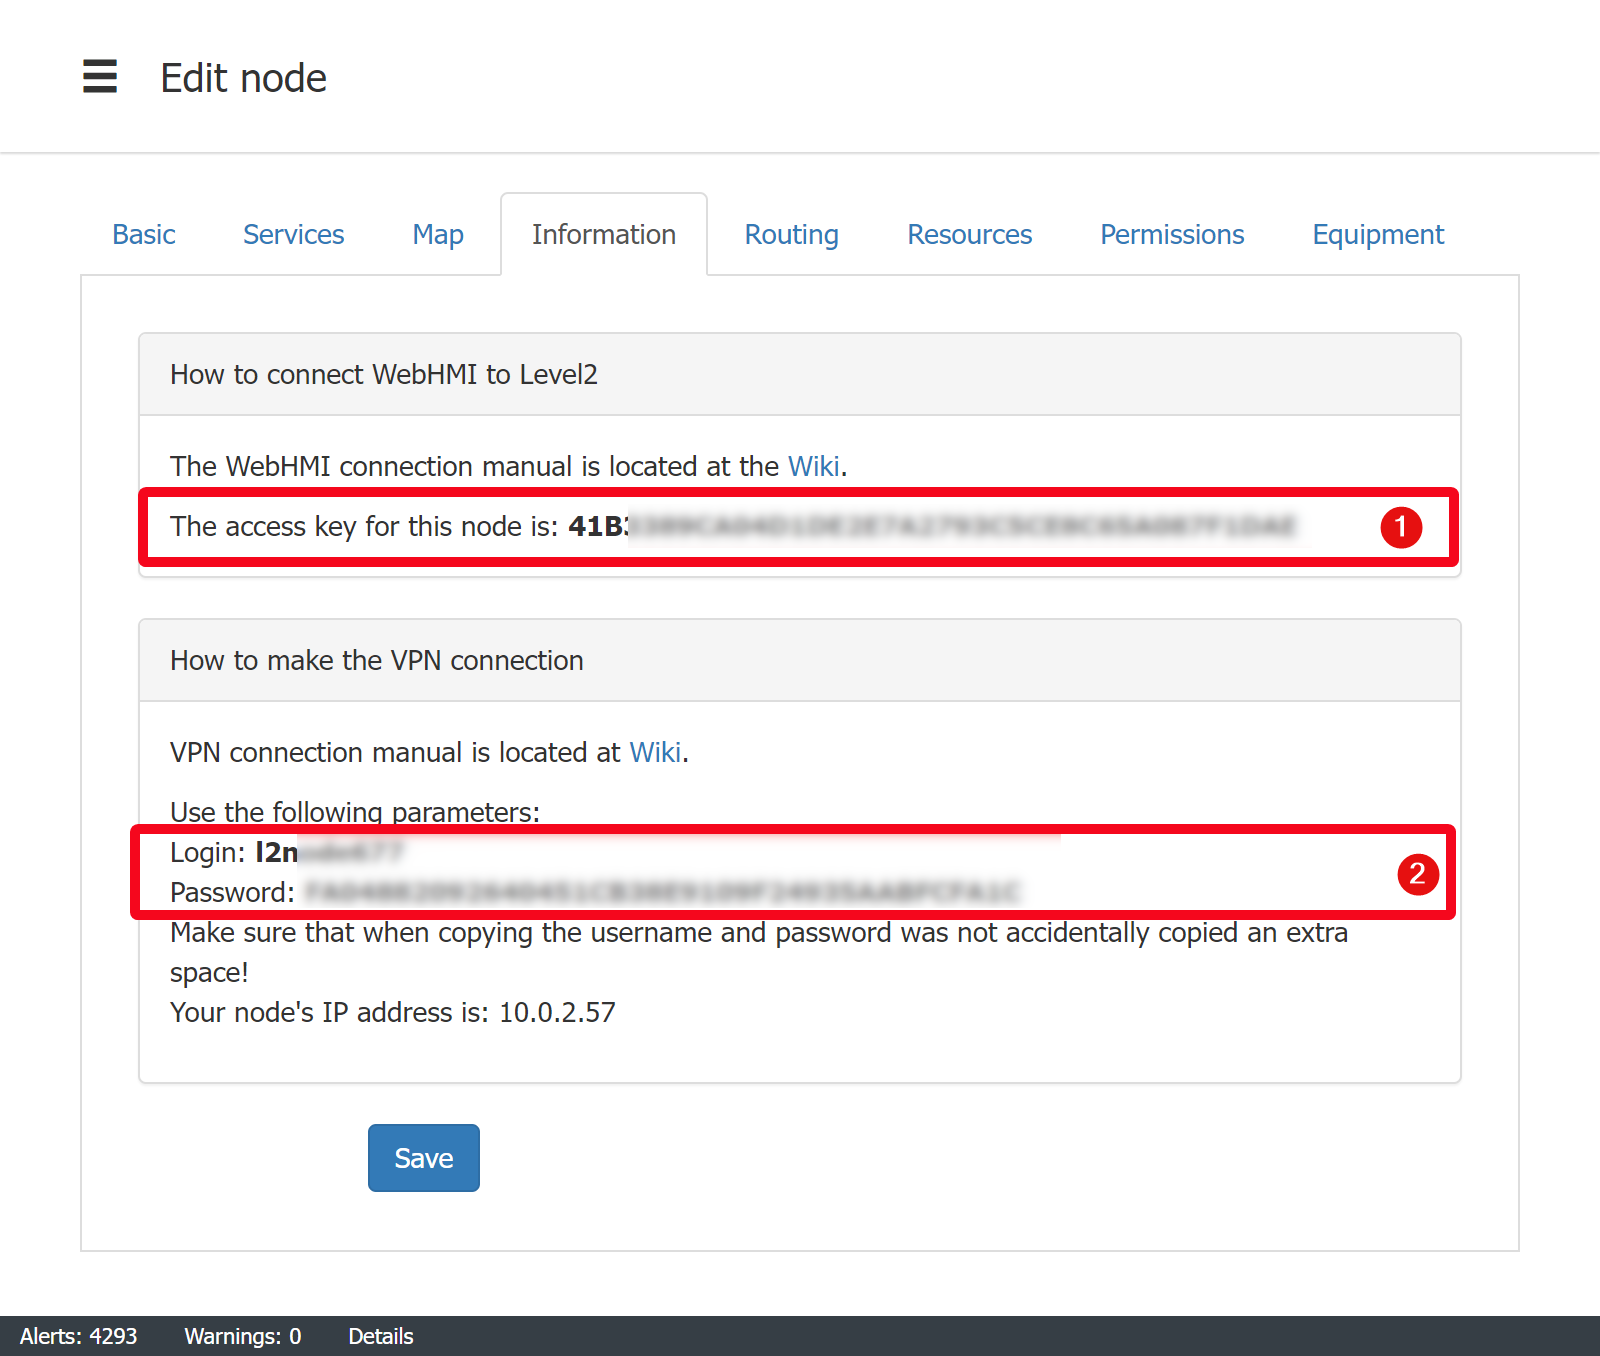
In the Information tab of the nodes properties, copy the following:
- API key for sending data
- VPN credentials
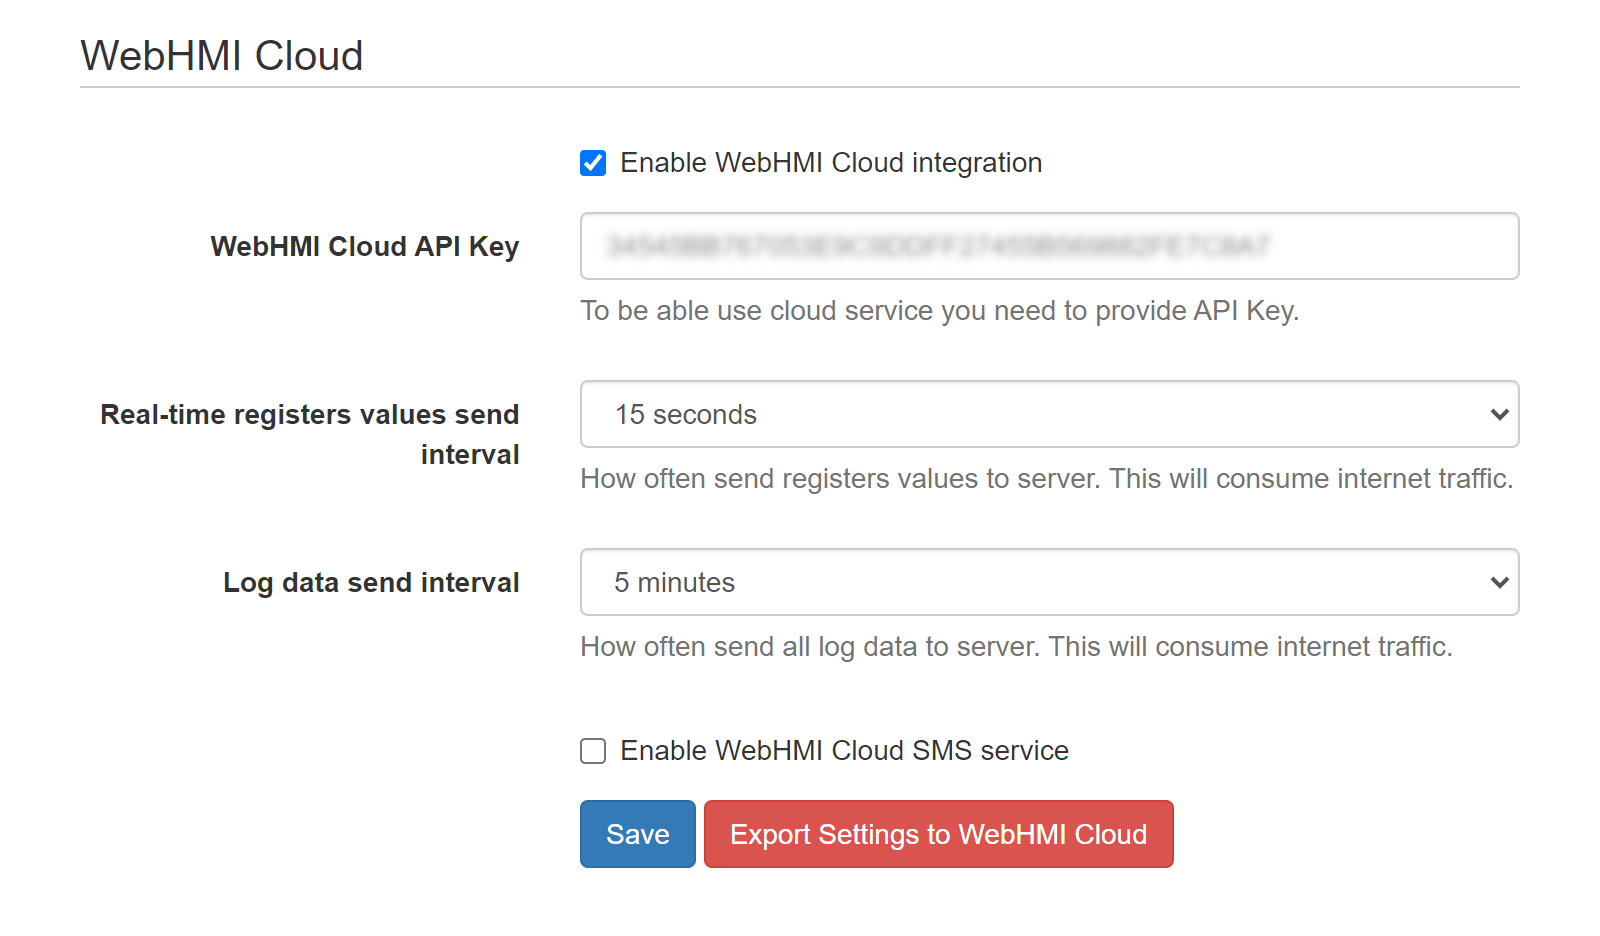
Then in the WebHMI project setup enter the API key from the node's properties and set respective checkbox.
For the VPN setup please refer to this page.
The Level2 node setup is given in more details in the following section.