Table of Contents
First power-up

Preparation for work
Before you can start WebHMI for the first time, you need to take some preparatory steps.
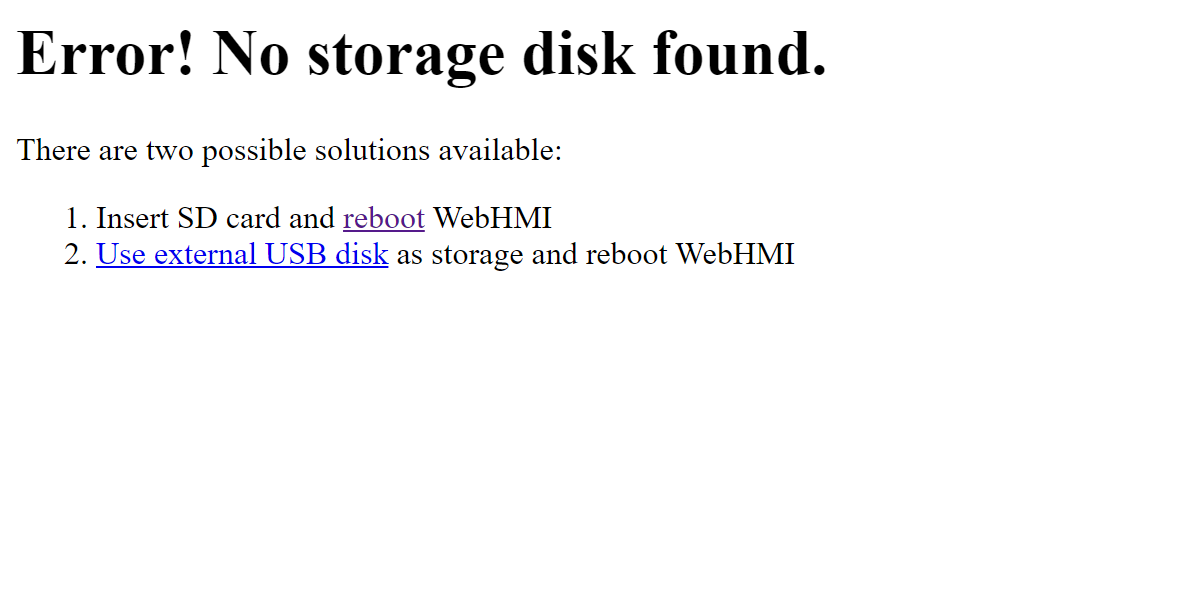
The storage device is set by default to SD card. You can use USB drives either. If you change storage device and install different one from the currently set in the WebHMI's config, you will get to the warning page during bootup process. The screen looks as follows:
- Insert an SD card or attach USB storage. A memory card is not included in WebHMI shipment package and its selection we leave for users. Recommended size - from 1 GB. We recommend use industrial grade SLC cards. Commercial grade cards might fail after few weeks of work. How to select a proper card.
- By default, the WebHMI's IP address of the LAN interface is 192.168.1.1. If you plan to connect to a local network, you need to make sure that there are no devices with the address 192.168.1.1 in this network, otherwise there will be a conflict of addresses. The same applies when several WebHMI devices with factory settings are connected to the same local network. All devices will have the same IP address and the network will not work correctly.
- When connecting the RS485 bus, make sure that not only lines A and B are connected but also their common wire that equalizes the potentials between the WebHMI and other devices on the bus is connected too. This is especially true if the line is long or the devices are powered by different power sources.
- If you do not have WiFi on your computer, you must connect the WebHMI to your computer or network using an Ethernet cable through the LAN interface. By default only this interface allows incoming connections. Note that WebHMI on this interface has a DHCP server enabled by default. There may be conflicts with other DHCP servers on the local network if they exist.
After completing these steps, you can power-up WebHMI.
During the boot process, the system will check the SD card and automatically format it if necessary. All data on card might be lost.
If the SD card is not detected, the WebHMI will flash three LEDs (Error, WWW, and VPN). After 20 flashes, the system boots but not all services are started. During the next minute, watchhog will see that there is no SD card and will reboot the system. In this way, the system will constantly reboot until an SD card is inserted.
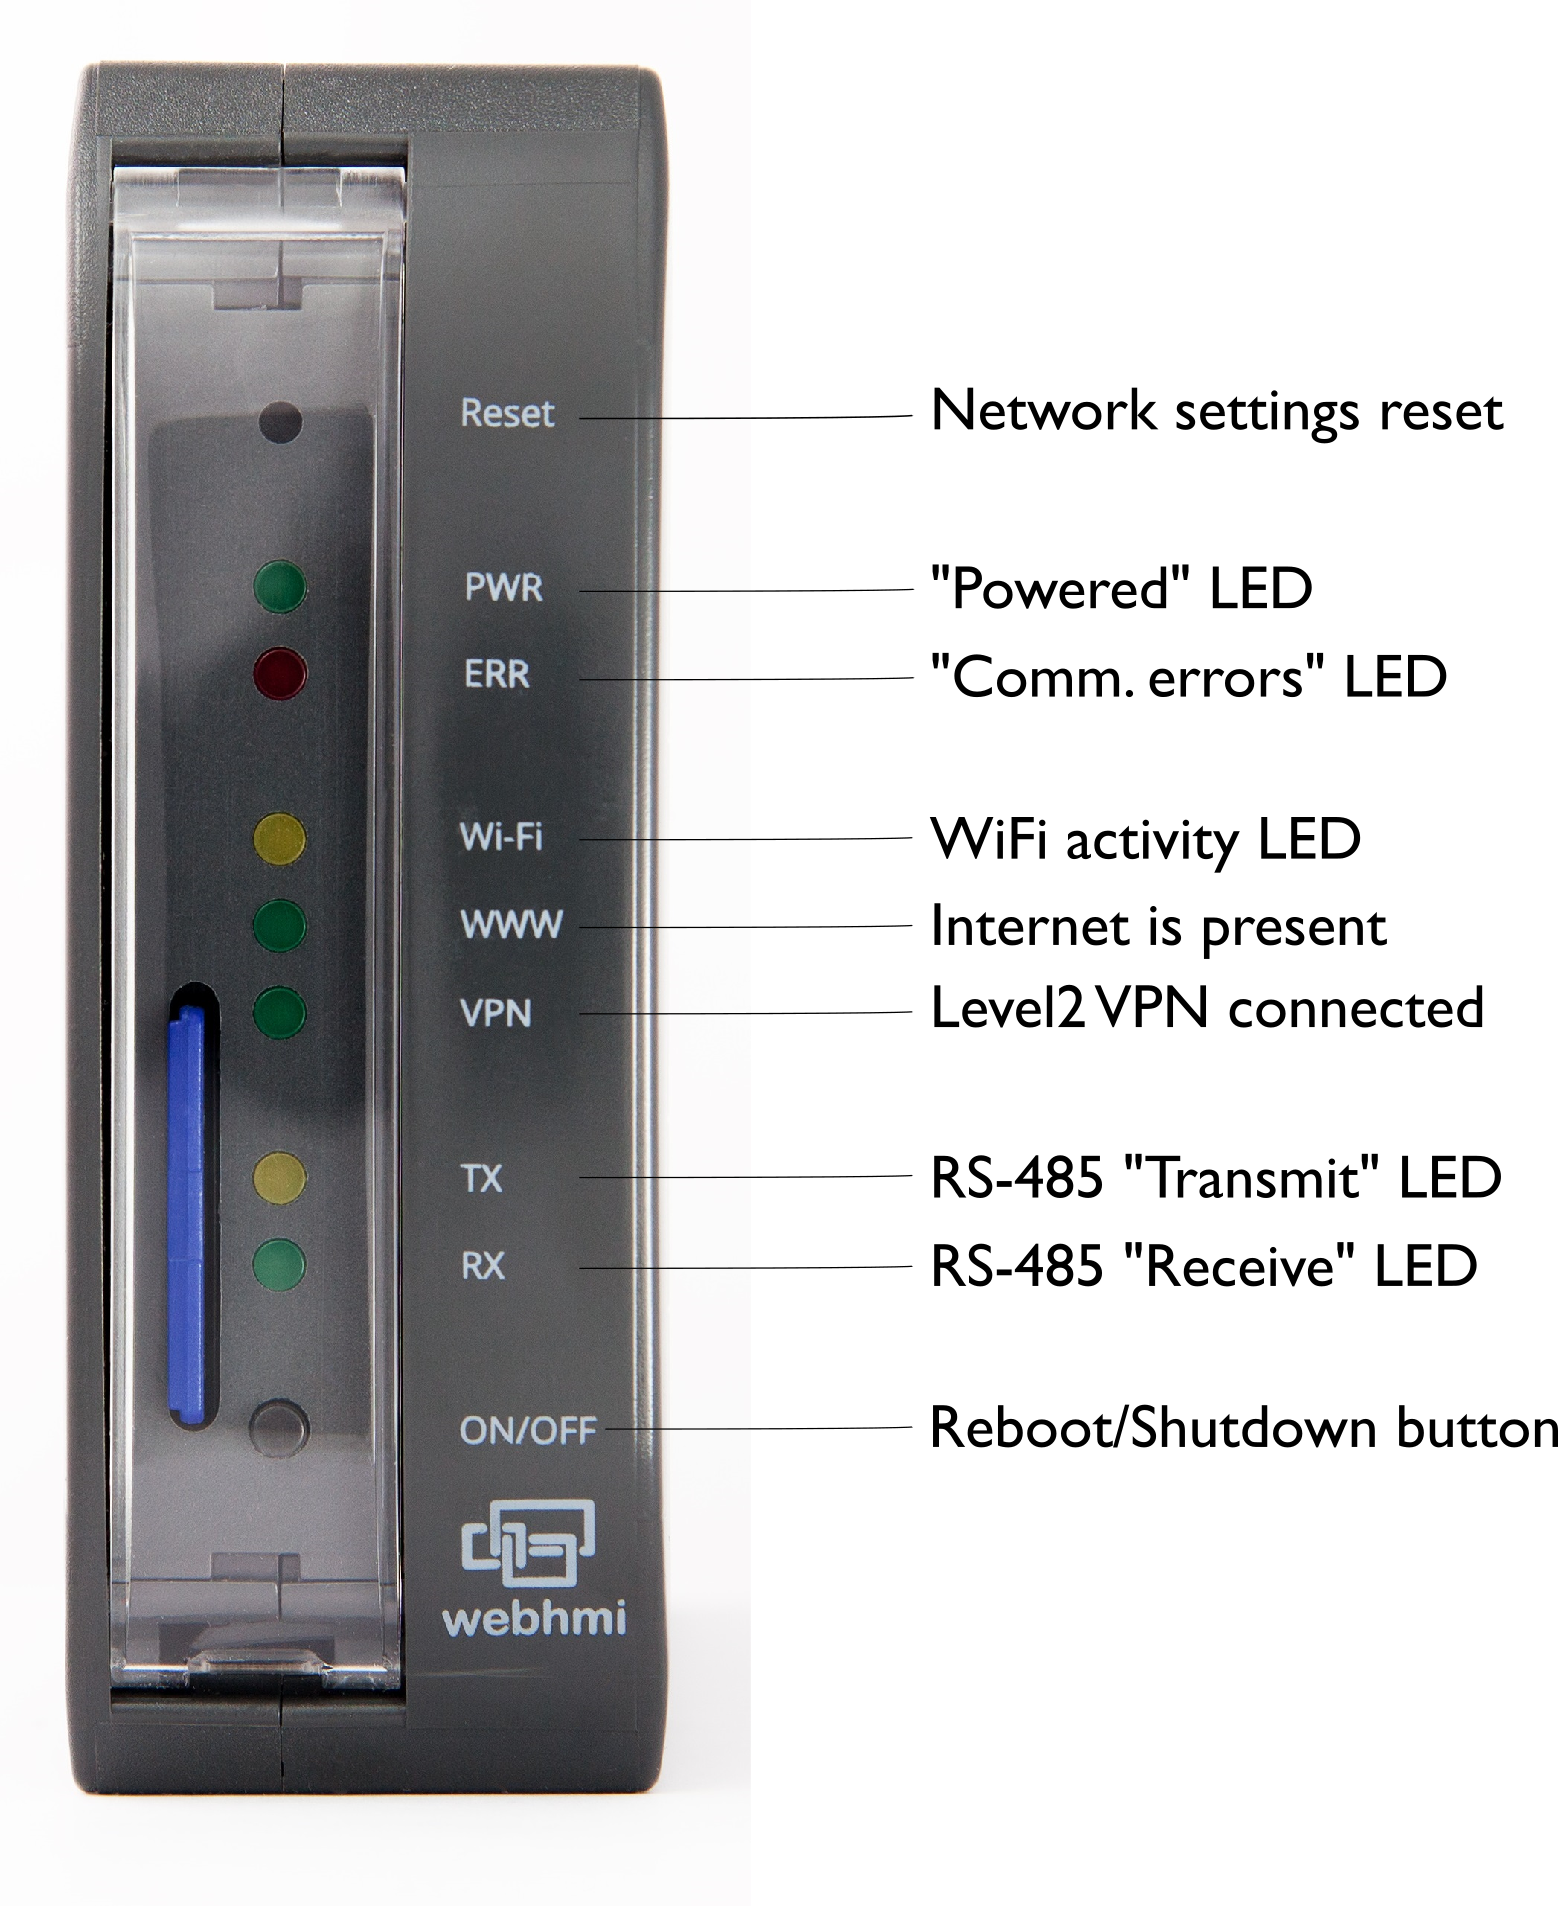
Front panel conteols designations
Access to the web interface
Work with WebHMI takes place over the network. All settings, including project configuration, are done in the browser. All you need to get started - connect to the device and go in the web interface.
Wireless connection over Wi-Fi
By default, the WebHMI wireless interface is configured in an access point mode with DHCP enabled and disabled security. Thus, your laptop or tablet can simply be connected to the WebHMI network (the settings will be made automatically), then go to the site with the address: 192.168.1.1
Wired connection
WebHMI has 2 Ethernet ports: a LAN configured as a DHCP server and a WAN configured as a DHCP client with incoming connections disabled by default in the firewall. Thus, access to the web interface of the system can only be obtained from the LAN port.

To get access to web interface please configure your network adapter either in DHCP client mode or with following settings:
IP address: 192.168.1.2
Subnet mask: 255.255.255.0
Once network cable is connected check the connection by pinging 192.168.1.1 (execute the command 'ping 192.168.1.1'). If there is a exchange of packages, then you have the connection established.
If there is a link, but for some reason you can not access the site - check if the proxy server is being used in the browser settings.
TIP. For correct operation of the web-interface of the system,
use the latest version of Google Chrome web-browser.
Login to the web interface
To enter the new device, you must use default credentials:
| Login | admin |
|---|---|
| Password | admin |

On login screen at the bottom section you can find current version of firmware and link to network setup interface.
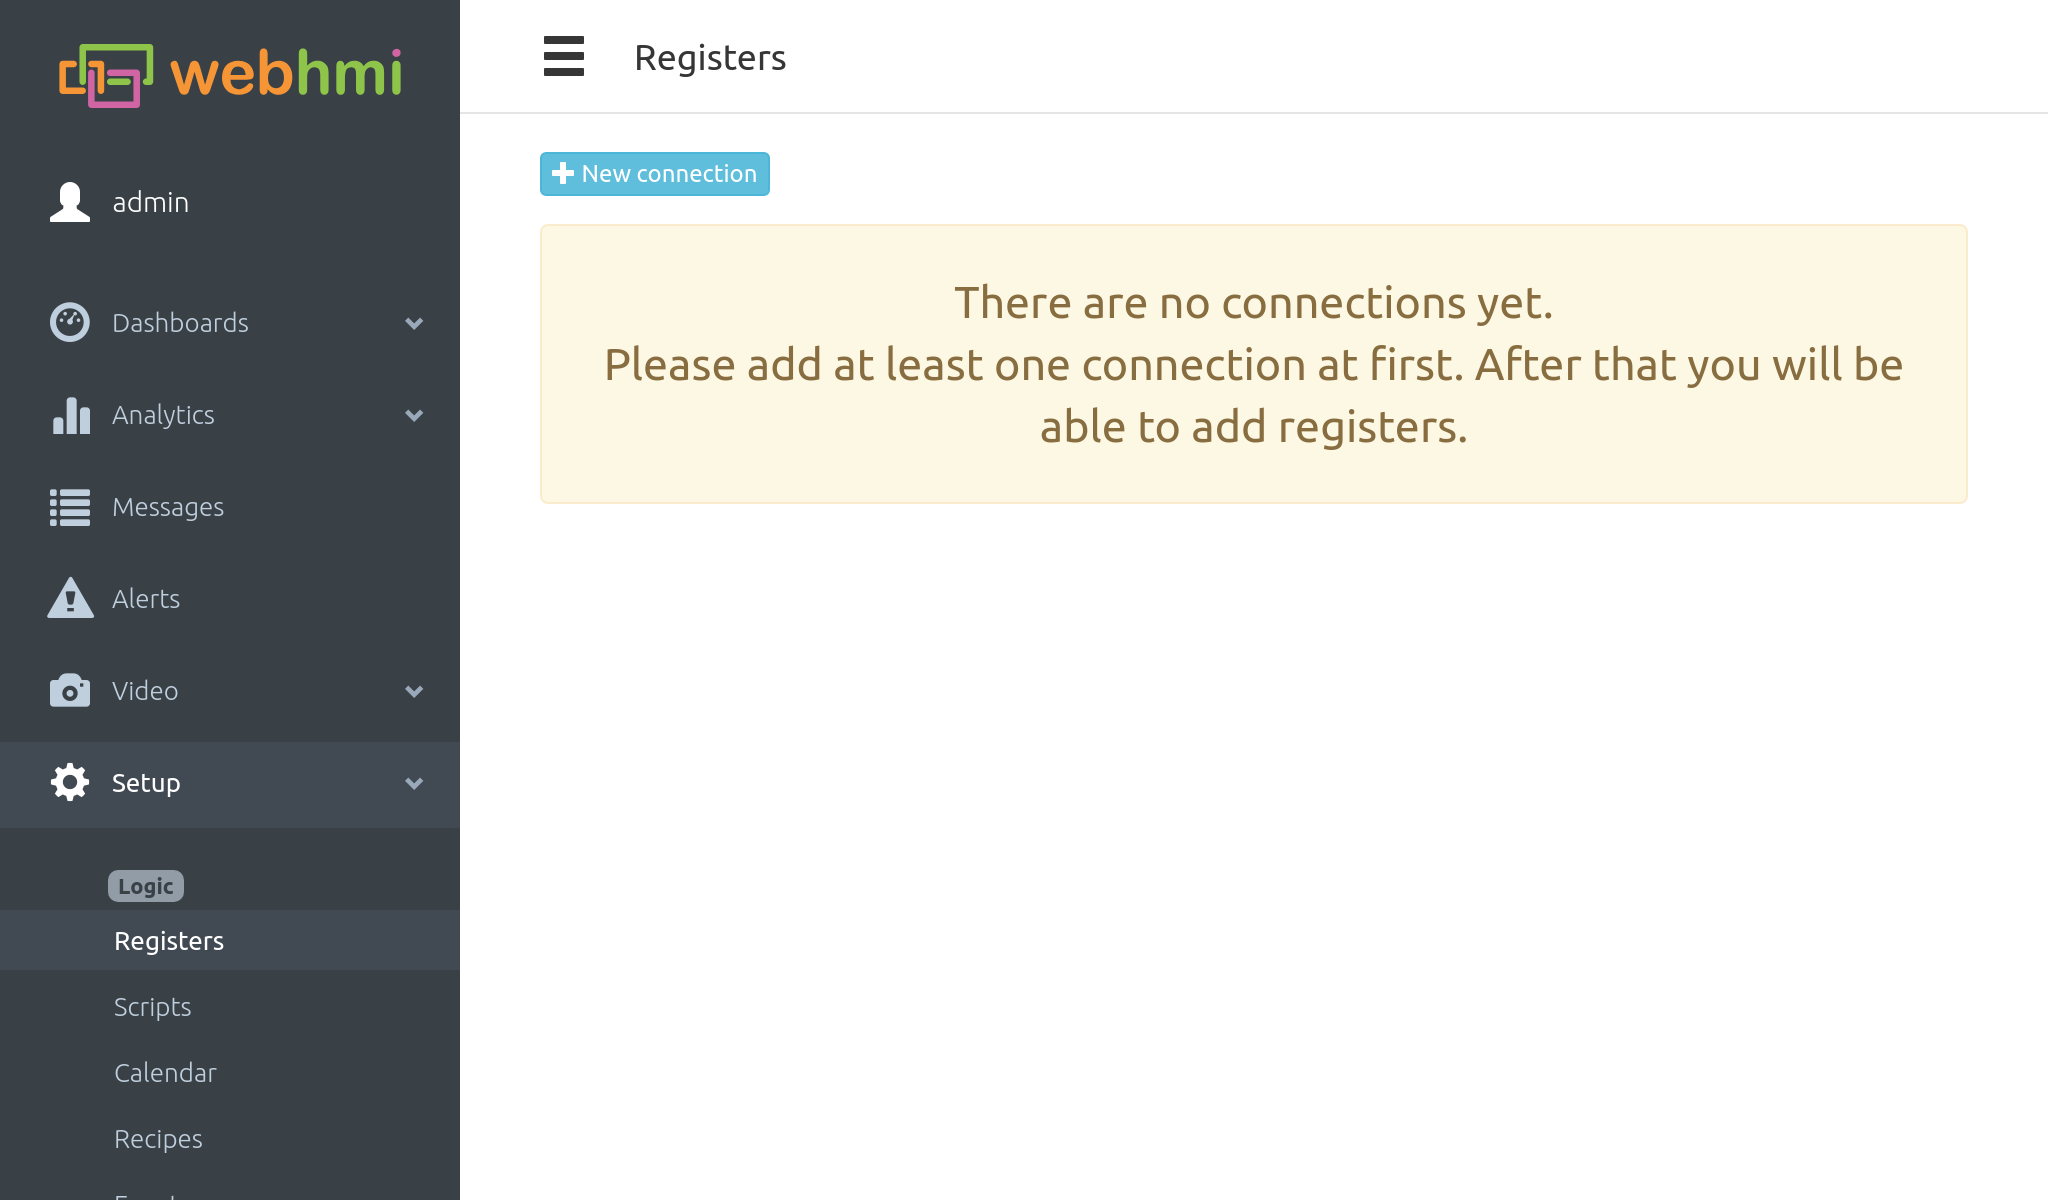
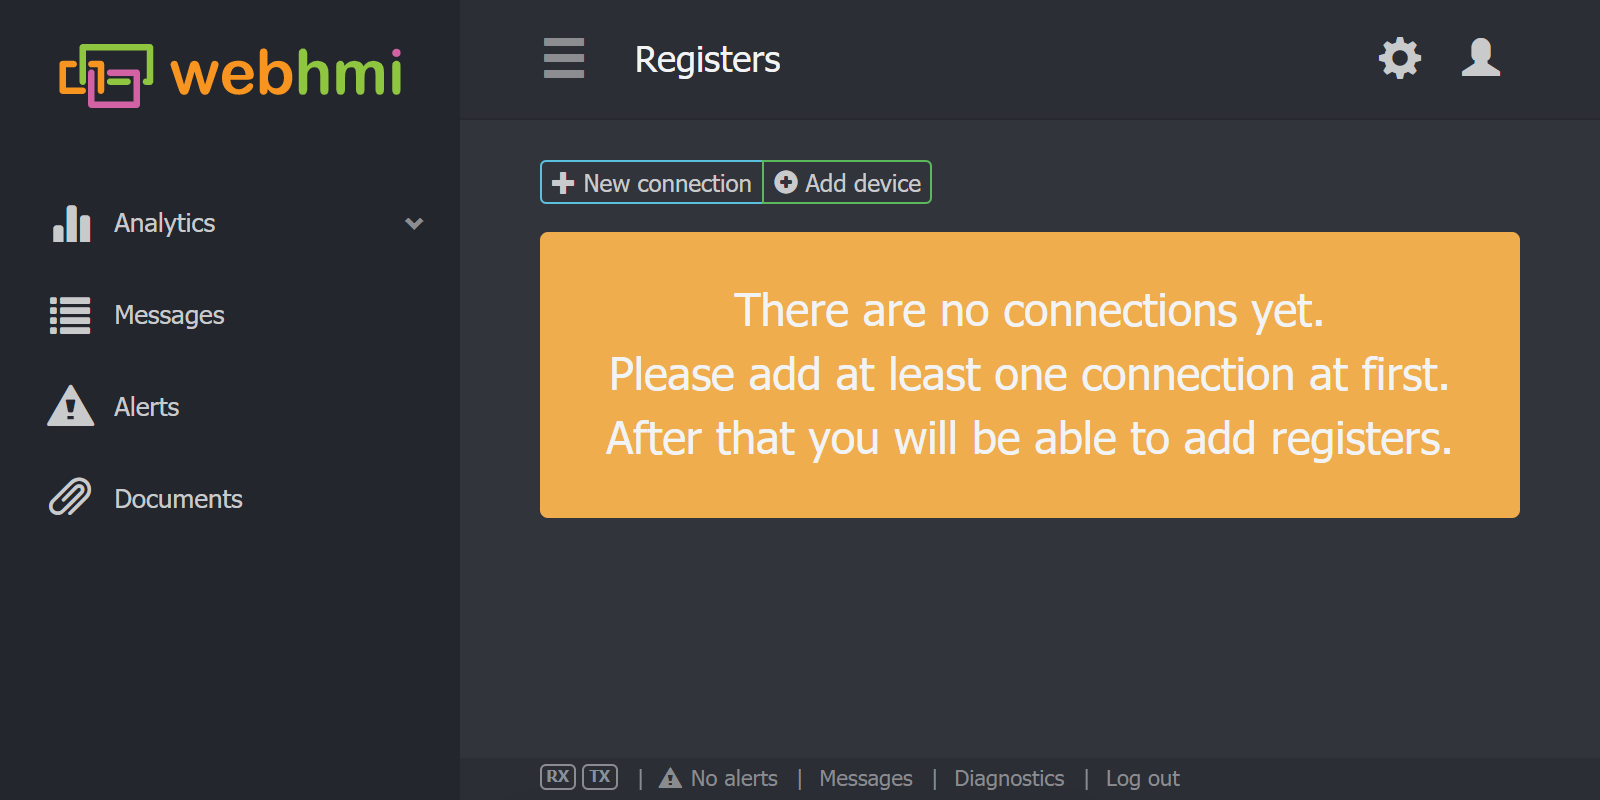
After logging in by default, you will be taken to the registers configuration page:
An "after login" project view after 3.6 fw
(in the Setup/Registers menu). In the future, the whole project is configured through the side submenu “Setup”.
Moon color theme

Mars color theme
An "after login" project view before 3.6 fw